Manuel’s revenge – Byzantine victory at Hyelion
Mere months after the Seljuq victory at Myriokephalon, Sultan Kilij Arslan dispatched a 24,000 man elite force to ravage the Byzantine territory of the Meander Valley from the mountains to the sea. While the Seljuq raid-in-force and the subsequent Battle at Hyelion are referenced by several contemporary sources, the only detailed account is by Byzantine chronicler Niketas Choniates, who also wrote in-depth on the Battle of Myriokephalon. Niketas does not give a precise date for this Turkish expedition but the circumstances he describes indicate the incursion was launched in early 1177, at the height of winter.
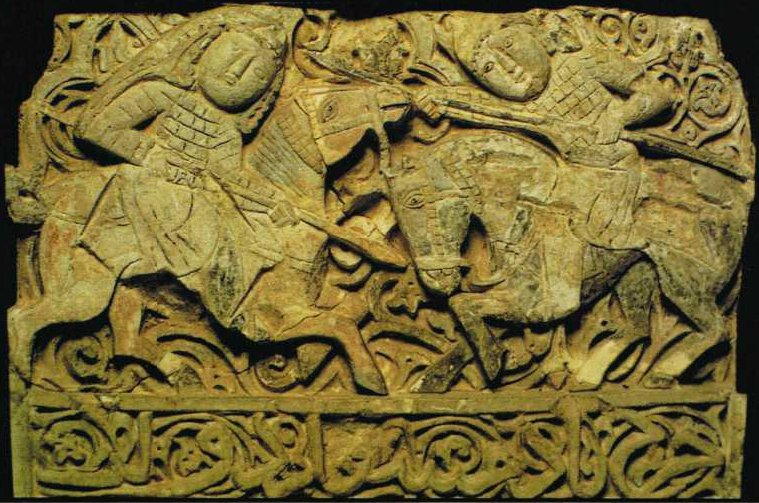
Above, the stucco plaque shows armoured cavalrymen jousting or in combat, Iran twelfth-thirteenth centuries. The two men are very similarly equipped, both having a small form of jawshan lamellar cuirass over their chests. However, the horseman on the left also has a long cloth over his pointed hat or more probably helmet. This is given to elite guard figures or courtiers in other sources, and perhaps serves the same function here. Description from warfare.atspace.eu. (inv. 54.29, Art Museum, Seattle, USA). Source: p54, EH - 001 - D.Nicolle, The Crusades.
From Kilij Arslan’s viewpoint it was a punitive expedition. As part of the truce settlement agreed to at Myriokephalon, Emperor Manuel Komnenos had promised to raze the Byzantine fortress of Dorylaeum. Safely home, Manuel reneged. The Sultan seems to have taken this as a personal affront. He ordered his expedition commander (a high ranking noble bearing the title of an Atabeg) to pursue a burnt-earth policy; there was never any question of seizing and holding territory.
The Atabeg carried out his mission with a vengeance. Marching down the Meander River he systematically took and sacked the towns of Antioch, Tralles (Aydin), Louma and Pentacheir, as well as numerous fortresses and countless villages. Reaching the Aegean Sea, he plundered and burned his way through the coastal provinces. This reign of terror lasted at least a month before the Seljuqs began retracing their steps upriver, mission accomplished. Prior to departing the coastline, theAtabeg collected a jar of water from the Aegean Sea, a container of sand from the beach, and an oar from a Byzantine galley which had been captured in port. These were no mere souvenirs. Kilij Arslan had ordered his commander to bring home this symbolic prize.
Byzantine response
The Byzantine standing army was still suffering the effects of the defeat at Myriokephalon. Manuel could not immediately deploy ready forces strong enough to face the enemy. But he was not idle during the Seljuq incursion. As soon as the Emperor learned of the offensive he tasked three officers with organizing a counterstrike. He placed his nephew John Komnenos Vatatzes, an experienced general in his forties, in overall command. John’s subcommanders were Michael Aspietes and Constantine Doukas.
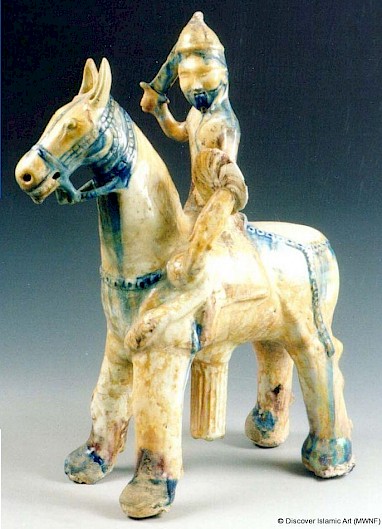
Above, a figurine of a bearded horseman with Asian Turkoman facial features, long braided hair and a helmet. Around the right front hoof of the horse is a snake that is climbing towards the rider from his left. The snake is shown opening its mouth to bite the rider through his armour, but he repels it with his shield. He carries a straight sword lifted into the air, ready to strike. There is a grooved cylindrical column coming out of the stomach of the horse that probably supported the statue, keeping it upright. The horse wears blue reins that are executed in relief. The reins continue around the horse’s mouth and hang in front of its neck, then, like a harness, run across the sides of the horse’s body down to the lower part of its hind legs. The object is glazed in off-white and blue and, therefore, can be compared to the laqabi-style ware of Persia, also known to have been produced in Raqqa. Laqabi ware is often seen as luxury bowls and dishes with moulded decorations. Production probably centred on the city of Kashan in Persia. Raised areas were often coloured in bright-blue, yellow, green, purple and pink to differentiate them from the white or off-white background. Description from warfare.atspace.eu. Now in the National Museum of Damascus, Damascus, Syria.
Manuel had obviously learned from past mistakes. He ordered his commanders to scout the enemy carefully and refrain from engaging until they had sufficient intelligence regarding the enemy’s strength and were sure of victory. John Vatatzes et al soon departed Byzantium with a contingent of regular army soldiers, including foreign mercenaries. As they marched south they augmented their force with military units of the eastern Anatolian provinces.
When scouts reported that the Turks had begun their march homeward, the Byzantine commanders decided to ambush the enemy. It was the obvious choice. The Turks would have to cross the Meander at some point in order to head back toward their capital Iconium (Konya). The mid-winter rivers were still swollen from the autumn rainy season. The enemy – already less mobile than usual because of the bountiful booty they now carried – would be most vulnerable when crossing.
Vatatzes immediately led his men to Hyelion and Leimmocheir, two small fortresses (or perhaps walled villages) on either side of the upper Meander. An ancient bridge spanned the river here, although it seems to have fallen into disrepair by the 1170s. Vatatzes hid the greater portion of his men in the woods on the right bank of the river, spreading them out to flank the approach road the Turks would take. The rest of his force he deployed to the left bank of the river with orders to conceal themselves in the thicket along the river and along the mountain slopes.
Bottleneck on the Meander
As anticipated, the Seljuqs arrived in a long, extended train and began to slowly cross the old bridge. Once the vanguard had crossed, the Byzantines on the left bank sprung the trap. Following Vatatzes’ orders they opened fire on the nearby enemy as well as on those crossing the river. Some were killed outright by Byzantine arrows while others fell into the cold, raging river and drowned.
Now Vatatzes’s main force charged the Turks on the right bank. The Atabeg, who was on the right bank, gathered his heavy forces and made a stand. He held back the main Byzantine force for some time, buying time for his Turcoman light cavalry (who seemed to form the greatest portion of his contingent) to cross the river. The Turcomans, seeing the slaughter that awaited them, hesitated, crossing slowly, wasting time. In doing so, they simply presented better targets. When theAtabeg noticed that everyone crossing the bridge was being shot down he changed tactics and withdrew further upstream, looking for an alternate fording spot. Byzantine forces pursued the Turks.
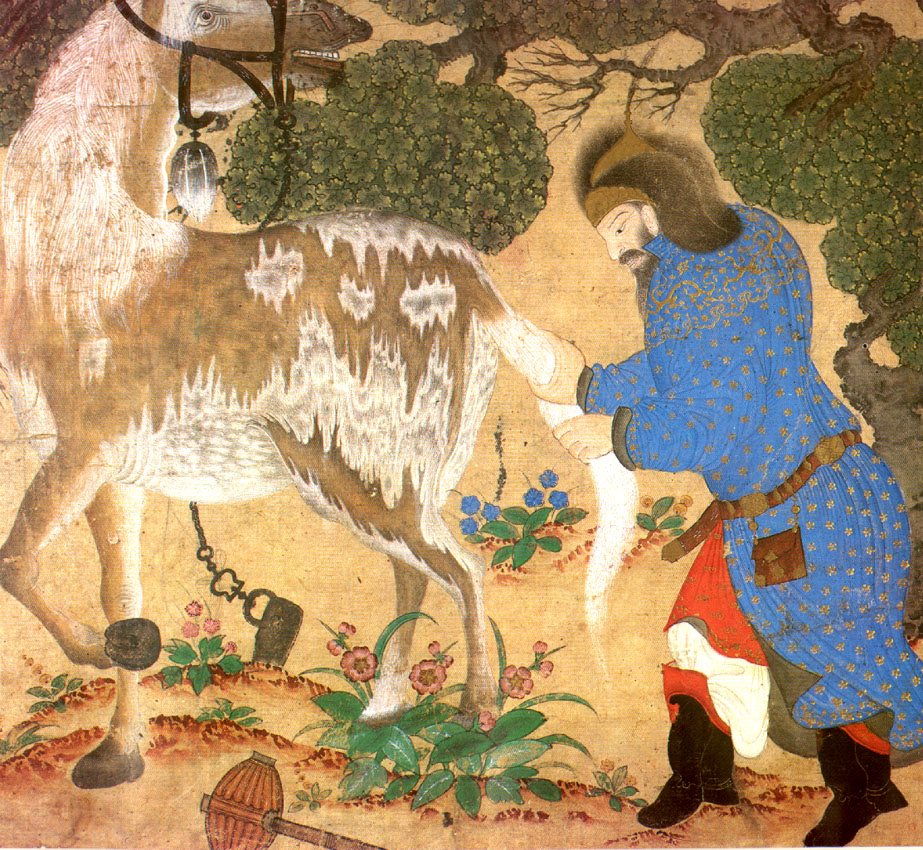
Above, a Turkmen Warrior with horse. From the fifteenth century Siyah Qalem school of painting. From Manuscript Hazine 2160, of the Saray Albums, Topkapi Palace Museum, Istanbul Turkey. Folio 86b.
Finding no suitable ford, the Atabeg tried a different tack. Choniates explains: “He floated his shield in the water and used it as a boat (…). With his left hand he held his horse as it swam; in his right hand he held his naked sword as if it were an oar, and so he quickly rowed across the river’s expanse.” (Niketas Choniates, O city of Byzantium, pp. 109-110). Once across he climbed a hill, shouting loudly; boasting of his feat, writes Choniates, although he was probably just rallying his surviving troops.
Endgame
Either way, it did him little good. While the Byzantine officers were reluctant to challenge theAtabeg, an Alan mercenary stormed up the hill and killed the Turkish commander with his longsword. The remaining Turks fled, most of them drowning while trying to cross the river. Only a few thousand survived.
There are no precise figures on the size of the Byzantine force or their casualties. Choniates does record that Aspietes was killed in combat, probably during the Atabeg’s initial holding action. The Byzantine co-commander was charged by an elite Seljuq warrior. Aspietes’ armor and shield were too strong for the Turk to land a killing blow, so he struck Aspietes’ horse in the face. The mount reared up on its hind legs, throwing Aspietes into the water where his armor immediately pulled him under.
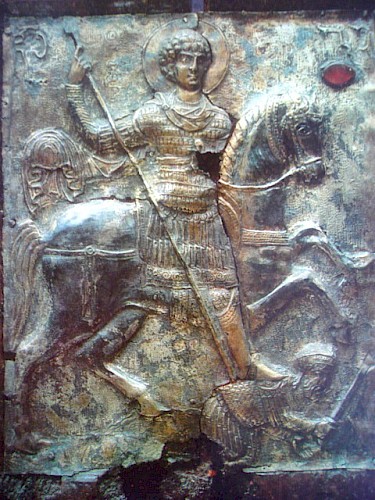
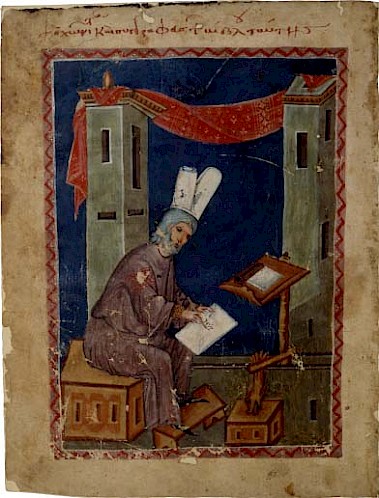
Above, an eleventh-century depiction of St. George. The saint is depicted in armor typical for the Komnenian period heavy cavalry.
The battle was a clear and decisive victory for the Byzantines. Vatatzes followed up by mounting his own short incursion into the Seljuq portion of Phrygian territory along the Meander, avenging the Byzantine victims by plundering and burning what he could.
Locating Hyelion and Leimmocheir
It seems that Vatatzes, having decided to pursue an ambush, immediately led his troops to Hyelion. The precise location of this battle has never been determined, but the circumstances of the ambush provide some clues.
The fact that the Byzantines were confident enough to commit to the location indicates that Hyelion offered the first viable crossing point for the returning Turks. During their invasion they had first sacked Antioch, on the river’s left bank, before crossing to the right bank to attack other cities. According to Scottish archaeologist and historian William Mitchell Ramsay, one of the nineteenth century’s foremost experts on the historical geography of Asia Minor, the bridge at Antioch had been destroyed some years earlier and not rebuilt (W. M. Ramsay, The Cities and Bishoprics of Phrygia, Vol. 1, p. 162). This would have forced the invading Seljuqs to swim their horses across the Meander. In the one to two months which passed between their incursion and their withdrawal, the Meander’s water level rose and the current became swifter, forcing them to follow the river upstream on the right bank to Hyelion.
 Thus, Ramsay concludes that the battle took place east of the confluence of the Lycos River into the Meander, relatively near to the point where the Meander emerges into the Lycos Valley from a gorge in the Mossyna mountains. (Ramsay, p. 176)
Further reading
- O City of Byzantium. Annals of Niketas Choniatum, transl. by H.J. Magoulias. Detroit 1984.
- W.M. Ramsay, The Cities and Bishoprics of Phrygia, Vol. 1: The Lycos Valley and Southwestern Phrygia. Oxford 1895. (Chapter 5)

1 comment
Excellent. I find the Kommenus reign fascinating-a kind of last hurrah for an empire with enemies on every side as well as within.