Sarissa Precision Horsa Glider Build
It's always good to attack the 'Great Pile of Unbuilt', isn't it? - Well, after a long time waiting, I recently decided to take the plunge.
Now, over the last couple of years I've built a not insignificant amount of laser-cut kits of varying complexity...and I'm very glad that I didn't go for this one first: Sarissa's Horsa really is not a kit for beginners!
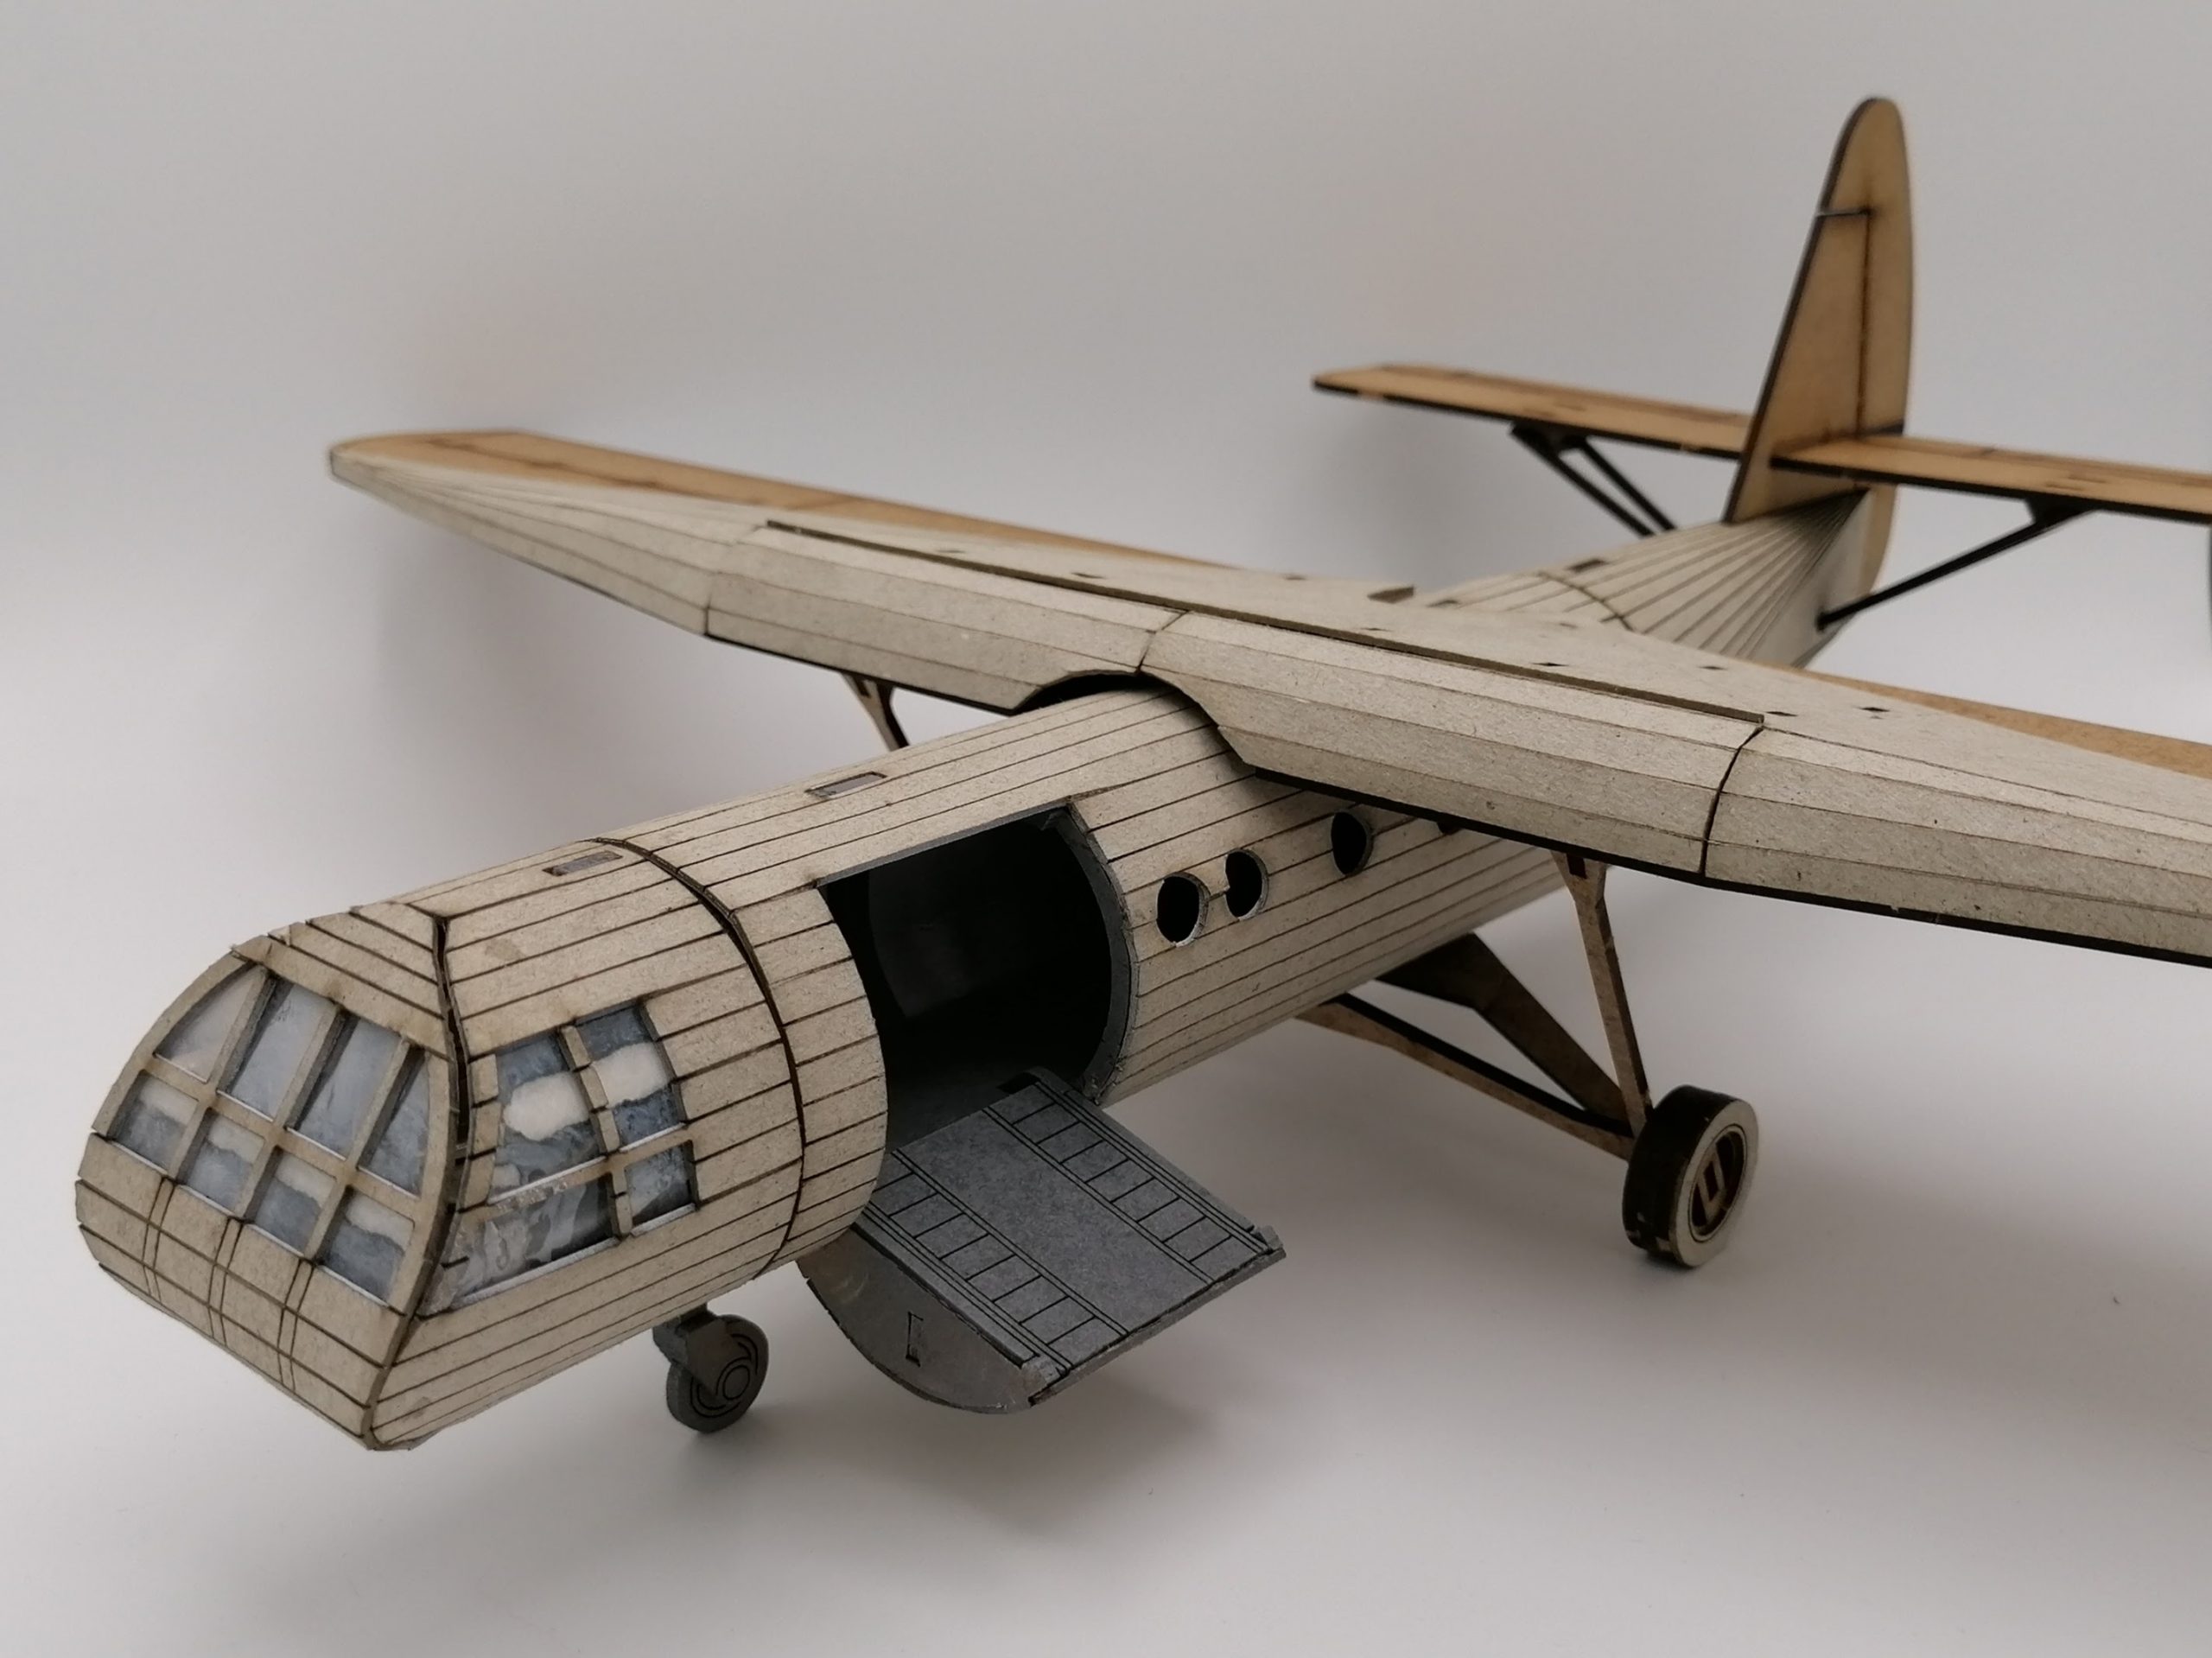
The hatch/loading ramp raises and lowers. Clever.
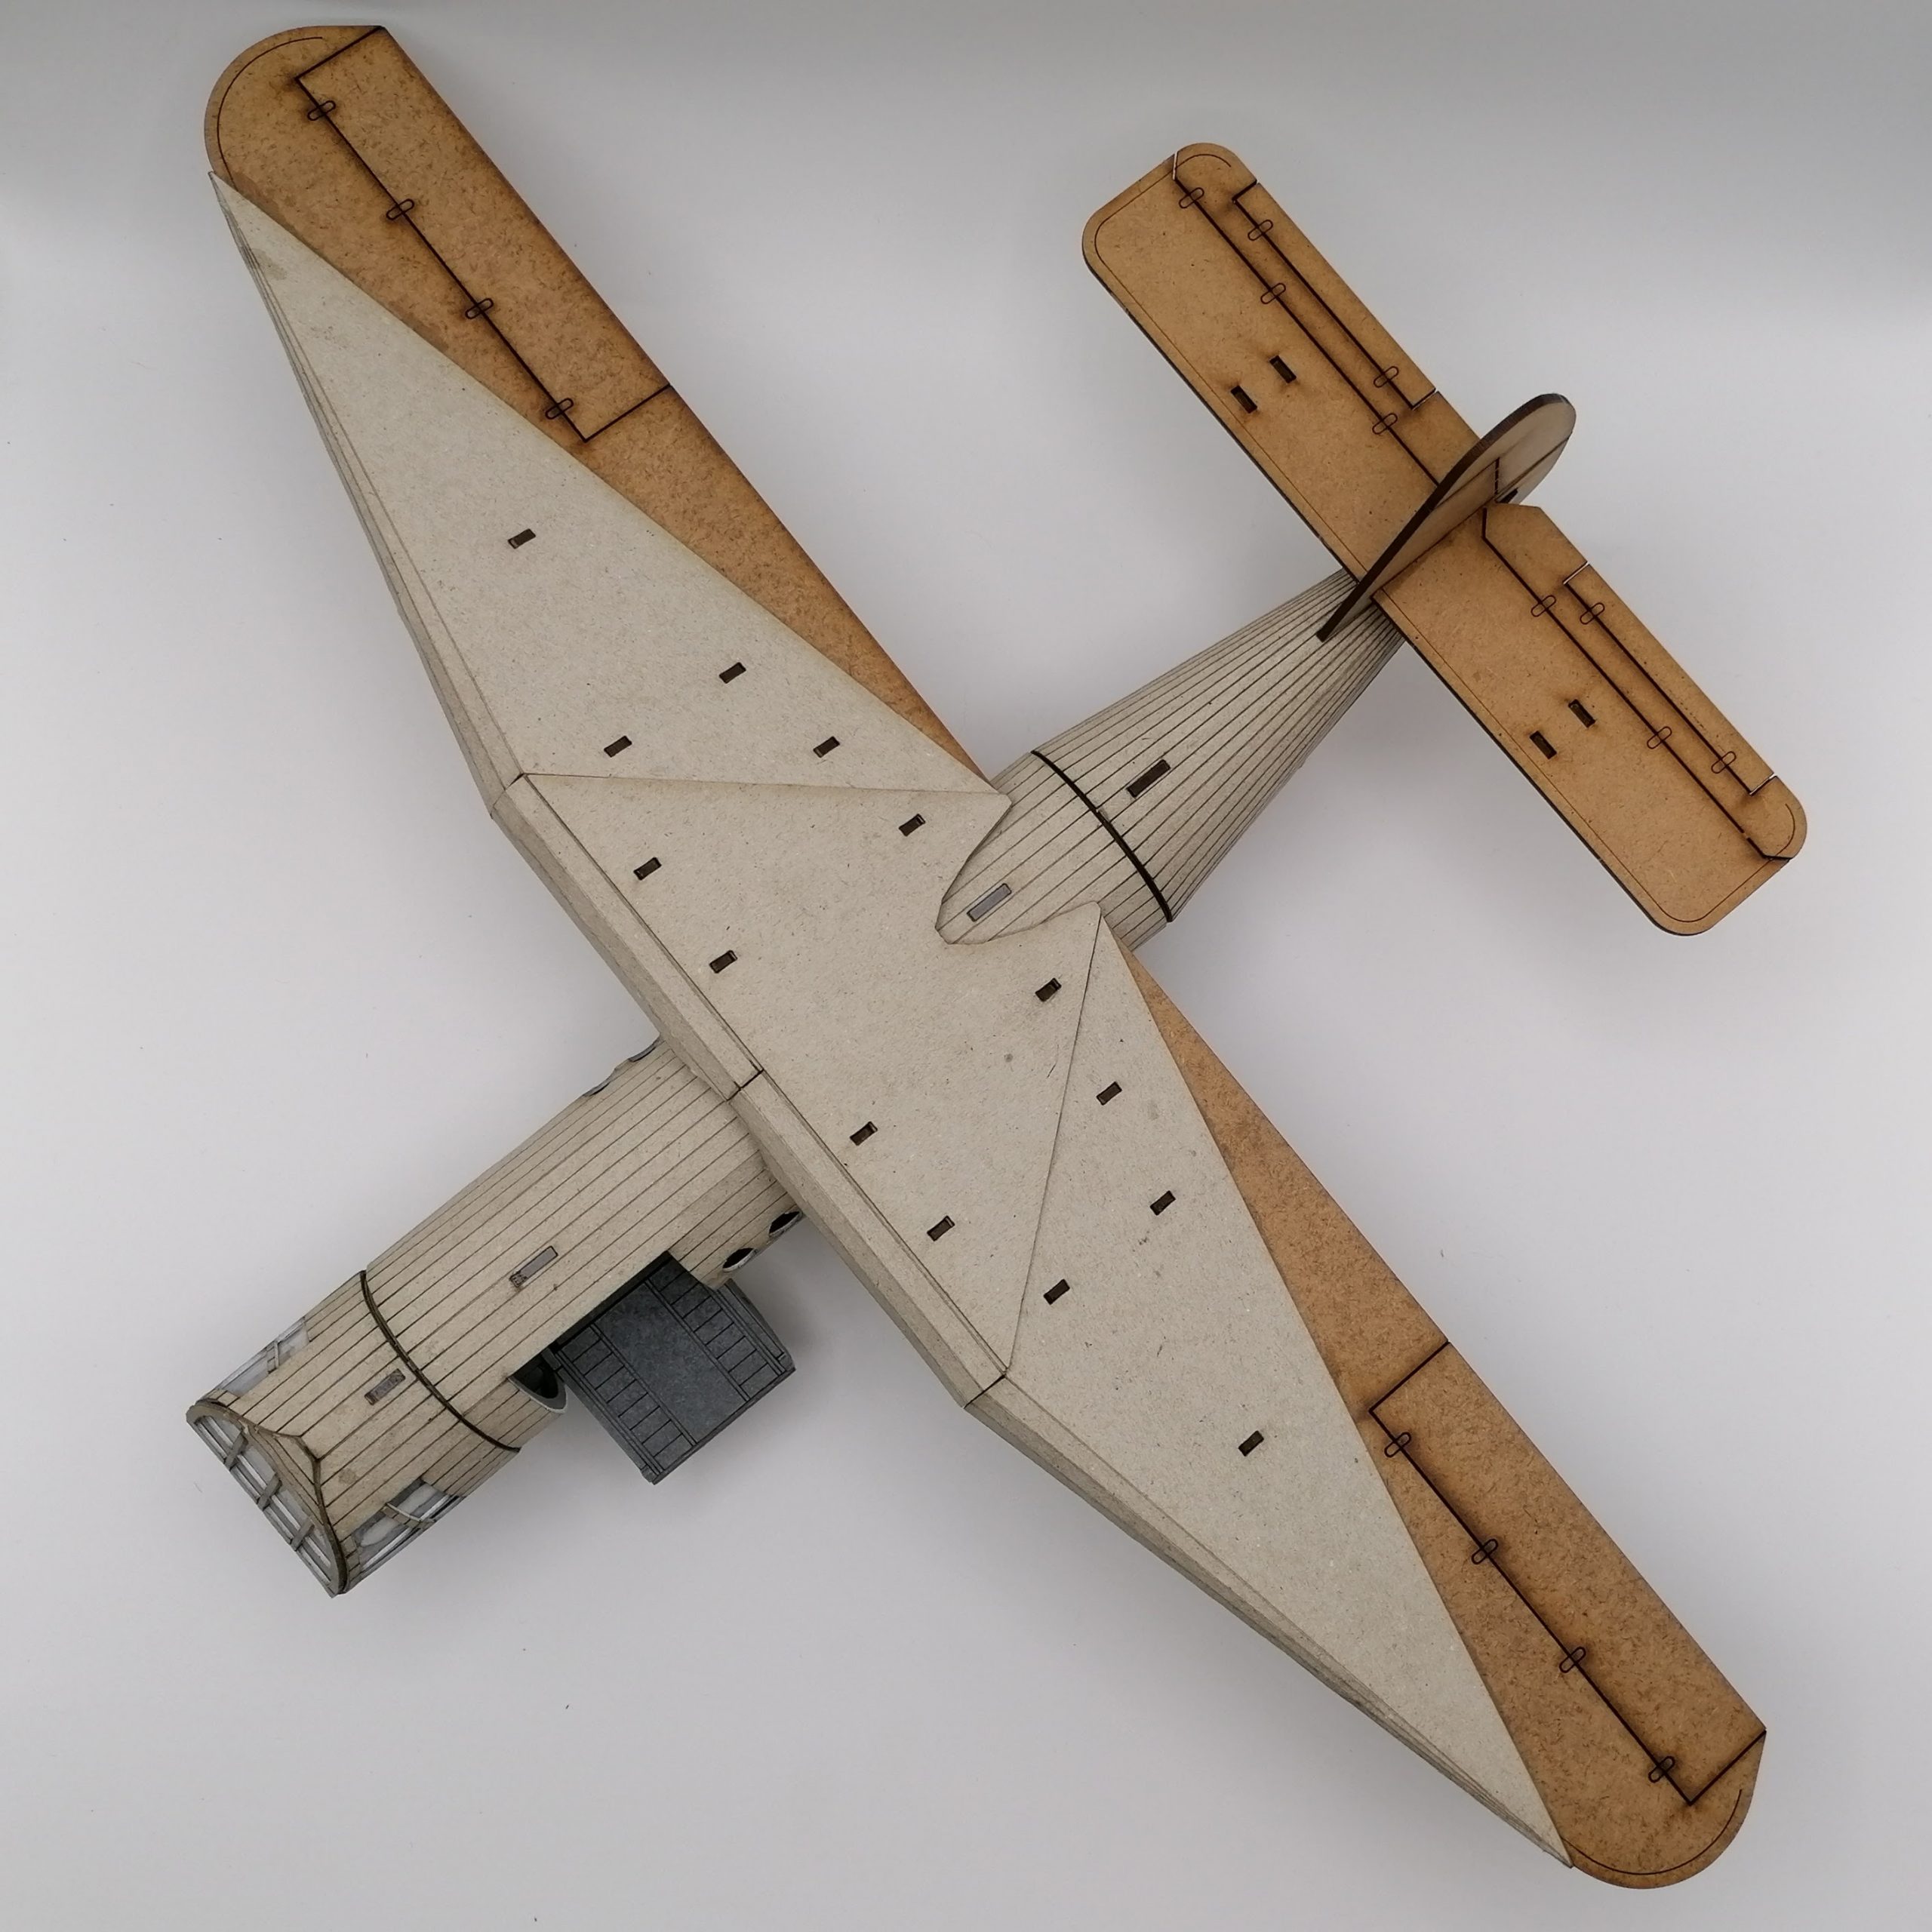
That said, it was a fun build. Seing (or rather, feeling) the aerofoil curve of the high wing take its shape is rather pleasing, and getting to appreciate the clever geometric design of the tail section beats that into a cocked hat!

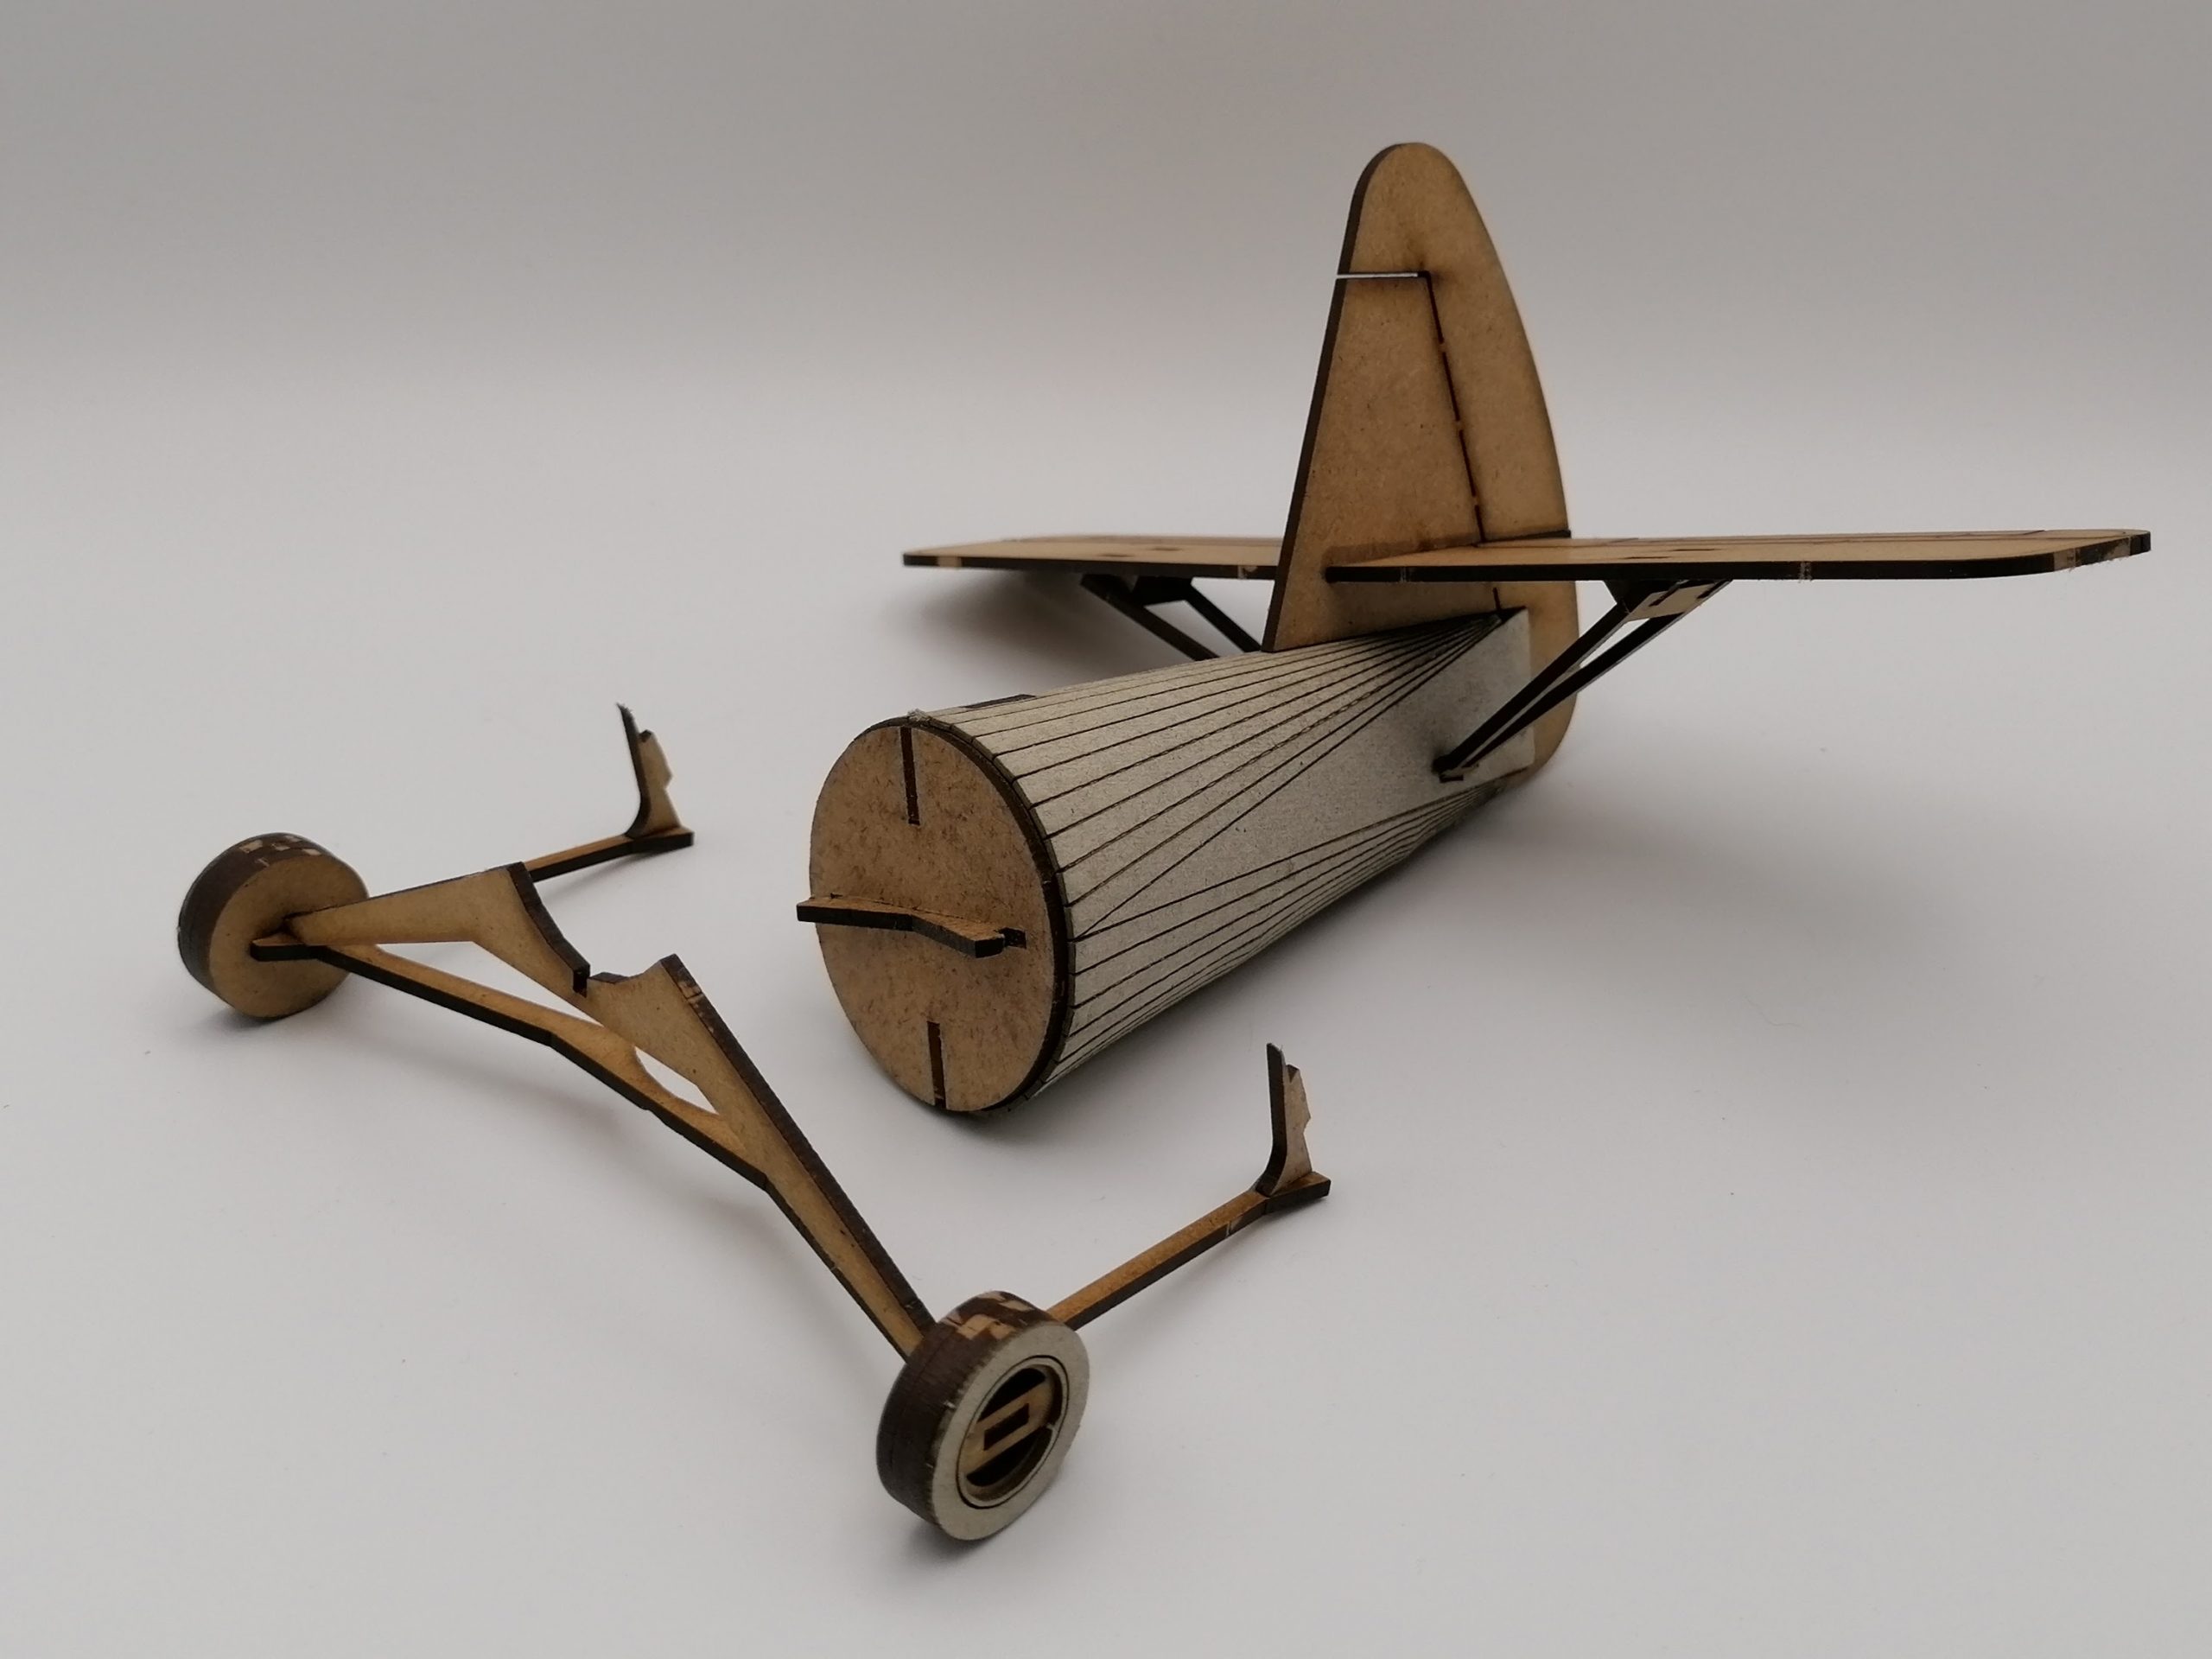
The Horsa kit has been very cleverly designed so that the fuselage section breaks neatly into three, with the cockpit and tailplane designed detach, mirroring the real glider. In this case, the sections are engineered to twist and lock into place, and it works pretty well, although (as is so often the case in such kits) the designs don't quite seem to take into account the breadth of the component pieces, so I had to bevel most of the tabs and shave half-millimetre layers from each of the interlocking fuselage - awkward, but certainly nothing insurmountable.

I decided to 'glaze' the cockpit windows with thin plastic. The marks on it are on the reverse side - it'll all be painted anyhow.
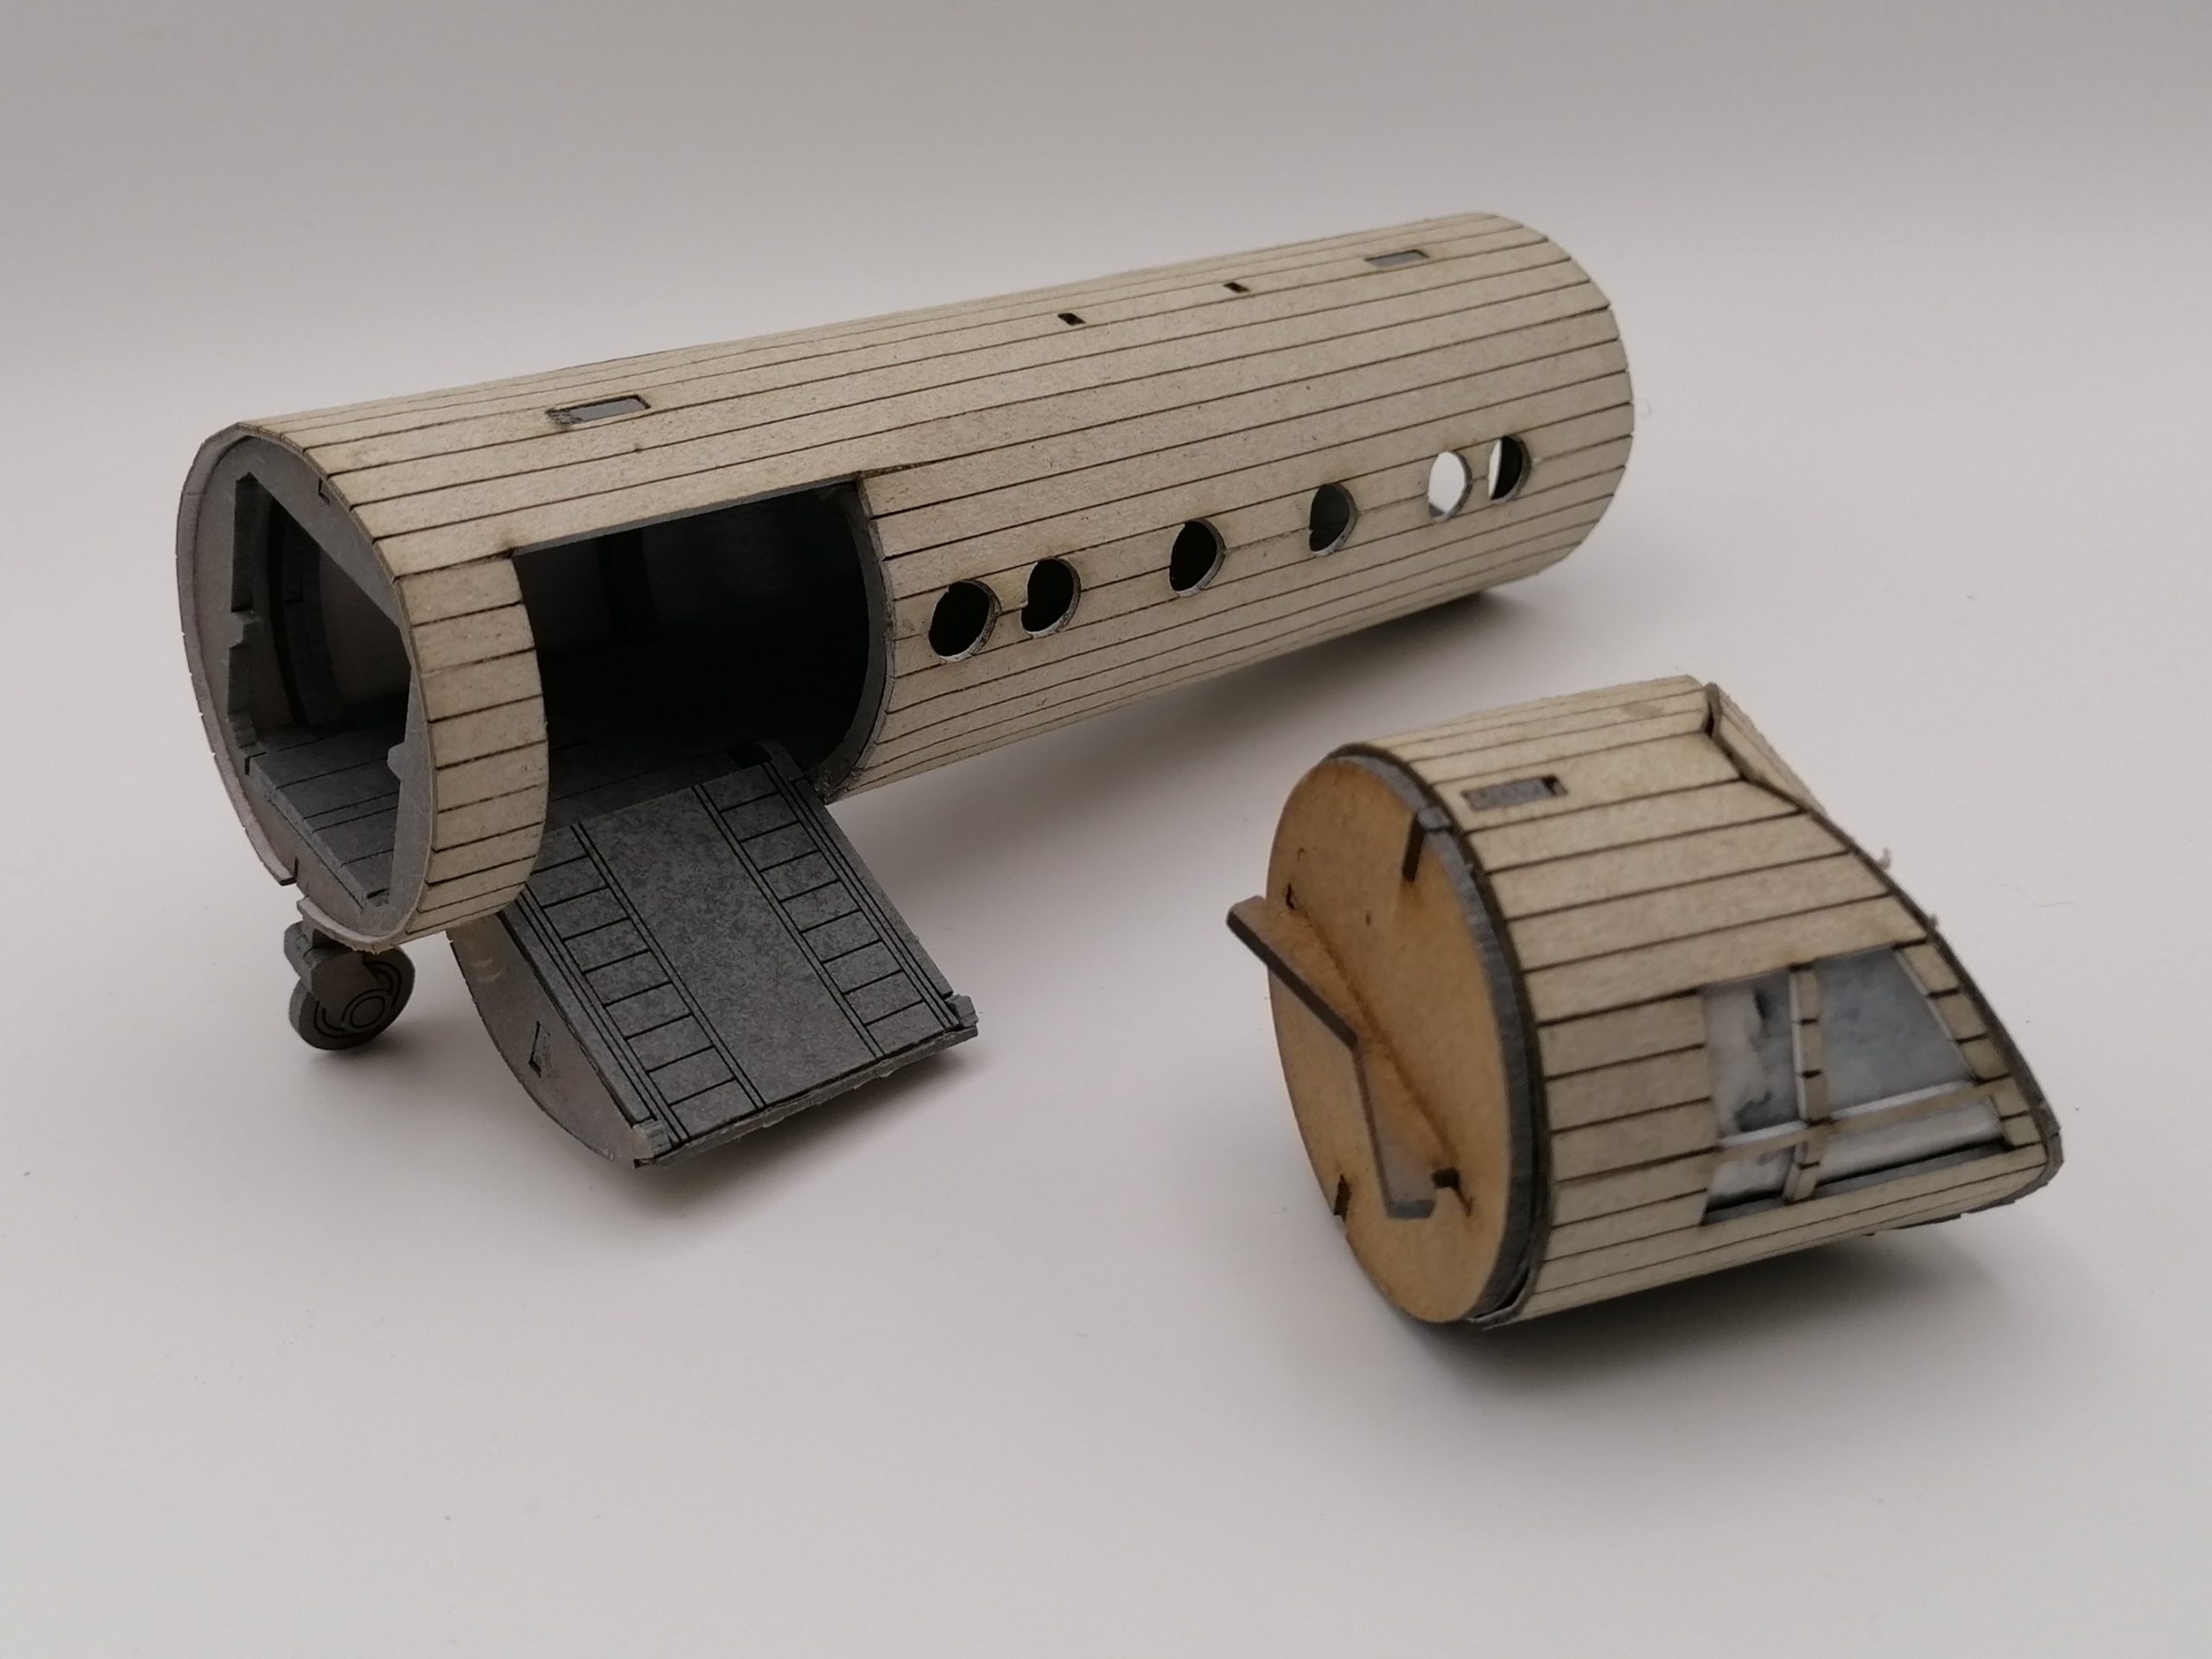
This shot really allows you to see the locking lug mechanism. It turns through about thirty degrees, and is nice and snug.
The good folks over at Sarissa also very kindly include a few 25mm washers to act as a counter-balance in the nose, given its unusual (for the time) tricycle undercarriage, and this works pretty well, except that (a) they weren't enough (luckily I use them for basing 28mm minis anyway, so I had a stock of them to hand) and (b) they are a really inconvenient shape to try to fit. Hmmm... if only I had some offcuts of heavy white metal to hand too.
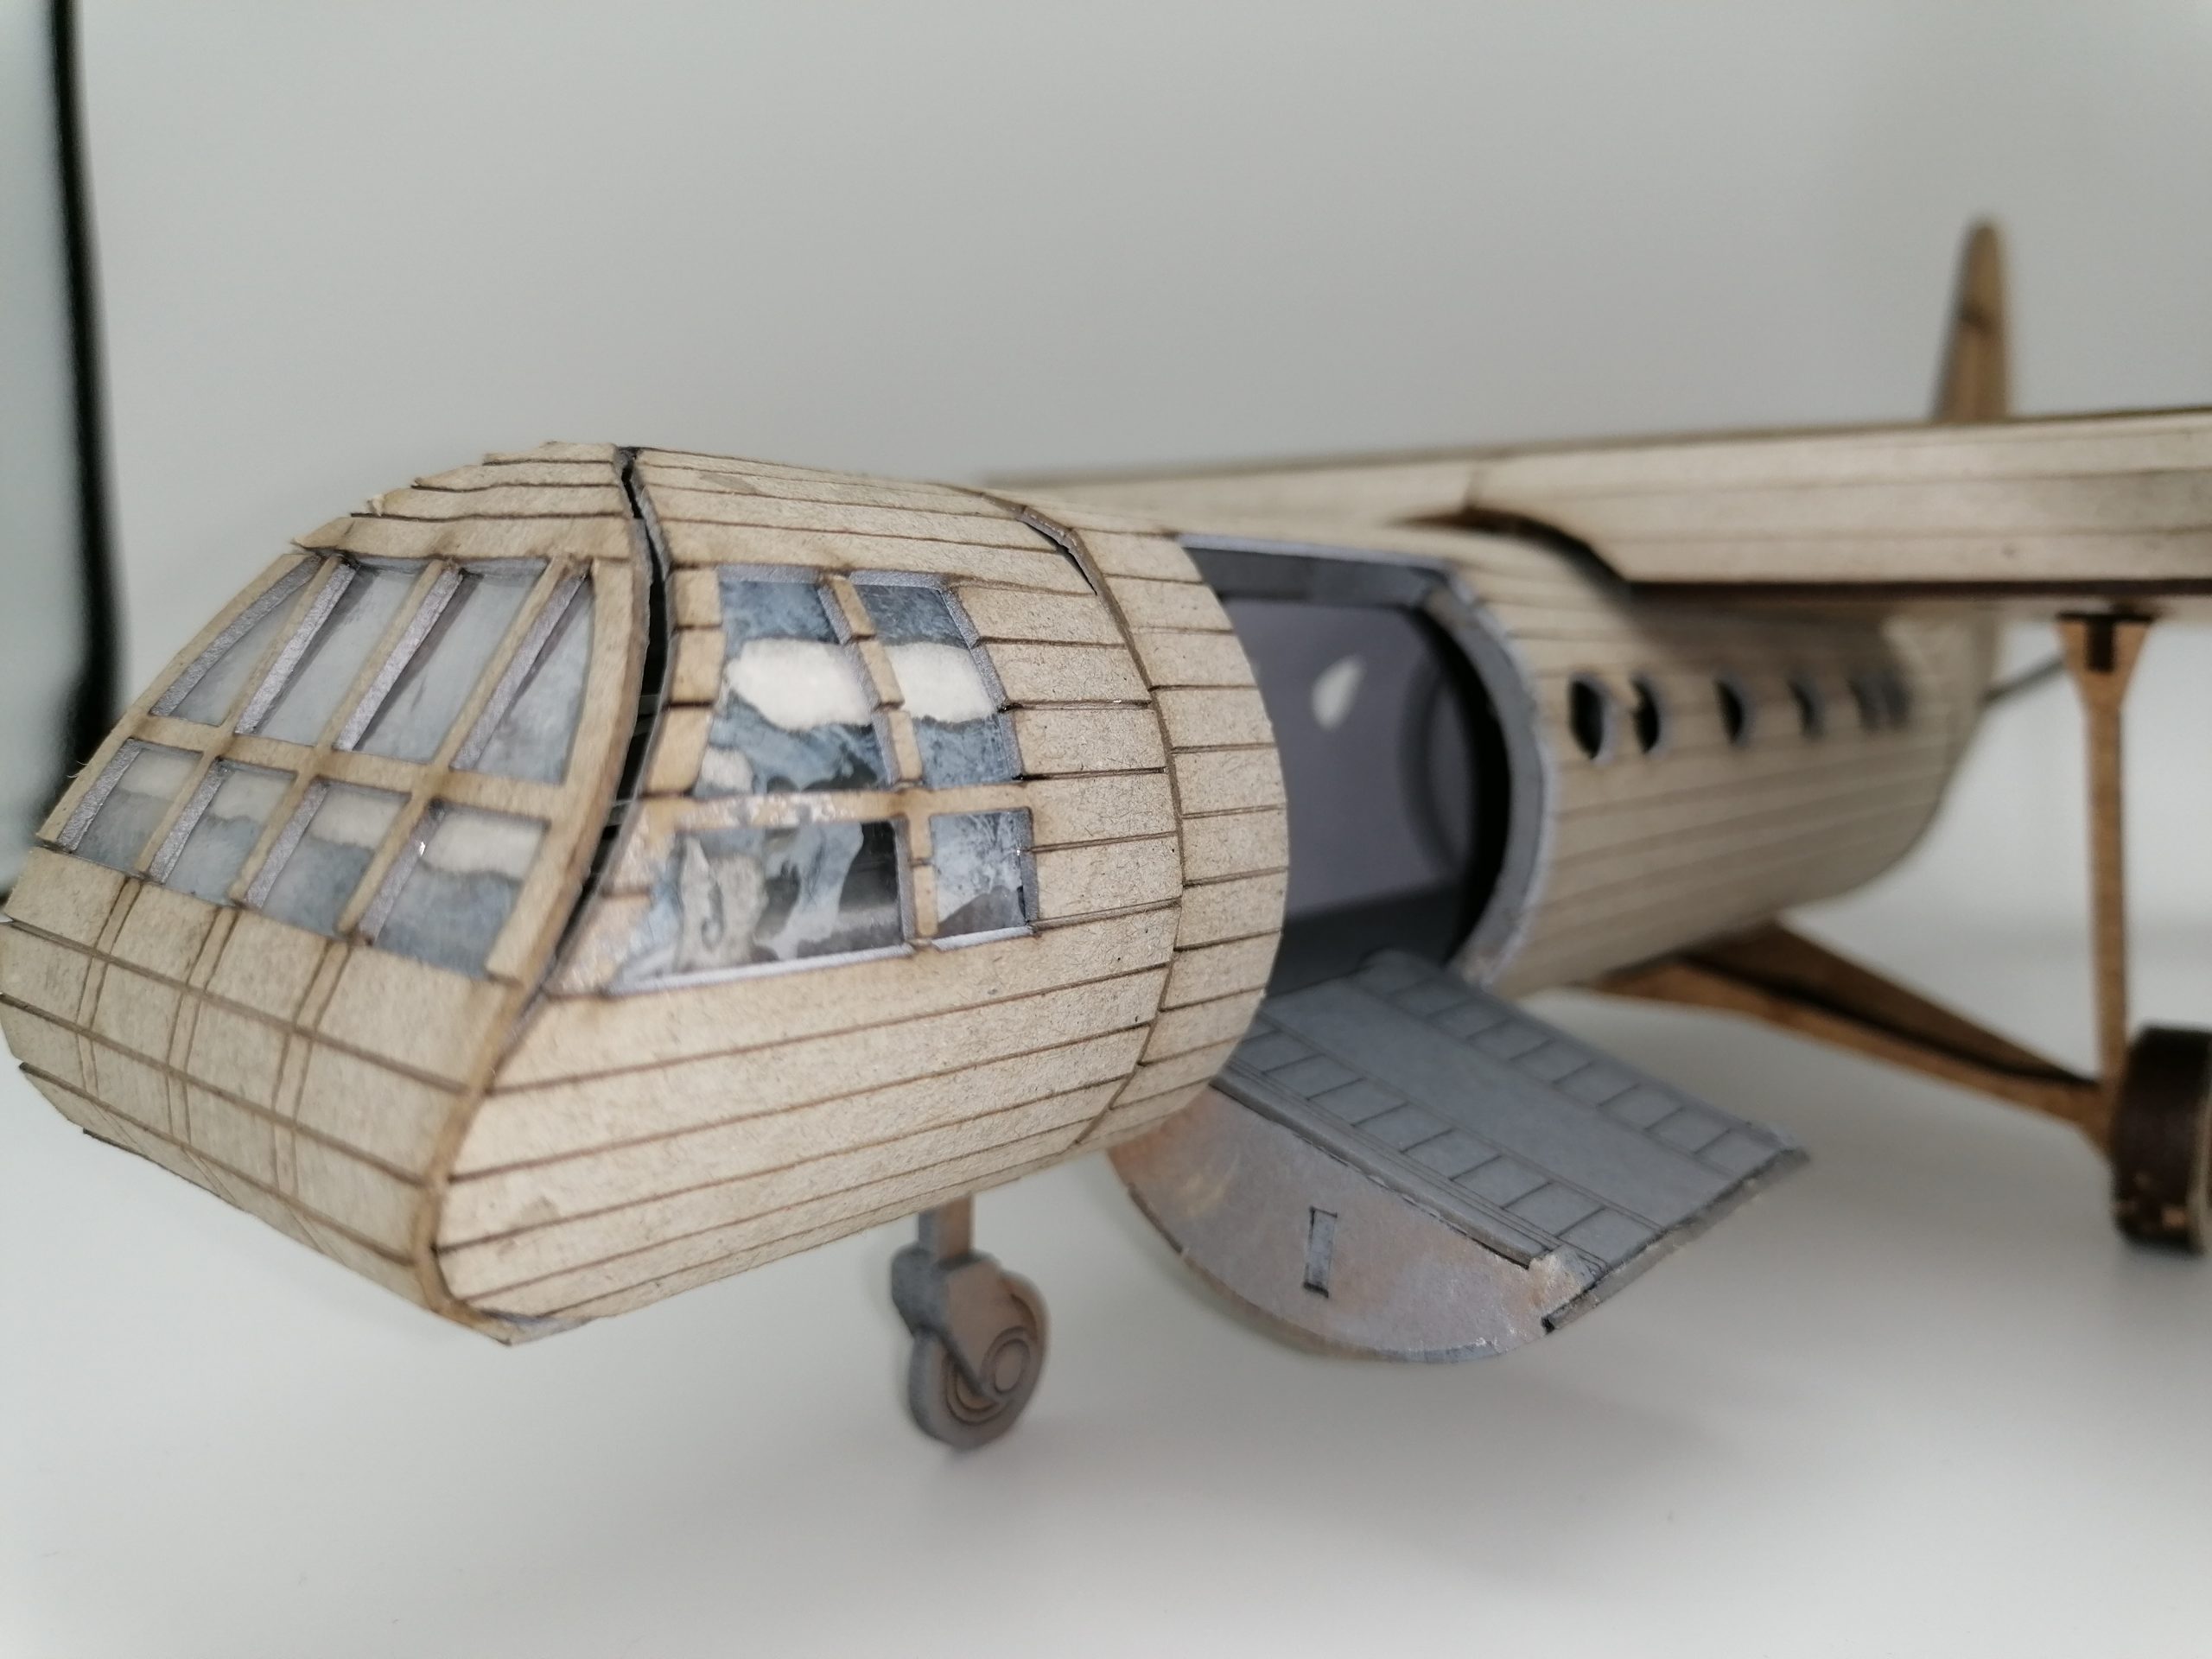
Sadly, with the best will in the world, I just couldn't bring these two components flush, so I shall be filling that gap anon...
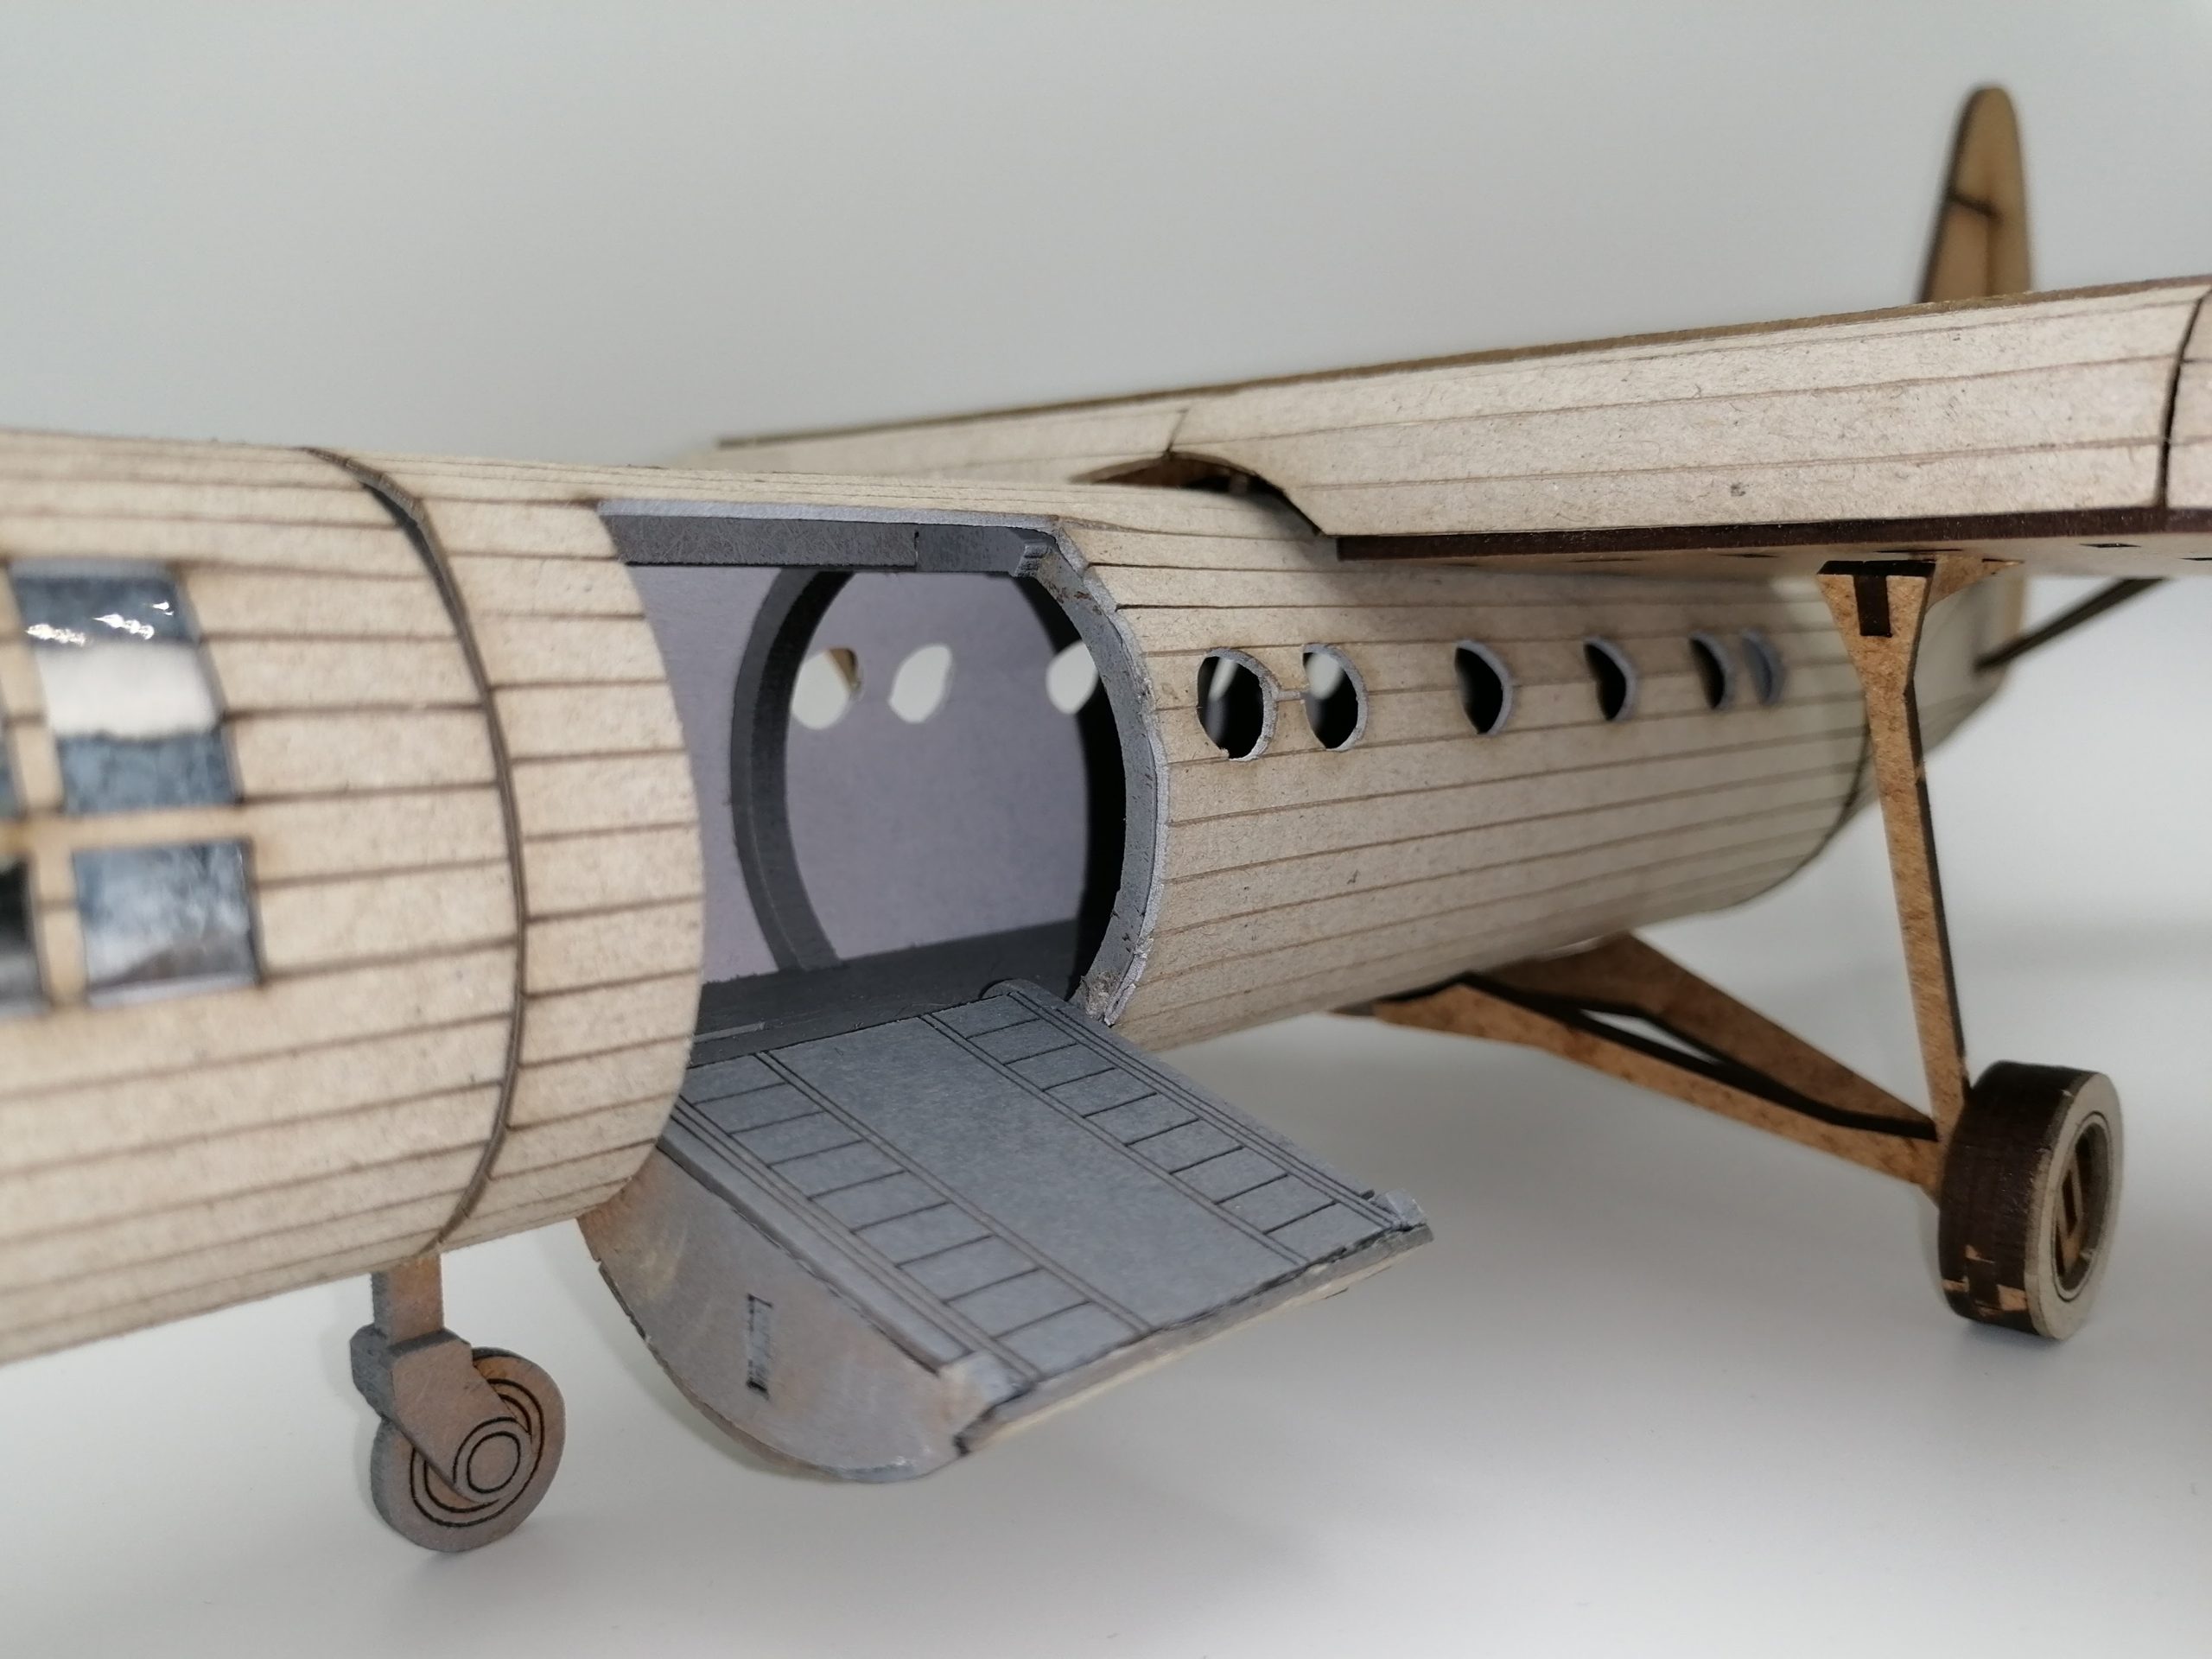
The model fits together fairly well (it's only dry-fitted in these pics), but I don't think the undercarriage struts will take much in the way of repeated fitting and removal - the flared juncture, for example, where they adjoin the lower wings, tapers to a wafer-thin point at its trailing edge, and that simply won't last. I suspect I shall end up gluing both the undercarriage trolley and the wings. That will, of course, potentially make transporting the glider rather trickier, but the model belongs to our editor, Guy, so that's something for him to solve.
In the meantime, I need to start thinking about painting it.
Here you can see I rattlecan-primed the inside of the fuselage white and the floor grey; the outside will of course be black with a camo topside.
The AIrspeed Horsa. It won't win any beauty contests, but what a remarkable piece of engineering!