-

Imperial Women of Rome by Mary T. Boatwright - Review
-

Kerma-Period Grave Discovered in Sudan
-

Ancient History Podcast - White Pedestal with Curtis Dozier
-
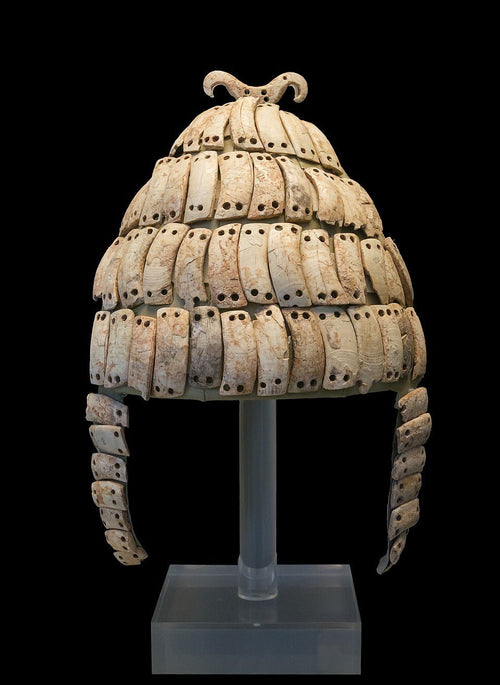
Homer, Helmets, and Hollywood
-

Ancient History 58 - Thoughts and Further Reading
-

Ancient History Podcast - A New History of Ancient Roman Theatre
-

A Wealth of Objects on Display – Munich Archäologische Staatssammlung
-
First Ever Insular Celtic Dictionary Being Written
-

Ancient History Podcast - Greek Mythology with Carolina López-Ruiz
-
Looking Behind, Looking Ahead
-
Ancient Greek History Gift Guide (Part 5): A Brief History of Ancient Greece
-

Ancient History Podcast - Killing the Messiah
-
Classical Sparta: A Militaristic Society? By Stephen Hodkinson
-
Ancient Greek History Gift Guide (Part 4): Creators, Conquerors, Citizens
-
Ancient Greek History Gift Guide (Part 3): The Rise and Fall of Classical Greece
-

Ancient History Podcast - The World of Homer
-
Chronicles: Alexander the Great - An Interview with Ben Angell
-
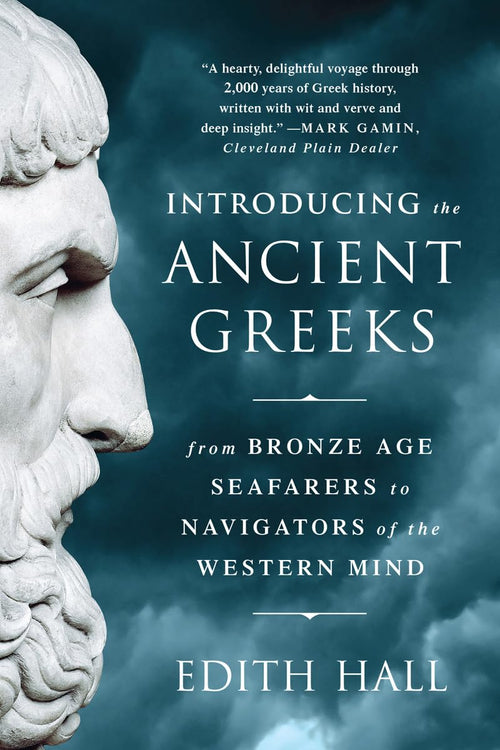
Ancient Greek History Gift Guide (Part 2): Introducing the Ancient Greeks
-
Ancient History Podcast - What is Ancient History? with Walter Scheidel
-

Ancient Greek History Gift Guide (Part 1): The Greek World
-

Assassin's Creed: Odyssey - Slavery
-

Ancient History Podcast - YouTube with Erica Stevenson
-

Win a Copy of Domination by Alice Roberts!
-

The importance of images in ancient history
-

Ancient History Podcast - Fulvia with Jane Draycott
-
Gladiator II and Ancient North Africa
-

Ancient News: The Spread of Leprosy in the Bronze Age
-

Ancient History Podcast - The House of the Satrap
-

Summer Reading Recommendations (2025)
-

Assassin's Creed: Odyssey - Strange Names and Places
-

Phoenician DNA and Misleading Media Headlines
-

Ancient History Podcast - History, myth, and folktale
-
Ancient History Online - New and Improved
-
Pax Augusta has finally released!
-
Ancient History Podcast - Standing Among the Spartans
-

Ancient History Along the Via Degli Dei
-

Ancient History: A How-To Guide
-

Ancient History Podcast - The Xiongnu Empire
-

Ancient Scented Statues
-

Ancient History and Tabletop Role-Playing Games
-
Ancient History Podcast - Race and Racism in Ancient Greece
-

Thoughts on Matt Damon's Odysseus
-

New Study Demonstrates Increased Lead Pollution in the Roman Empire
-

Ancient History Podcast - Soldiers, Wages, and the Hellenistic Economies
-

The Voyage Home - Review
-

Exciting Archaeology in Ireland
-

Ancient History Podcast - The Trouble with Ancient DNA
-
Tolkien and the Classical World - Review
-

My top books of 2024
-
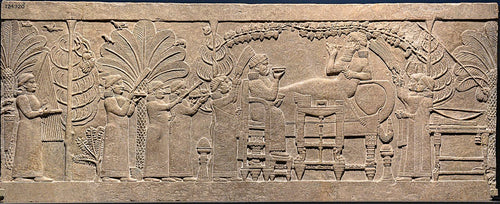
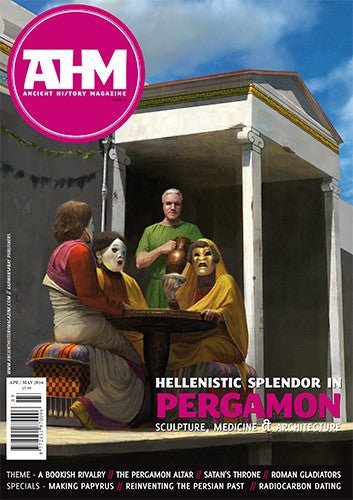
Musing on Mesopotamia in the Magazine
-
Ancient Warfare Answers (402): Arausio 105 BC: military defeat or political disaster?
-
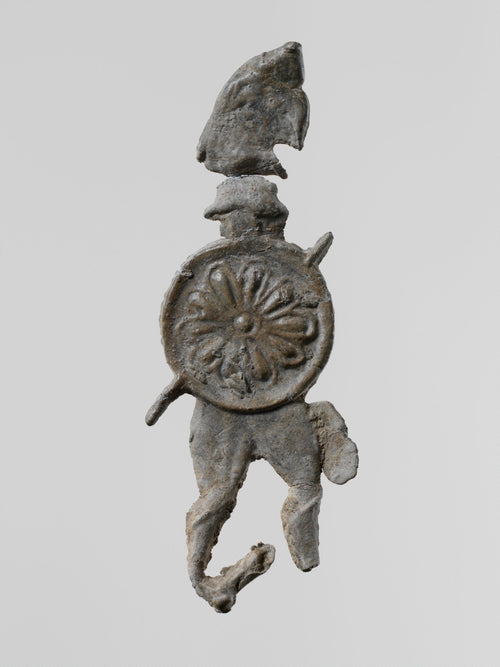
Ancient Warfare Answers (401): Why Did Helmets Have Crests?
-

Ancient Warfare Podcast (400): Greece in the Late Archaic period
-

Ancient Warfare Answers (399): Outflanking as a Tactical Innovation
-

Ancient Warfare Answers (398): Turning to Face an Outflank
-

Ancient Warfare Answers (397): Athenian Archers
-

Ancient Warfare Podcast (396): Revolutions in Warfare
-

Ancient Warfare Answers (395): Gladiators and the Roman Army
-

Ancient Warfare Answers (394): War Pigs
-

Ancient Warfare Answers (393): How long were bronze helmets used?
-
Ancient Warfare Answers (391): Bridging the Hellespont
-

Ancient Warfare Answers (390): Roman Military Signalling
-

Ancient Warfare Answers (389): Rome’s Elite Veterans: Influence, Origins, and End
-

Ancient Warfare Podcast (388): The triple acies revisited
-

Ancient Warfare Podcast (387): The Roman legion in the second century AD
-

Ancient Warfare Podcast (386): Let the die be cast
-

Ancient Warfare Podcast (385): Did the ancients fight with their cloaks on?
-

Ancient Warfare Podcast (384): Did Hannibal and Scipio Africanus Really Meet?
-

Ancient Warfare Podcast (383): A Christmas reading list
-
Ancient Warfare Podcast (382): How Did Caesar’s Legionaries Stay Battle-Ready?
-

Ancient Warfare Podcast (381): Did Ancient Soldiers Protect Their Feet?
-
Ancient Warfare Podcast (380): How Did the Greek Phalanx Keep Its Line?
-

Ancient Warfare Podcast (378): Did the Persians Really Use Cats at the Battle of Pelusium?
-

Ancient Warfare Podcast (377): How Much Do We Really Know About the Bacaudae?
-
Ancient Warfare Podcast (379): Commanding an army in antiquity
-

Ancient Warfare Answers (376): Are there any sources for the chariot driver actually exiting the chariot before contact?
-

Ancient Warfare Podcast (369): Battles of the Bronze Age
-

Ancient Warfare Answers (375): What was the relationship between Korybantic/Kouretic dances and ancient warfare?
-

Ancient Warfare Answers (373): Greek phalanx vs. Germanic shield wall: how different were they?
-

Ancient Warfare Answers (372): Were ancient armies ever at full strength?
-

Ancient Warfare Answers (371): Do we know anything about ancient soldiers dice games?
-

Ancient Warfare Answers (370): Which lost ancient military writer would we most want to recover?
-

Ancient Warfare Answers (368): What happened to the Hastati, Principes, and Triarii?
-
Ancient Warfare Answers (367): How permanent were institutions like dux or comes?
-

Ancient Warfare Answers (366): When did the classical Greek hoplite cease to exist?
-

Ancient Warfare Podcast (365): Controversies of Roman Warfare
-

Ancient Warfare Answers (364): Victories by missile-based armies
-

Ancient Warfare Answers (363): Why do slingers go away?
-
Ancient Warfare Answers (362): What can you tell me about the Scythed Chariots at Gaugamela?
-

Ancient Warfare Answers (360): Did the ancient Greeks have a padded garment under their armour?
-

Ancient Warfare Podcast (361): Helmets in the Ancient World
-

Ancient Warfare Answers (359): Who are your go-to translators for your favourite texts?
-

Ancient Warfare Answers (358): What was an oblique phalanx?
-

Ancient Warfare Answers (357): What was the least influential weapon on the ancient battlefield?
-

Ancient Warfare Answers (355): Did small built-up areas play a role in ancient battlefields?
-

Ancient Warfare Answers (354): Why did ancient armies have few ranged units compared to line infantry?
-

Ancient Warfare Answers (353): Who were ancient scouts?
-

Ancient Warfare Podcast (352): Lindsay Powell's Tiberius
-
Ancient Warfare Answers (351): What would be your ideal military?
-

Ancient Warfare Answers (350): What do we know about the early life of Marcus Furius Camillus?
-

References for issue 7
-
References for issue 6
-

References for issue 5
-
References for issue 4
-
References for issue 3
-

References for issue 2
-

References for issue 1
-

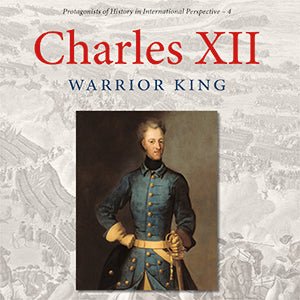
Charles XII: Warrior King reviewed in War in History 30
-
Recent review of Charles XII: Warrior King
Charles XII: Warrior King was favourably reviewed in a recent issue of the Swedish history magazine, Militär Historia. In issue number 8 from 2019, author Olle Bergman provides his take on the recent anthology edited by John Hattendorg, Augustus Veenendaal, Åsa Karlsson, Margriet Lacy Bruijn, and Rolof van Hovëll tot Westerflier. Below is a rough translation […]
-

Official launch for Charles XII: Warrior King
On October 3rd, 2018, Charles XII: Warrior King was officially released. The launch event was held in Stockholm, Sweden at the House of Nobility (Riddarhuset). Attended by an international audience, the official presentation included a panel discussion. This was moderated by John B. Hattendorf, Charles XII’s chief editor, and included contributions by several of the book’s […]
-

Edge of Empire review in Britannia
Even though it’s a few years old now, we’re very happy to see that many people are still reading (and reviewing) Edge of Empire, Jona Lendering and Arjen Bosman’s comprehensive look at Roman influence on Germany and the Low Countries. Recently, we found out about a new review in Britannia, the journal of the Society for […]
-

Rails to the Front reviewed by the Lexington Quarterly
Rails to the Front recently received a fabulous review in the 2018 January edition of the Lexington Quarterly. As Gregory P. Ames concludes about the book: “this is an authoritative work, engagingly written, attractively designed, and given its nice price, easily recommendable as the go-to work in its field.” You can read the complete review […]
-

New review for Rails to the Front
Rails to the Front: The role of railways in Wartime was recently reviewed in the fall-winter 2017 edition of Railway History. Col. Don Woodworth, Jr. Provided a thorough review of the work by Guus Veenendaal and Roger Grant, and concluded it was an excellent value for money and a fine introduction to the topic: “This book […]
-
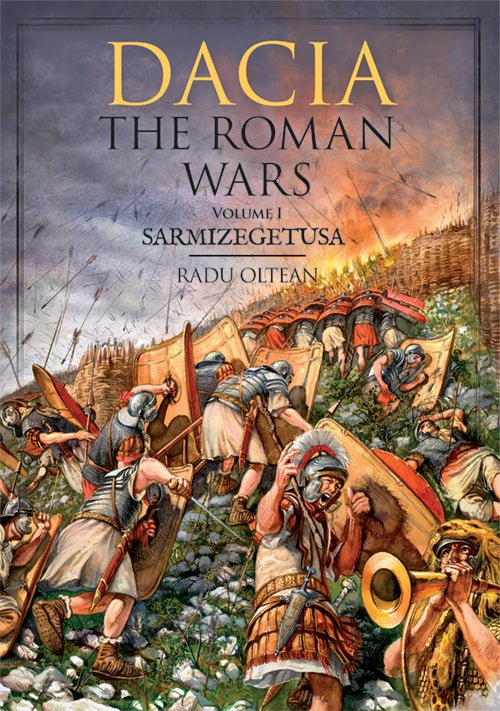
Radu Oltean’s Dacian Wars
Karwansaray was fortunate enough to acquire the rights to publish a second edition of Romanian artist Radu Oltean’s book on the Dacian Wars. You probably know Radu from the centrefolds that have illuminated (almost) every issue of Ancient Warfare magazine from issue VII.6 (on Marcus Aurelius) onwards. You can get an idea of how Radu […]
-
Unboxing Romans
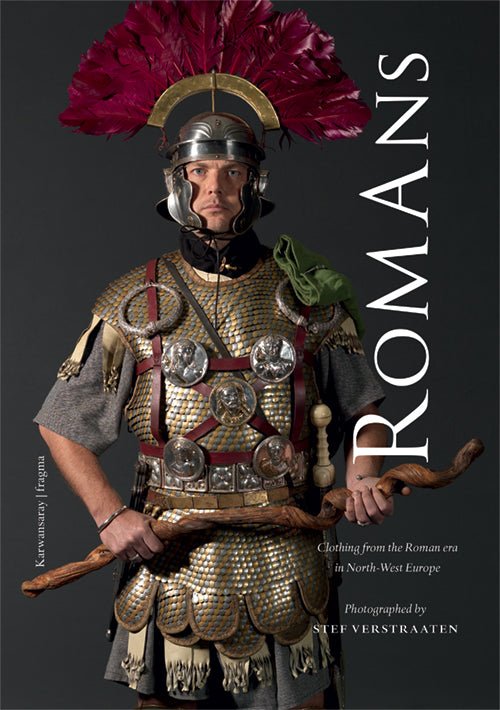
There is no advertising as good as a testimonial from a happy customer. When I met photographer Stef Verstraaten last weekend at the Nijmegen Roman festival, he told me someone had put a video on Youtube of his first impressions of Romans – Clothing from the Roman Era in North-West Europe. Obviously, I checked it immediately […]
-

New book: Henchmen of Ares
Last year saw the publication of the first hardcover special of Ancient Warfare magazine, Edge of Empire, written by Jona Lendering and Arjen Bosman. I recently interviewed Jona on the book, in case you missed it. This year’s Ancient Warfare special will be another hardcover book, entitled Henchmen of Ares: Warriors and Warfare in Early […]
-
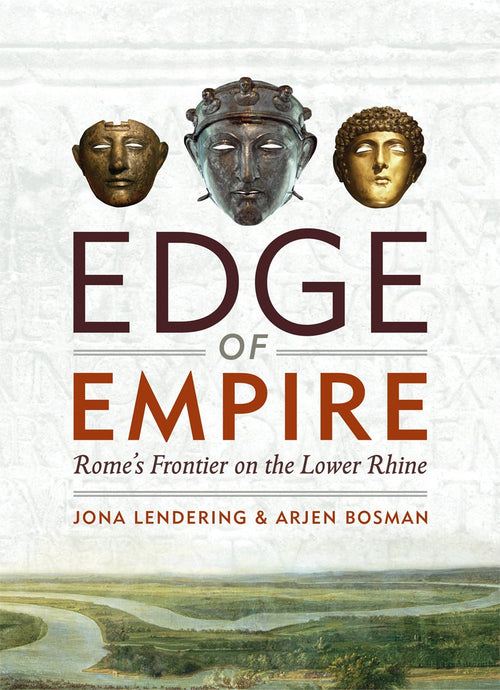
An interview on Edge of Empire
I recently had a talk with Jona Lendering, co-author of Edge of Empire: Rome’s Frontier on the Lower Rhine, a hardcover book on the Roman occupation of the Low Countries that was published as last year’s special of Ancient Warfare. What follows includes some background information on the book and one of its authors, as well as […]
-

New Praise for Marlborough: Soldier and Diplomat
Marlborough: Soldier and Diplomat received a special mention over the holidays when Janice Murray, Director General of the National Army Museum, praised it as one of the best military books of 2012 in an article for The London Times. You can read her pick, along with those of other notable experts, in this copy of […]
-

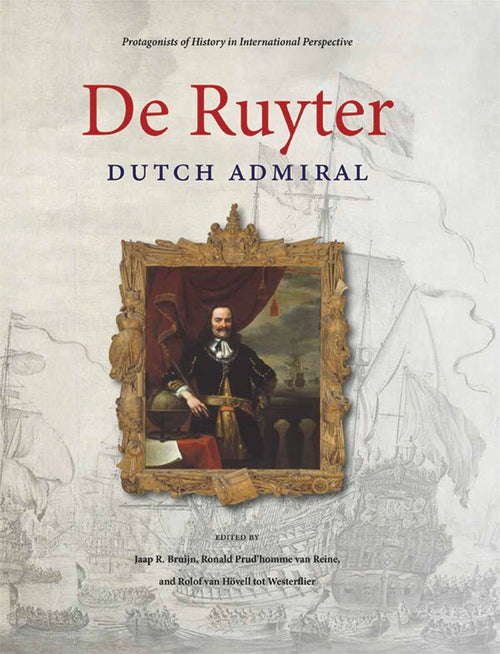
A new Dutch review
The Dutch academic journal, Tijdschrift voor Zeegeschiedenis, has just published another favourable review of De Ruyter: Dutch Admiral. You can read their review here (in Dutch).
-
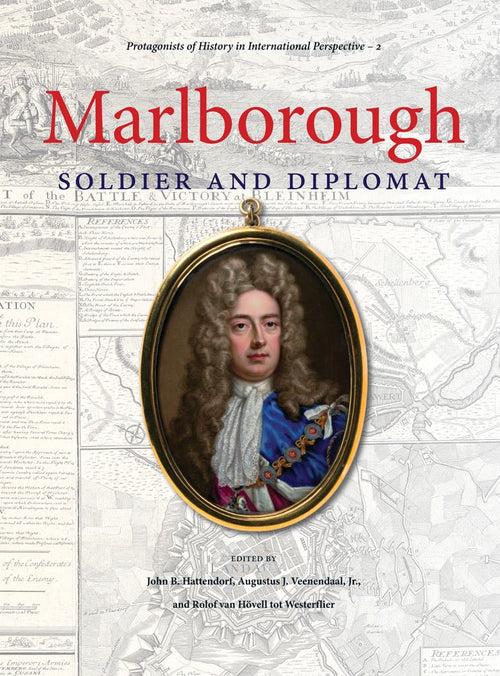
New book reveals unique insights into great British hero: John Churchill, First Duke of Marlborough
On Thursday, 27 September 2012, a landmark new book exploring the life and times of John Churchill, the 1st Duke of Marlborough, was launched by Karwansaray Publishers. Marlborough: Soldier and Diplomat offers uniquely diverse insights from twelve eminent international historians and experts on a man long regarded as one of Britain’s greatest generals. This key […]
-

A host of new reviews for De Ruyter
A number of new reviews for Michiel De Ruyter: Dutch Admiral have recently appeared in a variety of North American magazines and journals. The Northern Mariner, The Mariner’s Mirror and Naval History magazine have all published very positive and encouraging reviews of the book. To read what each of these publications had to say, you […]
-

De Ruyter nominated for prize
De Ruyter: Dutch Admiral has been nominated for the Boerhaave Biography Prize, an award given out by the Royal Dutch Academy of Sciences (KHMW). This prize is brand new in 2012 and De Ruyter will be competing against 19 other outstanding Dutch biographies for the award. For more information and a complete list of the […]
-

NRC Handelsblad reviews De Ruyter
A review of De Ruyter: Dutch Admiral appeared today in the book section of the NRC Handelsblad, one of the most prestigious newspapers in the Netherlands. The reviewer calls the book “a rich and instructive book with nicely reproduced illustrations, a lovely calling card for this new publisher”. You can read a complete reveiw on […]
-

Pirates and Privateers reviews De Ruyter
Cindy Vallar is an enthusiast of all things piratical. She provides a great resource via her website, Pirates and Privateers. Here you can find articles, book reviews and links to other sites all related to the history of pirates from ancient times to the present. She has recently published a review of De Ruyter, which […]
-

Historyofwar.org reviews De Ruyter: Dutch Admiral
Historyofwar.org has posted a review of De Ruyter: Dutch Admiral on their website. Unlike earlier press, this new review is in English. You can take a look at it here.
-
Radio interview for new book
Today, Rolof van Hövell tot Westerflier, one of the co-editors of De Ruyter: Dutch Admiral, discussed the book on Graven aan de Amstel, a weekly history program presented by Amsterdam FM. In the hour-long interview, the host, Laurens van der Heijden, discussed various aspect of De Ruyter’s career and life with Rolof, along with future […]
-

De Ruyter: Dutch Admiral launches
De Ruyter: Dutch Admiral was officially introduced to the press and public as part of the Admiral’s Lecture Series, a bi-annual presentation given by the Royal Dutch Navy. The book’s introduction was combined with a lecture by noted Oxford professor, Nicolas Rodger. He spoke on the subject of how history was often used to understand […]
-
Cavalry: Standard Model
Cavalry combat will be difficult to model. I would like to begin this section with some quotations for several books that give a flavor for cavalry combat and provide a few useful details. Connolly: Greece and Rome at War (P 224): “In the second half of the 2nd century BC the Romans made the momentous […]
-
Cavalry - an overview
Over the centuries of its existence, the Roman army used a variety of cavalry support units. The early legions were supported by 300 equites formed into a unit. In the latter years of the Republic Caesar, for example, employed thousands of allied cavalry. At times, during the empire, the role of the cavalry amounted to a […]
-
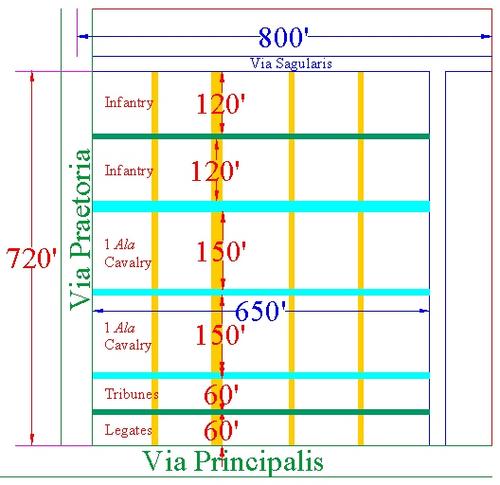
The Generic Army's camp
Using the formulas and other data described in Camp Sizes, it is calculated that the Generic Army needs about 196 a.q. of space. A camp drawn to that size is illustrated here. The red band around the camp is the line of fortifications. Inside it is the intervallum, the open space between the strigified space […]
-
Camp Size
Introduction Alan Richardson has written a series of articles in the Oxford Journal of Archaeology in which he develops the mathematical basis for determining the size of the Roman camp. He worked from ancient descriptions and from modern archaeological studies of camp sites. The result is a rather elegant rule of thumb that can be […]
-
The Hyginus Camp
Pseudo-Hyginus wrote sometime in the last half of the second century AD, between the reigns of Trajan and Septimius Severus. He says that what he has prepared is an explanation of his new way of laying out a camp which, he hopes the emperor will agree, is an improvement upon the customary way. In modern […]
-
The Roman Camp
As an introduction to the topic of the Roman camp, we could not do better than this description from Livy. He puts this speech in the mouth of Aemilius Paullus just before the Battle of Pydna in the summer of 168 BC. Paullus is addressing his senior officers who are critical of his decision to construct a […]
-
The Infantry Fighting Model
The challenge is to translate these new ideas about how the Romans fought into visual images of what it might have looked like. One faces several problems when trying to create a visual model. Drafting detailed images requires a lot of guesswork. It is one thing to say “they stood back from each other.” It […]
-
Elements of Roman Fighting
Sword or Spear? The generally accepted view has been that the legionary was primarily a sword fighter and that his use of the pilum was restricted to the initial charge. This view has been strongly challenged by the work of Dr. Alexander Zhmodikov (Historia, 2000). He cites plentiful ancient evidence of missile warfare continuing long […]
-
The Legion Formation
Considering that the Roman army was arguably the greatest military force the world has known, that pretty good eyewitness descriptions have come down to us and that it has been extensively studied for hundreds of years, it is somewhat amazing that no one really knows exactly how it looked or functioned. This section lays out […]
-
Introduction to a New Model
The new infantry model At about the same time that I first developed The Roman Army web page Adrain Goldsworthy’s book, The Roman Army At War was published. It was followed by articles by Dr. Philip Sabin: ‘The Mechanics of Battle in the Second Punic War and The Face of Roman Battle’; and by Alexander […]
-

Attacking the marching column
Introduction “Getting there is half the fun” would not describe the Roman army’s experience. Army travel was brutally hard work. In the previous pages the march is described in some detail. As the daily march was described and illustrated in that section the daily march averaged about 10 miles, took some nine hours from the […]
-
A day’s march
This page is an attempt to reconstruct a ‘typical’ day’s march for the army. Before showing the marching column there are a few basic considerations. Distance between camps There was surely no standard distance between camps. Estimates of the normal day’s march vary but 10 miles seems to be fairly standard. That is the distance […]
-
The order of march
The order in which the various units moved is uncertain. Delbrück, who devoted over 600 pages of his 4-volume work on the History of Warfare to Rome only wrote a single sentence about the march saying that he didn’t have enough information to speculate. More recent authors do give some opinions about the order of […]
-
March: the whole army
In the previous section the elements that would constitute a single legion were explored. When several legions were assembled into an army there would be some additional units that are described here. Bodyguards At least by the late republic the commander employed professional body guards made up of paid mercenaries. It seems that the number […]
-
March: noncombatants and legion baggage
Scribes In addition the legion would have scribes to keep its records and accounts. I have found no sources that give an estimate of the numbers of scribes. I arbitrarily assigned sixteen to the legion: one for each of the ten cohorts, one for the ala, one for the fabri, one to keep the supply […]
-

March: the legion components
The next several sections describe the men, animals and equipment that were associated with the legion; that is, the numbers of these units were more or less related to the number of legions in an army. Units more directly associated with the army as a whole (headquarters staff and auxiliary cavalry, for example) are described […]
-
The March - basics
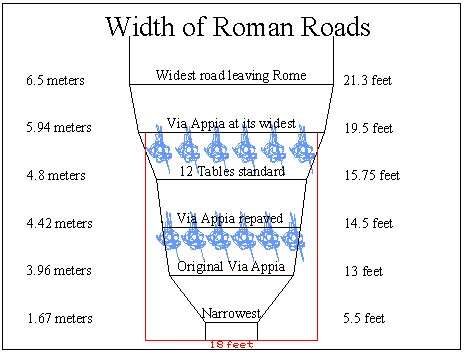
Roads The Roman roads were constructed for military purposes. It is obvious that, whenever possible, the army moved along the roads. Therefore the width of the paved roads determined the width of the Roman column. Most descriptions ignore this factor. Judson, for example, describes the army marching on a 40 foot front. There were […]
-

Equipment
Sections Standards Some of the types of standards used by the Roman army are shown in this illustration. The top part of the illustration shows the standards in profile, below each is an overhead view of the standard-bearer as he appears in the illustrations. From left to right the standards are: aquila, vexilla, three signa, […]
-

Supplemental material concerning the march
For modeling the Roman Army on the march I have used three main sources for the constituents of the army and the order of march:: Harry Pratt Judson, Caesar’s Army; Peter Connolly, Greece and Rome at War; and John Peddie, The Roman War Machine. Supplemental information about mules as pack animals, horse-drawn carts and ox-drawn wagons comes […]
-

The march
Developing a complete model of a representative Roman army on the march is more complicated than might be thought. Delbrück, who wrote over 500 pages on the Roman army, has just a single sentence about the march. He simply says that he does not know enough about how the army moved to speculate. However there […]
-

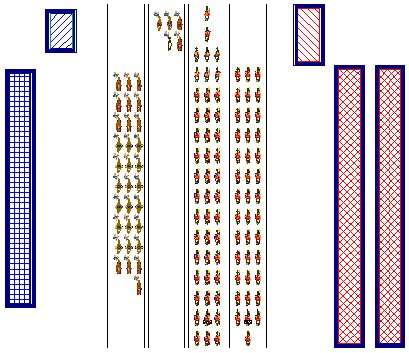
The Imperial army’s skirmish position
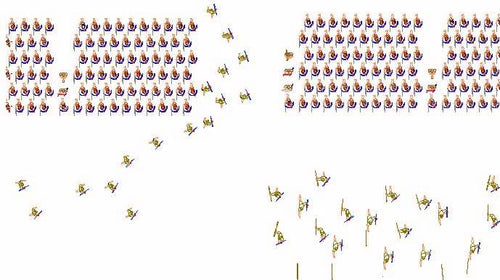
The following schematic shows two post-Marian armies of four legions each with thin lines of skirmishers deployed in front of each army. In the post-Marian legion the auxiliaries used were funditori and sagitarii who had a much greater range than velites and, consequently, the armies would have had to deploy further apart.The two lines of […]
-
The Republican army’s skirmish position
The following schematic shows two pre-Marian armies of four legions each with thin lines of skirmishers deployed in front of each army. In the early pre-Marian legion the auxiliaries used were velites who were armed with short spears or darts. The range for a hand thrown missile weapon could not have been great.The skirmishers are […]
-

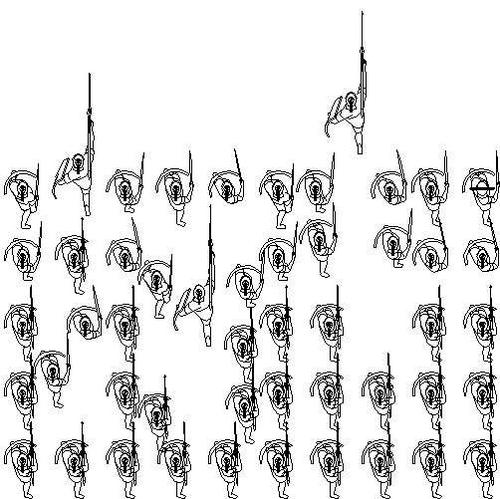
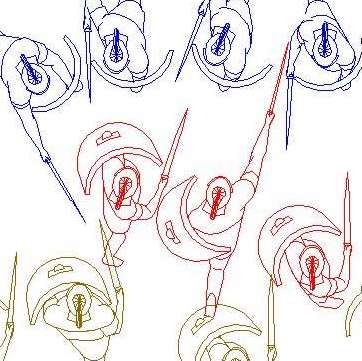
The skirmishers
Veles, funditor and sagittarius Three types of skirmishers are shown in this drawing. The first three figures are velites used in the early republic. They were skirmishers who threw light javelins and were protected by a shield. They wore animal skin headdresses. The center three are funditori, slingers, and the three on the right are […]
-
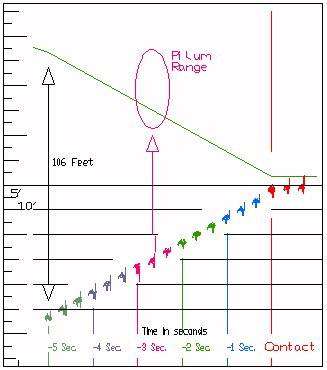
Model of the charge
Model of the charge of an individual in the first rank This drawing requires some explanation. It is a time and distance graph of the charge of a single soldier. The horizontal (X) axis is time, divided into seconds before contact with the enemy. The vertical (Y) axis is distance marked off in 5 and […]
-
Elements of the charge
The model of what the charge of the legion may have looked like is based on three fundamental building blocks. They are: how fast did the soldiers march and run, how far and at what distance could the pila have been thrown, and how far apart did the ranks and files need to be during […]
-
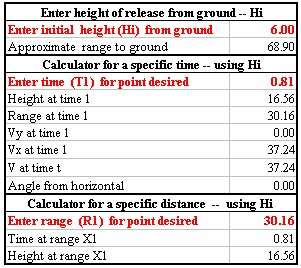
Trajectory calculator
The fundamental formulas for the parabolic path of a missile can be entered into an Excel spreadsheet to product a Trajectory Calculator. The actual spreadsheet cannot be placed in an HTML page but an image of it can. The illustration on the left shows the initial part of my calculator. The items in red are […]
-

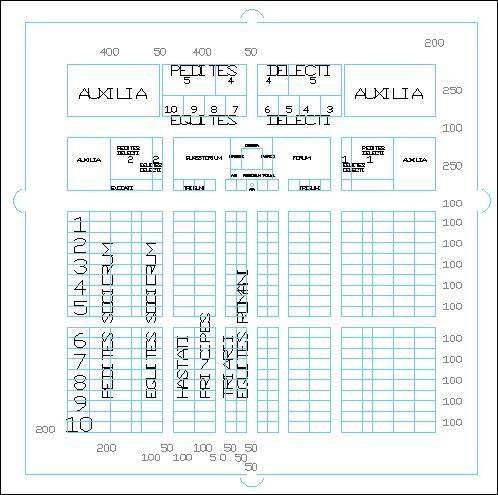
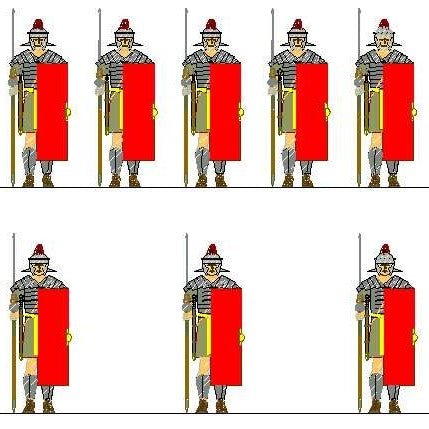
Description of the century and maniple
The configuration for the century most frequently given is an arrangement of 10 files and 6 ranks with the files on 0.9m (3’) intervals and the ranks on either 0.9m (3’) or 1. (4’) intervals. Delbrück suggests that each rank was offset to cover the gaps between men and to provide more room for maneuver. […]
-

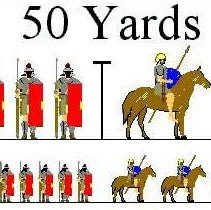
The spacing of individual soldiers
There is an ongoing question of the spacing required by legionaries. Vegetius says that each soldier required 1.83m (6’) of space. Most texts describe the legionary formation with spacing between the files of 0.9m (3’) and between the ranks of either 0.9m (3’) or 1.22 (4’). Some authors acquire additional space by spreading the close […]
-

Alternative to gaps: The articulated phalanx
Hans Delbrück presents a detailed analysis of the question of gaps in the line. He believes that the description in Livy should be regarded as a drill maneuver used in training but not a combat maneuver. He then argues for an “articulated phalanx.” As it evolves over time, the maniples and cohorts gain more autonomy […]
-

The Republican army’s skirmish position
The following schematic shows two pre-Marian armies of four legions each with thin lines of skirmishers deployed in front of each army. In the early pre-Marian legion the auxiliaries used were Velites who were armed with short spears or darts. The range for a hand thrown missile weapon could not have been great. The skirmishers […]
-

Alternatives to gaps: closing and re-opening them
Peter Connolly, in his book Greece and Rome at War, describes how the legion closed the gaps between units by having the rear centuries move into the gaps once the skirmishers had retreated. The second line exchanged places with the first by reversing the process, bringing the second line into the re-opened gaps, withdrawing the […]
-

Gaps in the formation
Following Livy and Polybius, many authors describe a legion formation with gaps between the maniples or cohorts equal to the width of the unit itself so the units of the second line could advance through the gaps while the first line retreated. Yet, such a formation seems implausible. Other authors argue that the legion could […]
-
Legion formations
The Earliest Army The earliest Roman army is usually described as composed of about 1,000 men per tribe drawn in 100 man levies. The soldiers were armed as Greek Hoplites and fought in a simple Phalanx. The drawing below shows the phalanx with 125 files and 8 ranks with 0.46m (18″) for the files and […]
-

Introduction
Purpose The Roman Legion represented a unique tactical formation that proved superior to all other ancient armies. Among the elements that contributed to is superiority was its unique configuration; that is, the physical arrangement of the soldiers and units and the way in which they moved in relationship to each other. Considering that the legion […]
-
GWS 2025: Wargaming as an escape
-

GWS 2025: Why we wargame - a closer look
-

GWS 2025: Why do we wargame?
-

GWS 2025: How did you learn of the 2025 survey?
-

GWS 2025: Ten-year lookback
-

GWS 2025: WINNERS!
-

GWS 2025: On the reliability of data
-

GWS 2024: Very large collections and the joy of painting
-

GWS 2024: Small figures and large collections
-

GWS 2024: Tinker, Tailor, Soldier, Poor Man
-

The Great Wargaming Survey 2025
-

GWS 2024: Wargaming Inspiration
-

GWS 2024: Looking to media for inspiration
-

GWS 2024: UK - Center of the Miniatures Wargaming Trade?
-

GWS 2024: Ancients as the missing link
-

GWS 2024: Games of a Feather...Group Together
-

GWS 2024: Period preferences
-
GWS 2024: Winners!
-

GWS 2024: Do miniature wargamers play boardgames?
-

GWS 2024: Where did everyone go?
-

GWS 2023: What do you like most?
-

The Great Wargaming Survey 2024!
-

GWS 2023: What do wargamers like least?
-
GWS 2020: Are wargamers competitive?
-

GWS 2023: Grouping wargame periods
-

GWS 2023: Tracking the spend
-

GWS 2023: Location, gaming, and the Magic Quadrant
-

GWS 2023: Does it matter where you live?
-

Great Wargaming Survey Winners
-

GWS 2023: Unpainted figures
-

GWS 2023: Buying quantities
-

GWS 2022: The best part of wargaming
-

GWS 2023: On reliability of data
-

The Great Wargaming Survey 2023
-

GWS 2022: Period preferences cluster analysis
-
GWS 2022: On the reliability of data
-

GWS 2022: Changing tide of interest
-

GWS 2022: Remote gaming, a flash in the pan?
-

GWS 2022: Location, location, location
-

GWS 2022: Favorite Gaming Periods
-

GWS 2022: A look at group size
-

GWS 2022: Bring out yer lead!
-

GWS 2022: Prizes!
-

GWS 2022: Where do you get your rules?
-

Down pens!
-

The Great Wargaming Survey 2022 begins
-
What do we like?
-

Historicals, Fantasy/Sci-Fi, or a mix?
-
GWS 2021: Inspiring media
The last time we dove into the Great Wargaming Survey results (see: What Inspires You?), the analysis focused on dissecting primary wargaming inspiration to see what sparks motivation. Today’s analysis examines a related survey question. That question asks about media sources of inspiration. As in the inspiration question looked at last time, today’s question allowed for up to […]
-

GWS 2021: Inspiration!
Wargamers take inspiration from a variety of sources. A spark for inspiration may originate from a quick conversation with a friend or a manufacturer’s advertisement. Perhaps a blog entry or a film triggers inspiration? Whatever the source, a kernel of inspiration can spawn a new project or breathe life into an old project. The 2021 […]
-

Matthew Paris
-

Sandwich: A day for medievalists
-
I am Saxon
-
Post-medieval Edinburgh
-
A year in review... and looking ahead
-

Lighting Sacred Spaces
-

New books on medieval rulers
-
Author Spotlight: Michael Stewart
-
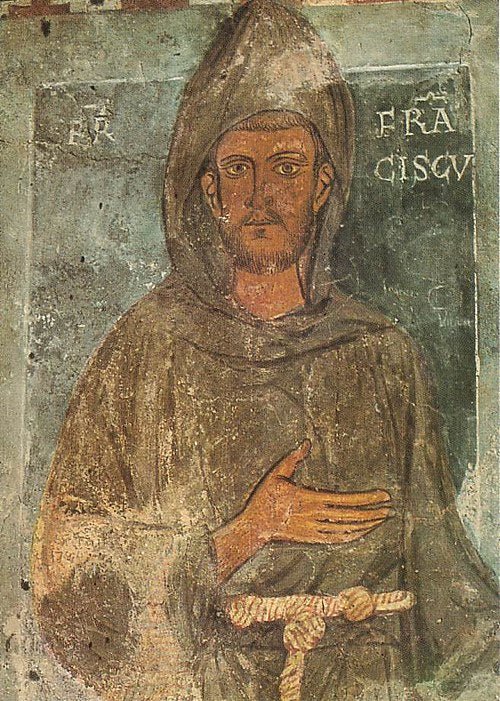
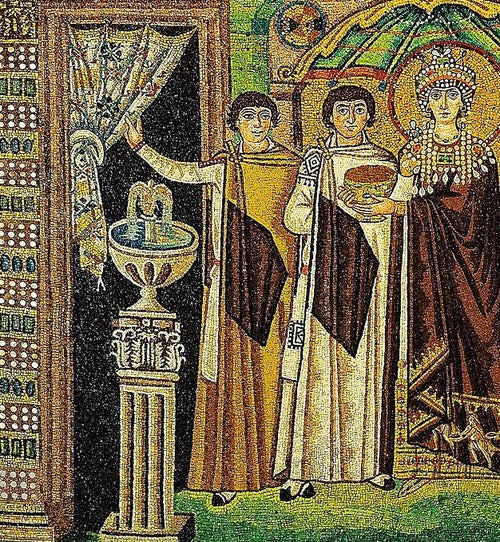
Exploring Francis
-
Medieval Albania
-
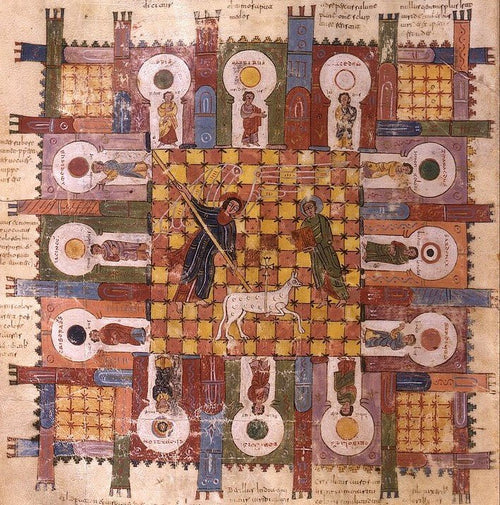
The Morgan Beatus
-

Author Spotlight: Katalin Prajda
-
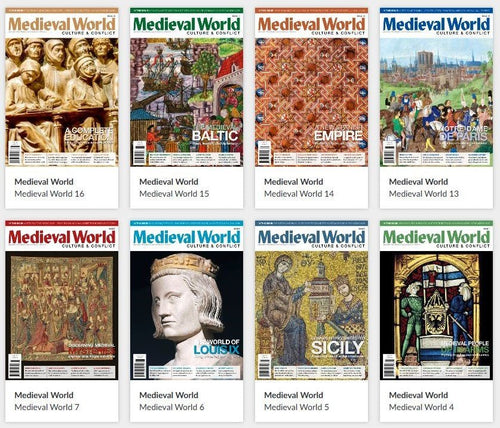
Medieval World Online
-
Virtual exhibitions
-
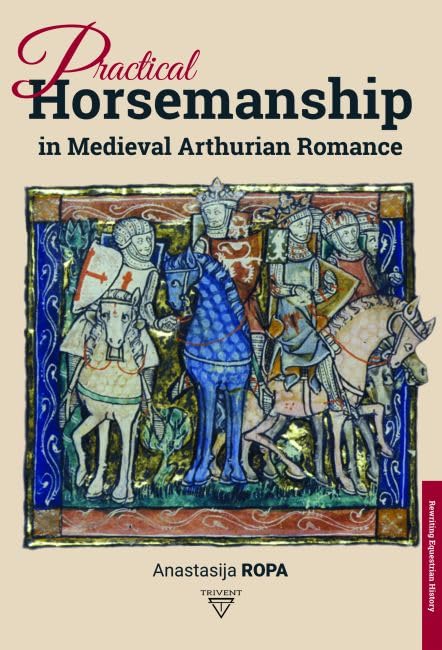
Author Spotlight: Anastasija Ropa
-
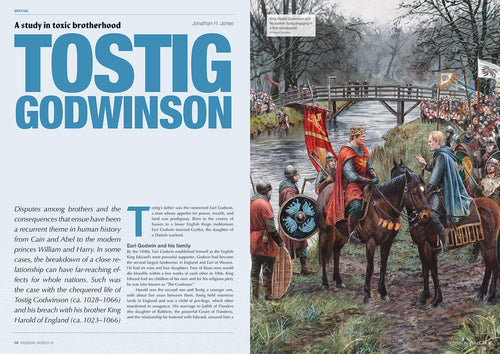
Tostig and his consequences
-
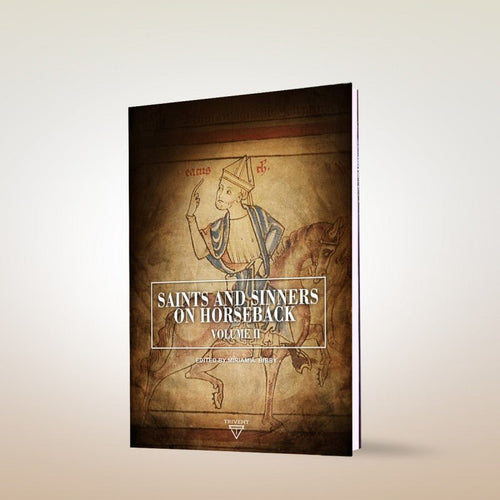
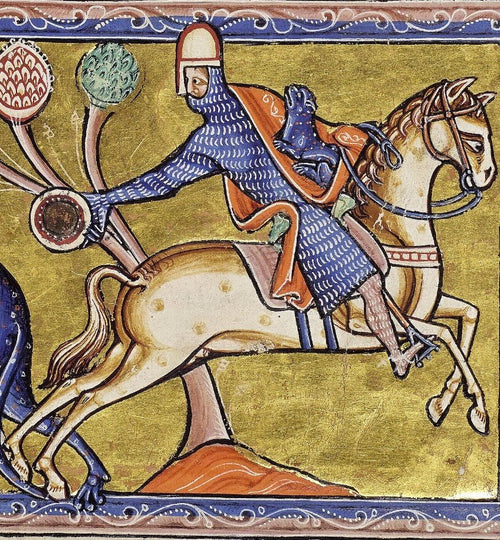
Author Spotlight: Miriam A. Bibby
-

The Green Ages
-

Author Spotlight: Joseph Luzzi
-
Medieval horse types
-

Author Spotlight: Jürg Gassmann
-
Medieval madrasa
-

The art of fencing
-

Author Spotlight: Christopher Fletcher
-
A notable historian of the Middle Ages
-
Author Spotlight: Michael S. Curl
-
Medieval Book Coffers
-
Book reviews
-

Author Spotlight: Murray Dahm
-

Two exciting exhibitions at the Musée de Cluny
-

A year in review... and looking to 2025
-

Victor Hugo's Notre-Dame de Paris
-

Viking York
-

Baltic Brothers in Arms
-

Land of amber
-

Author Spotlight: Susan Abernethy
-
Key Books about Medieval Spain
-

Author Spotlight: Mark Lewis
-

1492 and its consequences
-

Author Spotlight: Michael Kister and the Myth of Venice
-
Medieval Myths and Legends
-

Author Spotlight: Tim Miller
-

Medieval Feast of the Suckling Pig
-

Author Spotlight: Krisztina Ilko
-
The Ambras Fools Plate
-

Author Spotlight: Conor Robison
-
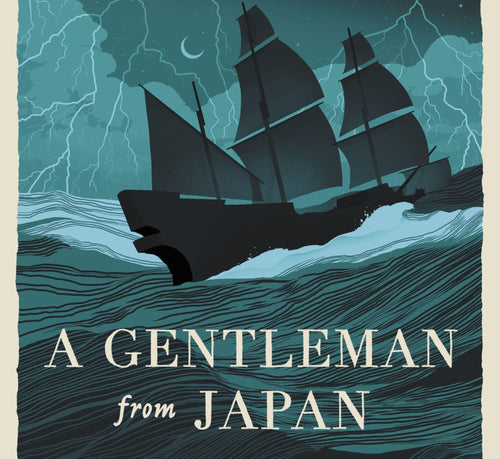
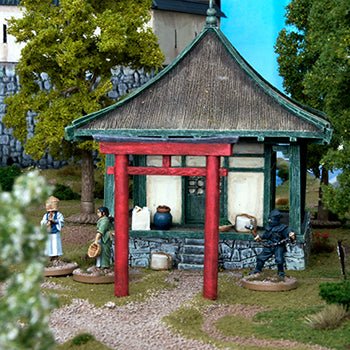
A Gentleman from Japan
-

Author Spotlight: Petr Uličný
-
The Monastery of Saint Elijah
-
Author Spotlight: James G. Clark
-

WSS Podcast 109: Epic insights
-

Customising MDF
-

WSS Podcast 108: Beachhead
-
Taking better photos part 2 - lighting
-

Field repairs - dusting off an old army
-

WSS podcast 107 - A few of our favourite things
-
Merry Christmas! Advent Calender finale 2025.
-
Community painting for Advent 2025
-

WSS podcast 106 - Atlantic fishing
-
Visiting Ravenscar
-

Go Command, for Advent!
-
Konflikt ‘47 at Devildog
-

WSS podcast 105 - 3D
-

WSS Podcast 104 - Is This Real, Or Just Fantasy?
-
Into the Rift: My First Steps into Konflikt ‘47
-
Taking better photos part 1 - easy mistakes
-
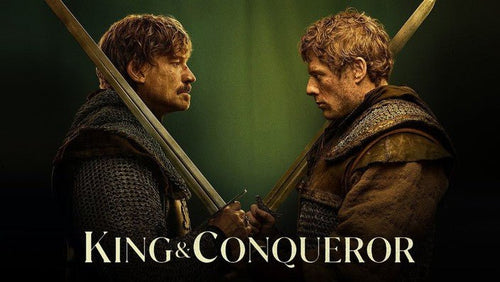
King and Conqueror - a review
-
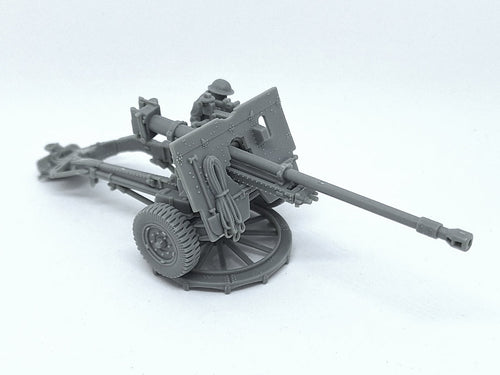
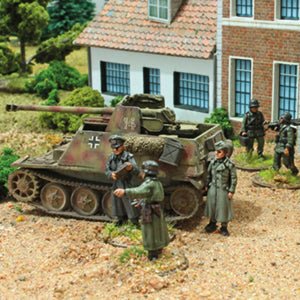
Rubicon Models' Ordnance QF25/QF17-pdr Gun
-

WSS Podcast 102 - The Great Wargaming Survey, 2025
-

WSS Podcast 101 - From our own correspondents
-

Through the barricades part 2 - painting
-
Through the barricades
-

WSS Podcast 100 - Rules of Engagement
-
Horses for courses
-
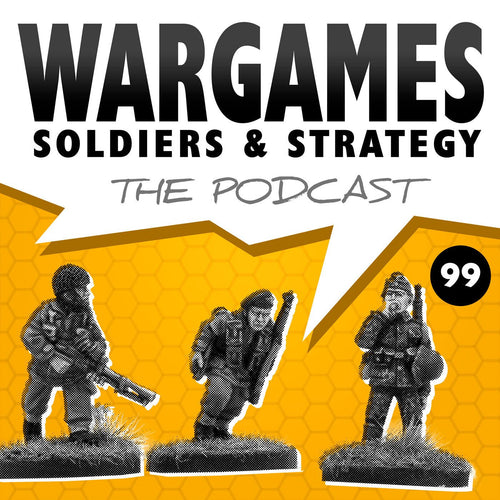
WSS Podcast 99 - Gaming Mechanisms
-

Painting a Wirbelwind
-

The promise of 28mm
-

WSS Podcast 98 – Salute ExCels
-
Planning a good campaign
-
Can they be saved? Rescuing minis.
-

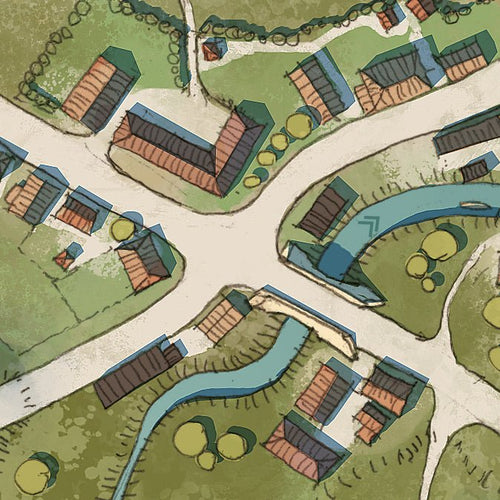
Painting a Medieval village
-

WSS Podcast 97 - Questions about hairdos and everything else
-
Making Medieval hybrids
-
Building Renaissance cavalry
-
Painting early WW2 Germans
-

Merry Christmas! Advent Calender finale 2024.
-
Building better AWI British
-

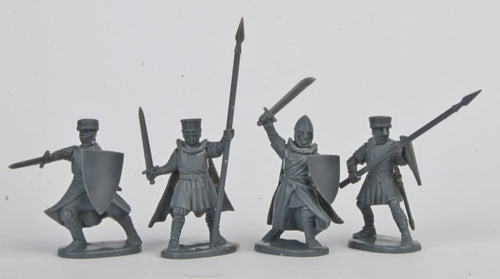
The Barons' War Grand Melee tournament
-
Our calendar Advent-ure!
-
Join our Advent Calendar!
-

Wargaming on Bluesky
-
Unboxing the V3 Bolt Action introduction set
-
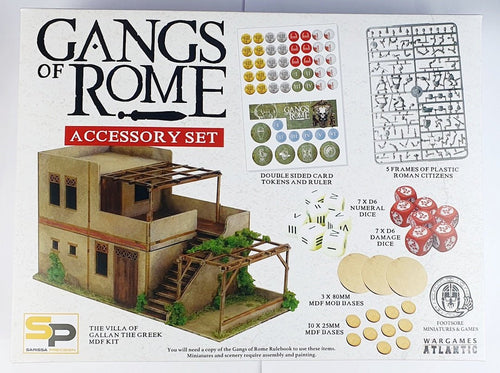
Unboxing the Gangs of Rome accessory pack
-

WSS Podcast 93 - Meeting 'strange men'
-

WSS Podcast 92 - On a budget
-
Dusting off some old miniatures
-
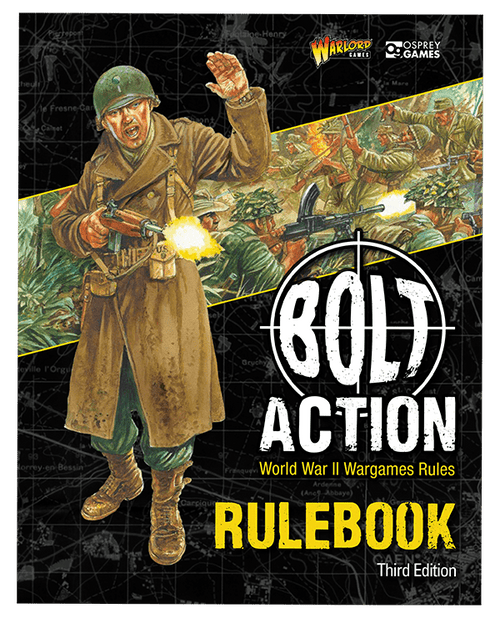
New Editions - Playing Bolt Action 3
-
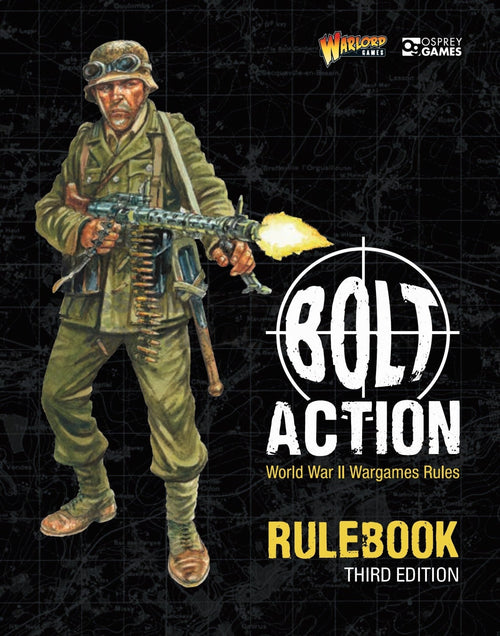
New Editions - Bolt Action 3
-
WSS Podcast 91 - New editions
-
Italian Armour released
-

Torpedoes and Tides - Rules for WW2 Coastal Forces Wargames
-

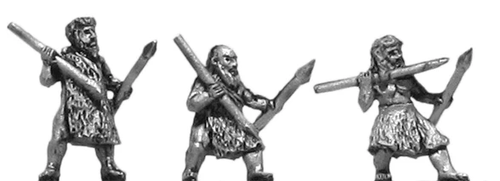
New 28mm Nubian Archers
-
BEF 1940 Armour STLs
-
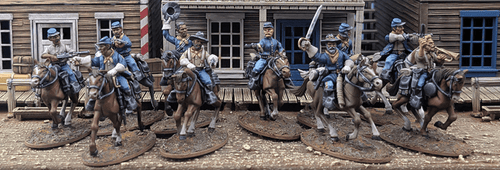
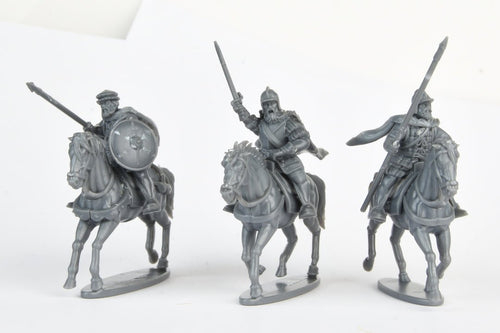
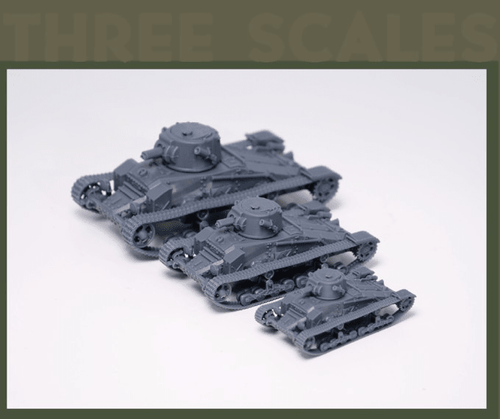
28mm plastic US Cavalry
-
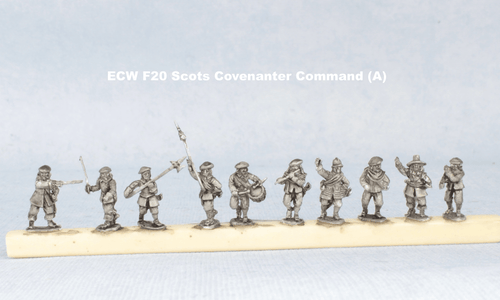
15mm Scots Covenanters
-
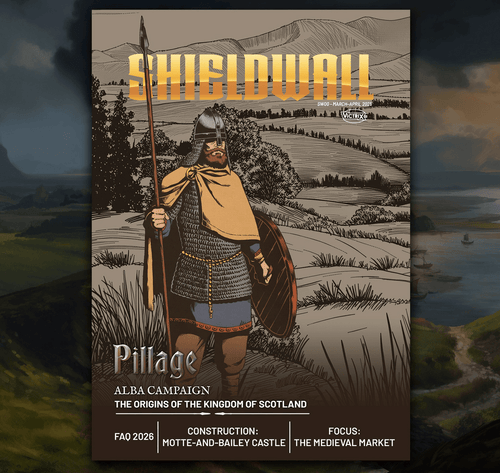
Shieldwall magazine for Pillage
-
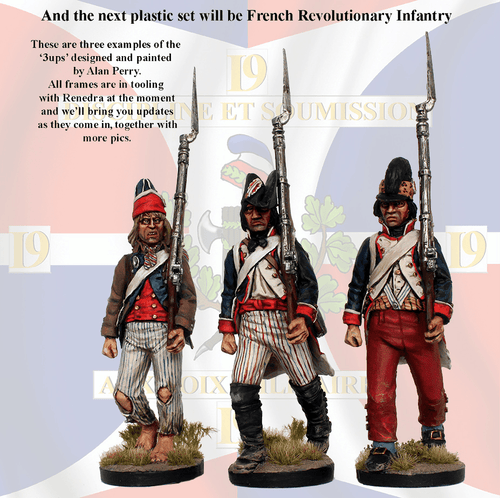
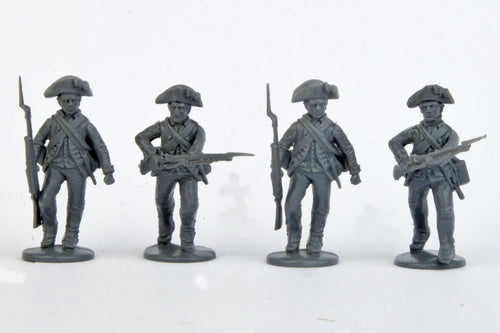
28mm plastic Revolutionary French
-
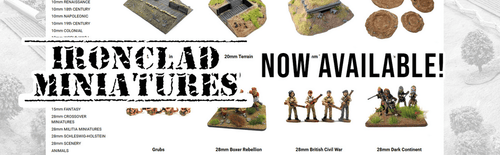
Ironclad Miniatures now available from Pendraken
-

More 8mm Travel Battle minis
-
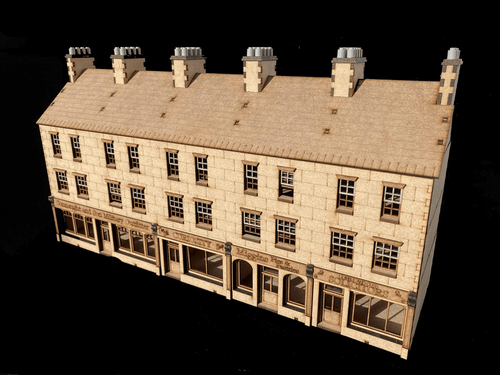
28mm Victorian terrace with shops
-
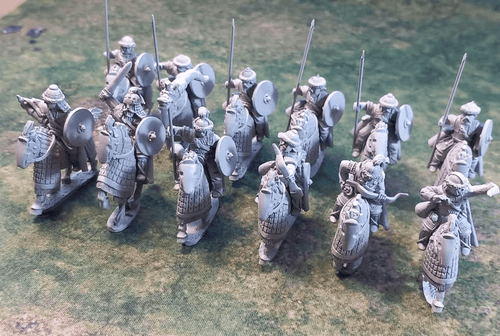
28mm Alan heavy cavalry
-
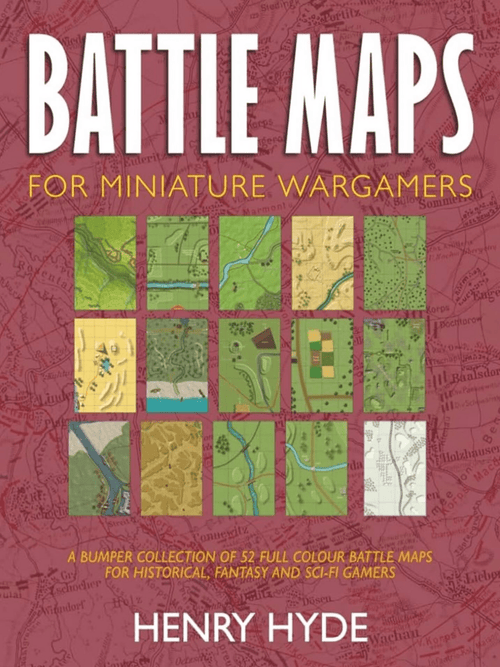
Battle maps for miniature wargamers
-

White Dragon Miniatures is closing
-
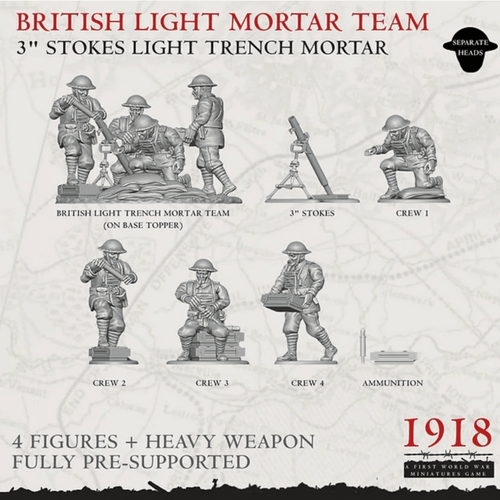
British and German support weapons arrive for 1918
-
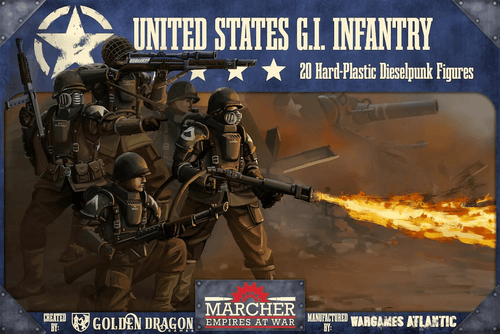
28mm plastic Dieselpunk US preview
-
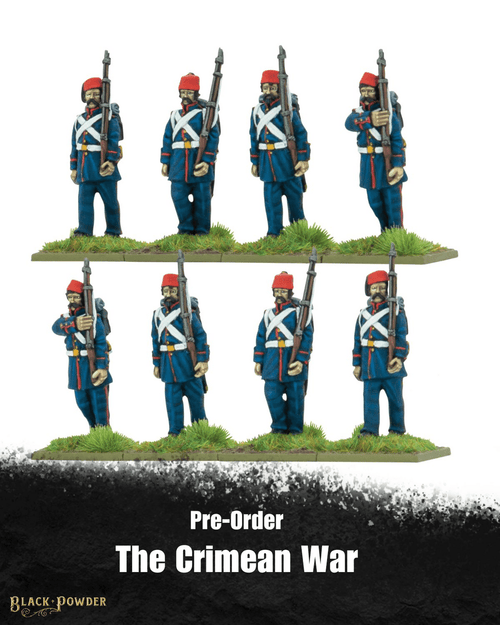
28mm Crimean War reinforcements
-
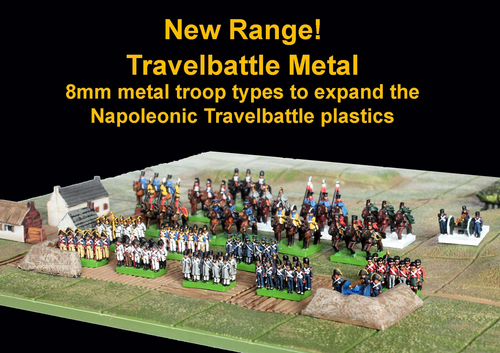
Metal 8mm Travel Battle range
-
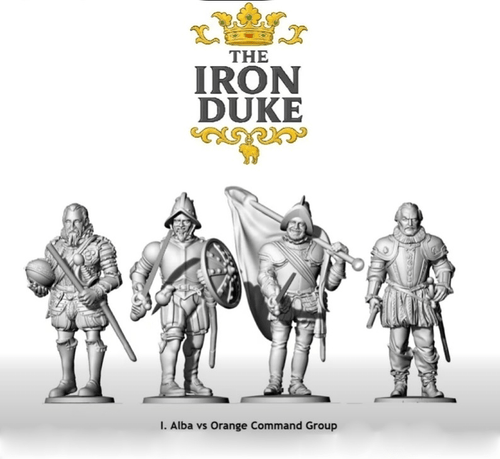
Spanish 'Iron Duke' preview.
-
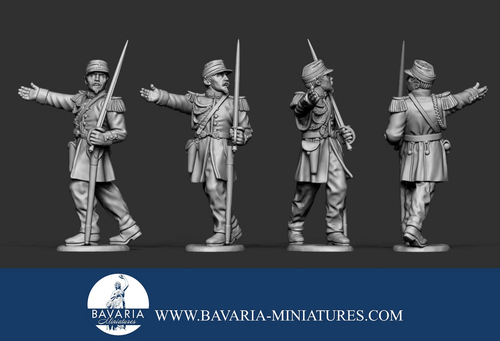
Bavaria Miniatures Imperial French announced
-

28mm Russian Civil War
-
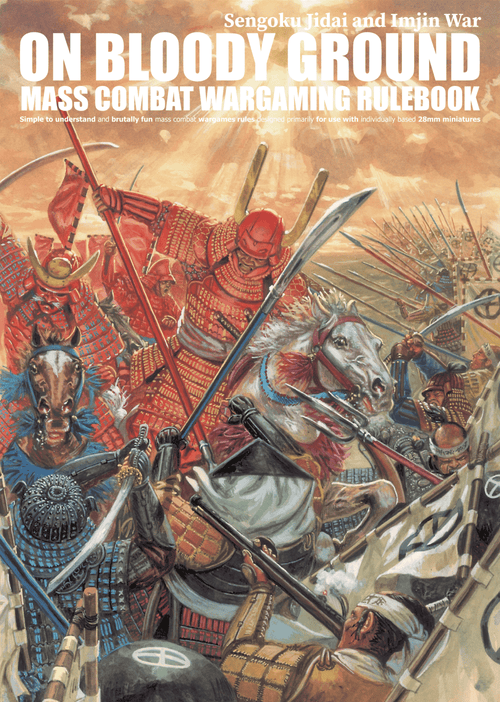
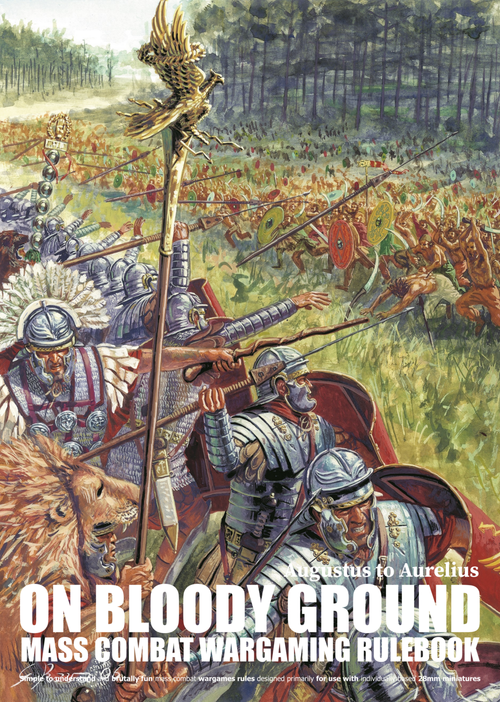
On Bloody Ground Sengoku Jidai
-
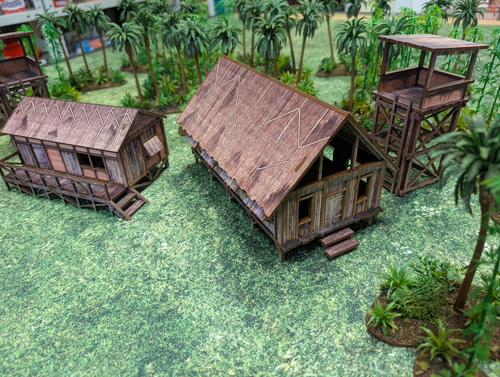
28mm colour MDF Jungle buildings
-

28mm Home Guard reinforcements
-

New War of Austrian Succession releases
-
28mm Piano Wargmes goes plastic
-
28mm Piano Wargmes goes plastic
-

28mm plastic Islamic horse archers
-
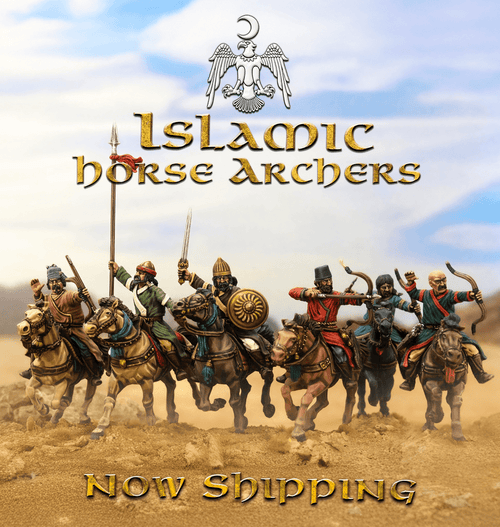
28mm plastic Islamic horse archers
-
20% ACW sale from 1st Corps
-
28mm ECW Scots Lancers
-
Osprey announce 2026 game releases
-
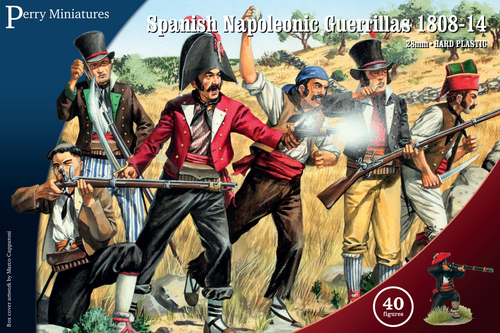
28mm plastic Spanish Guerrilla pre-order
-
Augustus & Aurelian
-

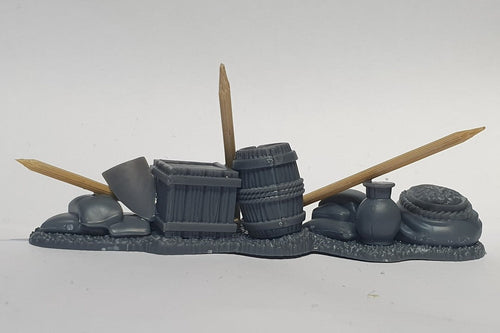
Law, Loans & Lies 28mm scenery set.
-
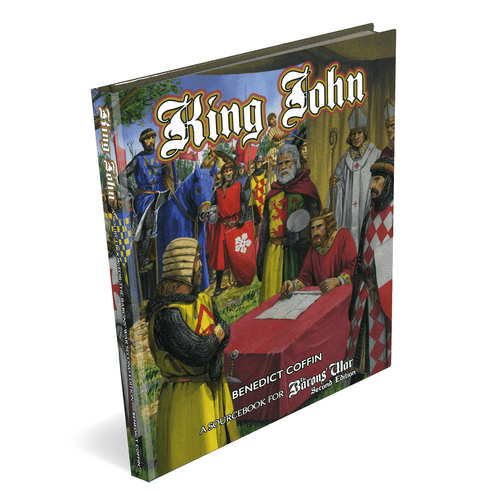
King John book for Barons' War announced
-
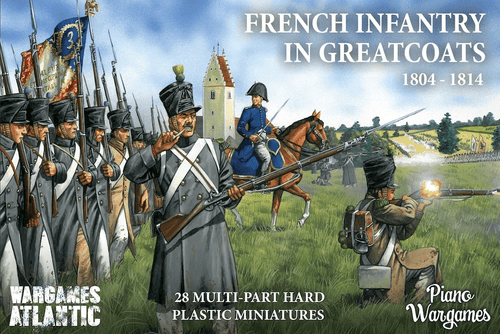
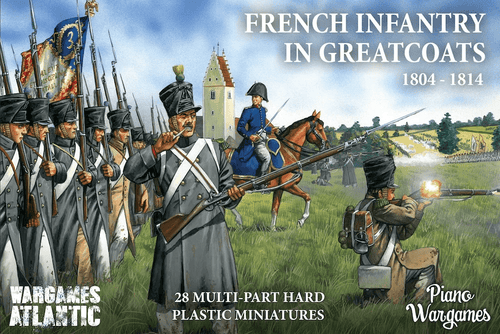
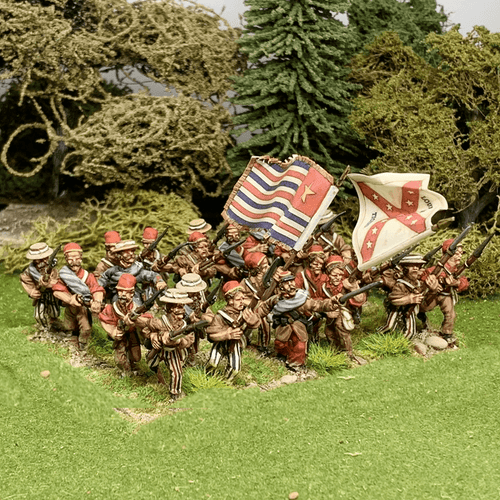
28mm Napoleonic Spanish Guerillas boxed set
-
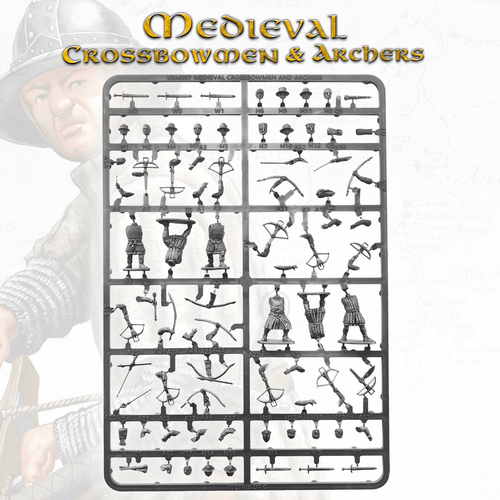
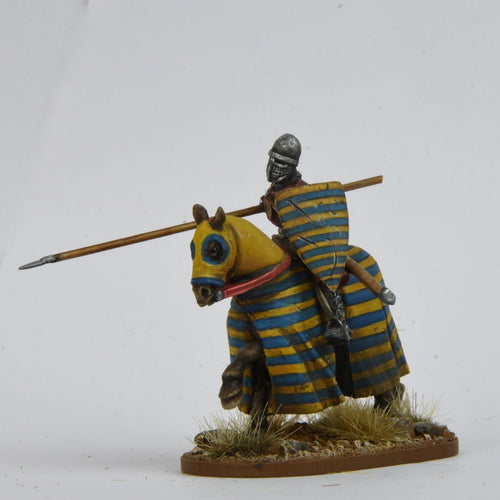
28mm Medieval bows and bowmen preview
-

New 3D-printable 28mm Pirate Kickstarter
-
15mm Sumerian & Zagros highlanders
-
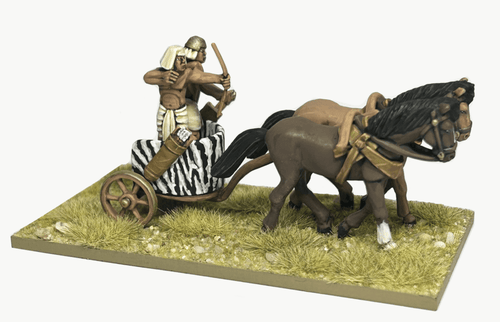
New Kingdom Egyptian Chariots
-

Azincourt 10mm English and French armies preorder
-

1898 Minituras Black Friday offer
-
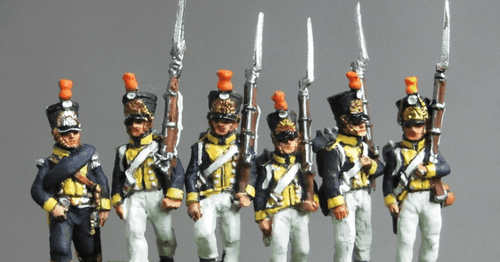
New 18mm Napoleonics from AB Miniatures
-

28mm hard plastic Agents
-
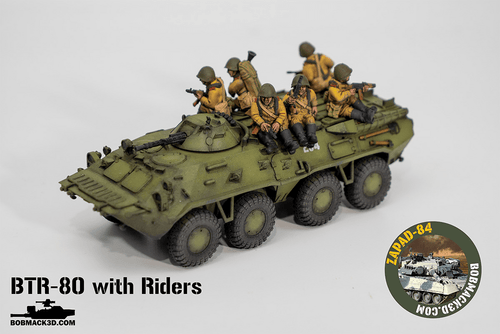
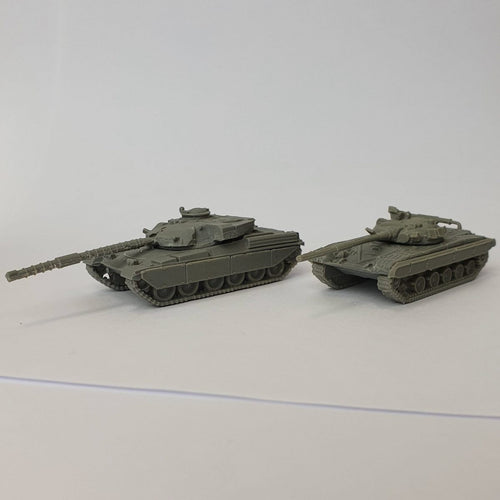
Zapad 84: Soviet tanks & AFVs of the Cold War
-
28mm hard plastic US Cavalry
-
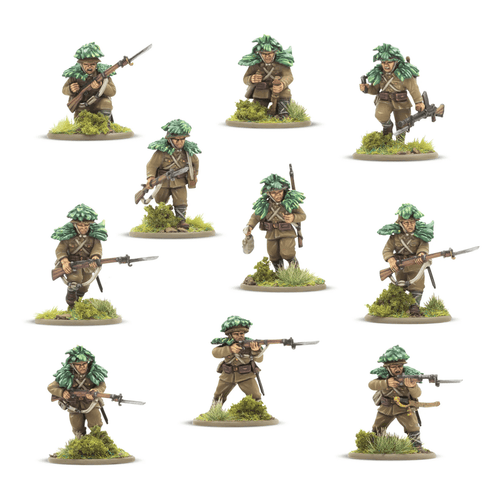
28mm plastic Imperial Japanese
-

28mm plastic Imperial Japanese
-
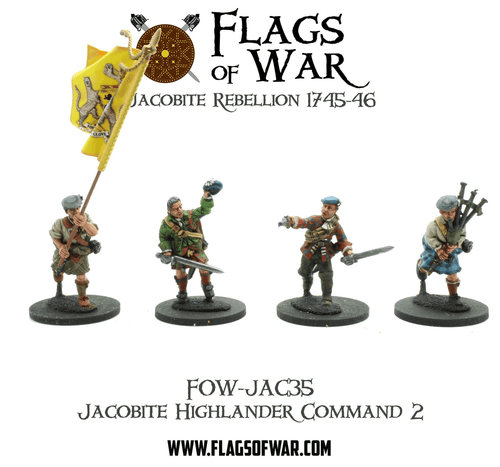
28mm Jacobite reinforcements
-
Issue 140: Benedict Arnold's greatest victory
-
Issue 139: The Thin Khaki Line
-
Issue 138: Seize Epirus
-

Issue 137: The Battle of Marignano
-
Issue 136 - Breakthrough to Kovel
-
Issue 135 - Once more into the desert
-
Issue 134 - The taxman cometh
-
Issue 133 - The Battle of Prestonpans
-

Issue 132 - The Battle of Griswoldville, 1864
-
Issue 131 - Breaking Bart, 1944
-

Issue 130 - The Battle of Theiningen, August 1796
-
Issue 130 - Painting Epic ECW cannons
-
Issue 129 - The Bitter Lakes
In 1796, an ambitious young French general by the name of Napoleon Bonaparte marched into northern Italy with a ragged army of Republican forces. In July, his troops invested the city of Mantua and the Austrian garrison within it. Over the next seven months, the Austrians launched four campaigns to lift the siege. Napoleon's fortunes waxed and waned, but in the end, the Austrian armies were defeated and Mantua taken. Austria sued for peace. This article allows you to replay the campaign with your own armies at whichever scale you prefer.
-
Issue 128 - The Mantua Campaign (1796-1797)
In 1796, an ambitious young French general by the name of Napoleon Bonaparte marched into northern Italy with a ragged army of Republican forces. In July, his troops invested the city of Mantua and the Austrian garrison within it. Over the next seven months, the Austrians launched four campaigns to lift the siege. Napoleon's fortunes waxed and waned, but in the end, the Austrian armies were defeated and Mantua taken. Austria sued for peace. This article allows you to replay the campaign with your own armies at whichever scale you prefer.
-
Issue 127 - Operation Biting
-
Issue 126 - Pico-scale Peleliu
-

Issue 125 - The Battle of Gerberoy
-
Issue 124 - Before the snow
-

Issue 123 - The Battle of Bovey Heath
-

Issue 122 - Baptism of fire for Kompanie Schmalz
-

Issue 121 - The Elegy of Geraint
-
Issue 120 - The defeat that saved an army
-
Issue 119 - The Consular Guard at Marengo
-

WSS 119 Irregular
-

Issue 118 - The Battle of Calatafimi
-

Issue 117 - The Battle of Pelusium
-
Issue 117 - A printable Persian shieldwall
-

Issue 116 - Massed light cavalry
-
Issue 115 - Things that make you go 'Mooh!'
-

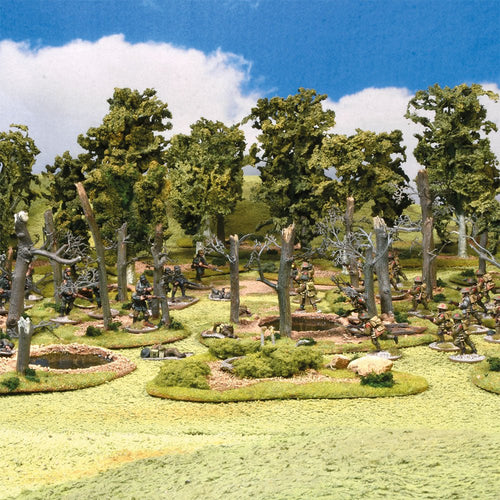
Issue 114 - If you go out in the woods today...
-

Issue 113 - The Battle of Bysjön, 22 December 1644
-

Issue 112 - The Siege of Toulouse (1218)
-

Issue 111 - the Battle of An Loc (1972)
-

Issue 110 - 1777 at sea
-
Issue 109 – Tabletop Tactics
-

Issue 109 - The Battle of Takur Ghar
-

Issue 108 - The Battle of Collecchio
-

Issue 107 - The Year of the Four Emperors
-

Issue 106 - The Battle of Anegawa (1570)
-
Issue 106 - Wrath of Heaven ruleset
-
Issue 105 - The second battle of El Bruch
-
Issue 104 - Task Force Chappuis
-

Issue 103 - Blood of the Alderney
-
Issue 102 - The Battle of Mantinea
-

Issue 101 - Vikings and Skraelings in Vinland
-

Issue 100 - Fallschirmjäger versus Maquisards at Vercors
-
Issue 99 - Saxons at Wagram
-
Issue 98 - Trenches and Treachery
-
Issue 97 - Panzermechs at dawn
-
Issue 96 - The raid on St. Albans
-

28mm plastic Boxer infantry
-
PSC 10mm Cold War miniatures
Plastic Soldier Company has released starter boxed sets for Battlegroup Northag. Currently, there are two, the Soviet and British army starter sets. Each set provides you with enough miniatures for a decent starter force to game with, although I can see gamers soon wanting to expand their forces even further. The sets have been reviewed […]
-

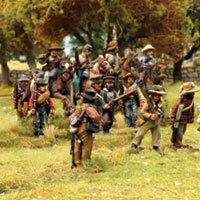
Review: Osprey’s Rebels and Patriots
Rebels and Patriots is the latest release from the Osprey Wargames series. It is the 23rd in the OWG series. Each book follows the standard and now familiar 64 page Osprey format. The Rebels and Patriots (R&P) rulebook covers battles in North America from the French Indian Wars to just after the American Civil War (the French […]
-
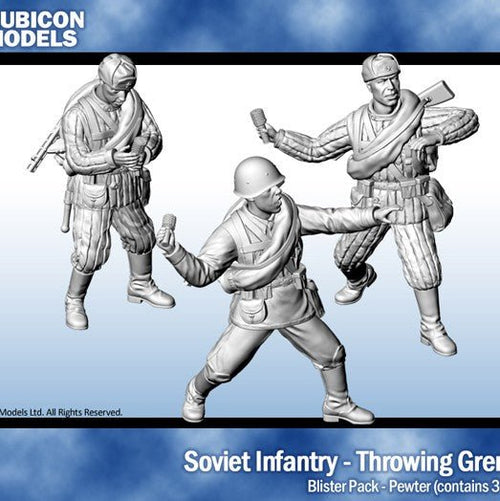
Rubicon Soviet Infantry
Rubicon Models have sent us samples of their new metal World War 2 Soviet Infantry. We had a request on Twitter to show pictures of the infantry. I hope the following will be informative. Are the actual models as good as the 3D images we’ve all seen? I think the answer is yes, they are. Up until […]
-
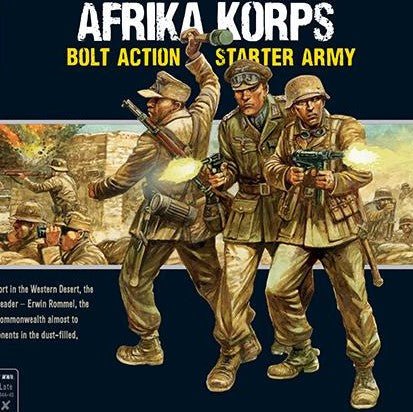
Warlord plastic Afrika Korps
Accompanying the recently reviewed 8th Army plastics, are the Afrika Korps from Warlord Games. They are available as a Starter Army (with plastic and metal support options) or a 30 figure boxed set.The boxed set contains five frames of plastic troops. Each frame has six torsos and an assortment of equipment. There are enough rifles for […]
-
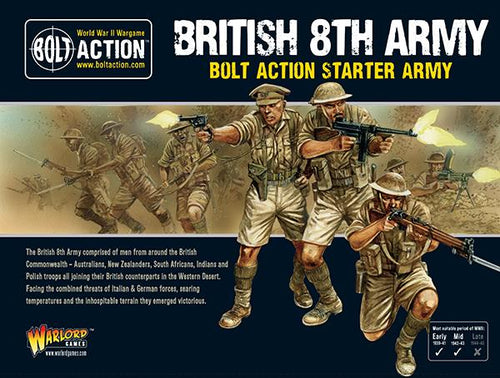
Warlord plastic 8th Army
The latest plastic set from Warlord Games is their 8th Army set, available as a Starter Army (with metal support options) or a 30 figure boxed set. The boxed set contains five frames of plastic troops. Each frame has six torsos and an assortment of weapons. There are enough rifles for each model. Also included […]
-

Unboxing ‘The Good, the Bad and the Mutie.’
Warlord Games have released The Good, the Bad and the Mutie the starter set for their new Strontium Dog game. There will be a full review of the game in the next issue. The Strontium Dog game is set in the 2000AD universe, where bounty hunters battle it out with outlaws and mutants in a Sci-Fi version of the Old […]
-
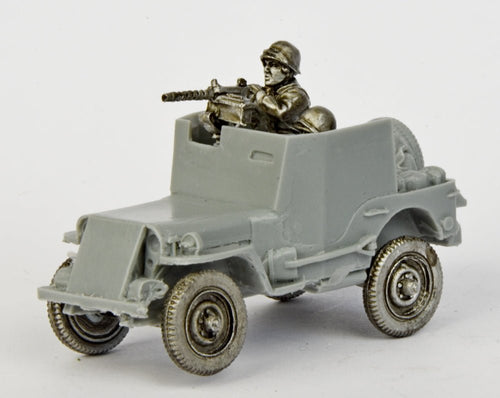
Warlord US Army Jeeps
Warlord Games have re-released their range of US army jeeps, which include a .30 Cal Jeep, the .50 Cal Jeep and the Armoured Jeep. The models are remastered with some modifications. The most notable thing is their size increase. The original range was spot on 1/56, the new ones are slightly larger (at roughly 1/52). The slightly […]
-

Rubicon Fences
Rubicon Models has brought out a set of fences for modellers and gamers. The set consists of four sprues, each containing four sections of fence (105mm or 4.13″ long) plus a gate (30mm or 1.18″ wide). The fence stands just over an inch or 28mm tall. In total that gives 168 cms (66″) of fencing, excluding […]
-
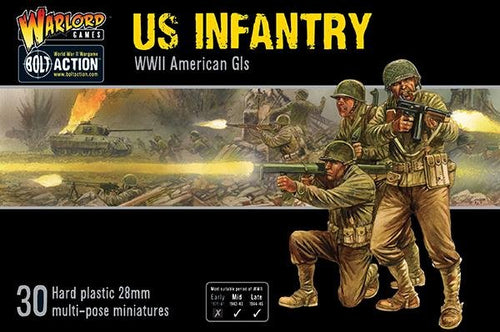
Plastic US Army Infantry
Warlord Games have re-released their US WWII American GIs in plastic. The set is a complete redesign of the original American Infantry set released in 2013. With each new set, Warlord has refined their design and process. The most obvious improvement is the weapons, which now come with arms attached, which makes assembly much easier. The weapons […]
-
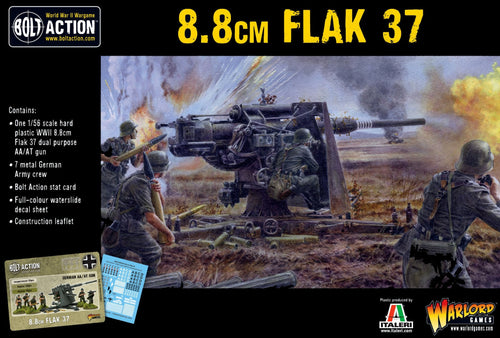
Plastic 8.8cm Flak 37
Warlord Games (with Italeri) has released an 8.8cm Flak 37 AA gun in 1/56, the classic early war dual purpose gun which saw service until 1945. The kit comes as two plastic sprues with a metal gun crew. The crew are one piece castings (no separate heads). Transfers are included (for kill rings) and a Bolt Action […]
-

Unboxing Blood on the Aventine.
Blood on the Aventine is the new scenario starter set for Gangs of Rome. It gives you everything you need to start playing, including miniatures, rules, dice, markers and even MDF scenery. The set contains six gangers with their cards, jigsaw bases, coins and dice, plus one ‘Incola’ character and card (a special NPC character – […]


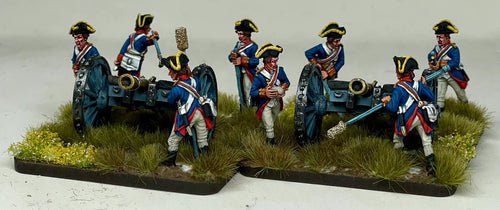
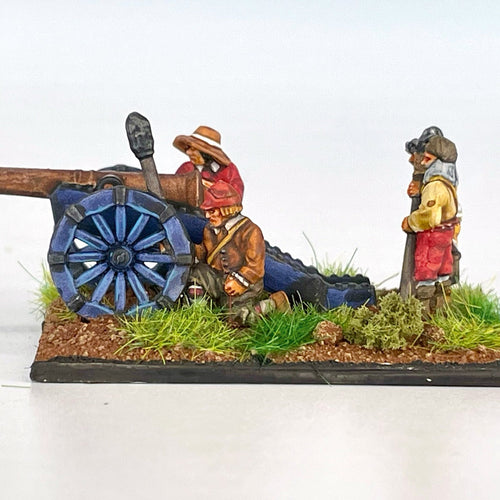
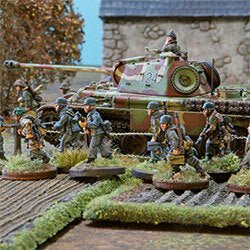
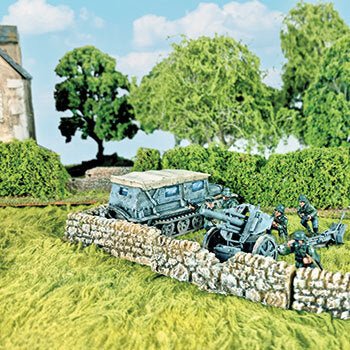
4 comments
Hello, Jeff,
Absolutely the best idea is to use a custom base: I completely, thoroughly, unreservedly endorse this approach – it makes by far the most sense!
…But as for myself, I just happen to like having guns on 60mm, round bases, so that is what I will continue to do!
Instead of taking a section out of the trails so they fit on the base, wouldn’t be easier to use a custom base? That is to say, a base that is sized for the gun including a forward portion to help protect the barrel.
Ha! – that’s a novel idea! And thanks.
I’m sure doing so is as feasible as it is clever, and I suspect many casual observers wouldn’t notice either… although it’d probably be better just to use a longer – or maybe ovoid – base!
As it happens, what you see in the pictures isn’t quite the base as finished, because the wheels will actually be moved forward a couple of millimetres into grooves I’ll cut into the rim. This will make the trail-spades at the back look less prominent over all.
Incidentally, a minor bugbear of mine is when trail spades are modeled sitting proud of earth into which the would otherwise dig, so if I were to put this on a longer or ovoid base, I’d also trim the bottom off the spades as if it were digging into the tough desert ground.
Good review, do you think anyone would notice if you just took a section out of the trails so they fit on the base? Having them hang over like that would drive me bonkers, I’d have to use a larger base.