1940 Campaign French - Part 4: Vehicular Shenanigans
Hello again, Readers.
I have been very busy over the holiday period painting my 28mm early-war French, all of which will go toward my contribution to the XII Annual Analogue Hobbies Painting Challenge. This in itself has proven a bit of a frustration, as I can't post about my completed work on here until I've done so on the Challenge blog (rightly so!), but I don't have access to my photography set-up at the moment, and without that I can't yet take pretty pics. What I DID realise, though, is that I could talk about some of my processes without showing the finished articles.
So before I explore the painting of my hordes of French infantry, let's take a brief look at some weird early-war French vehicle camouflage.
Rationale:
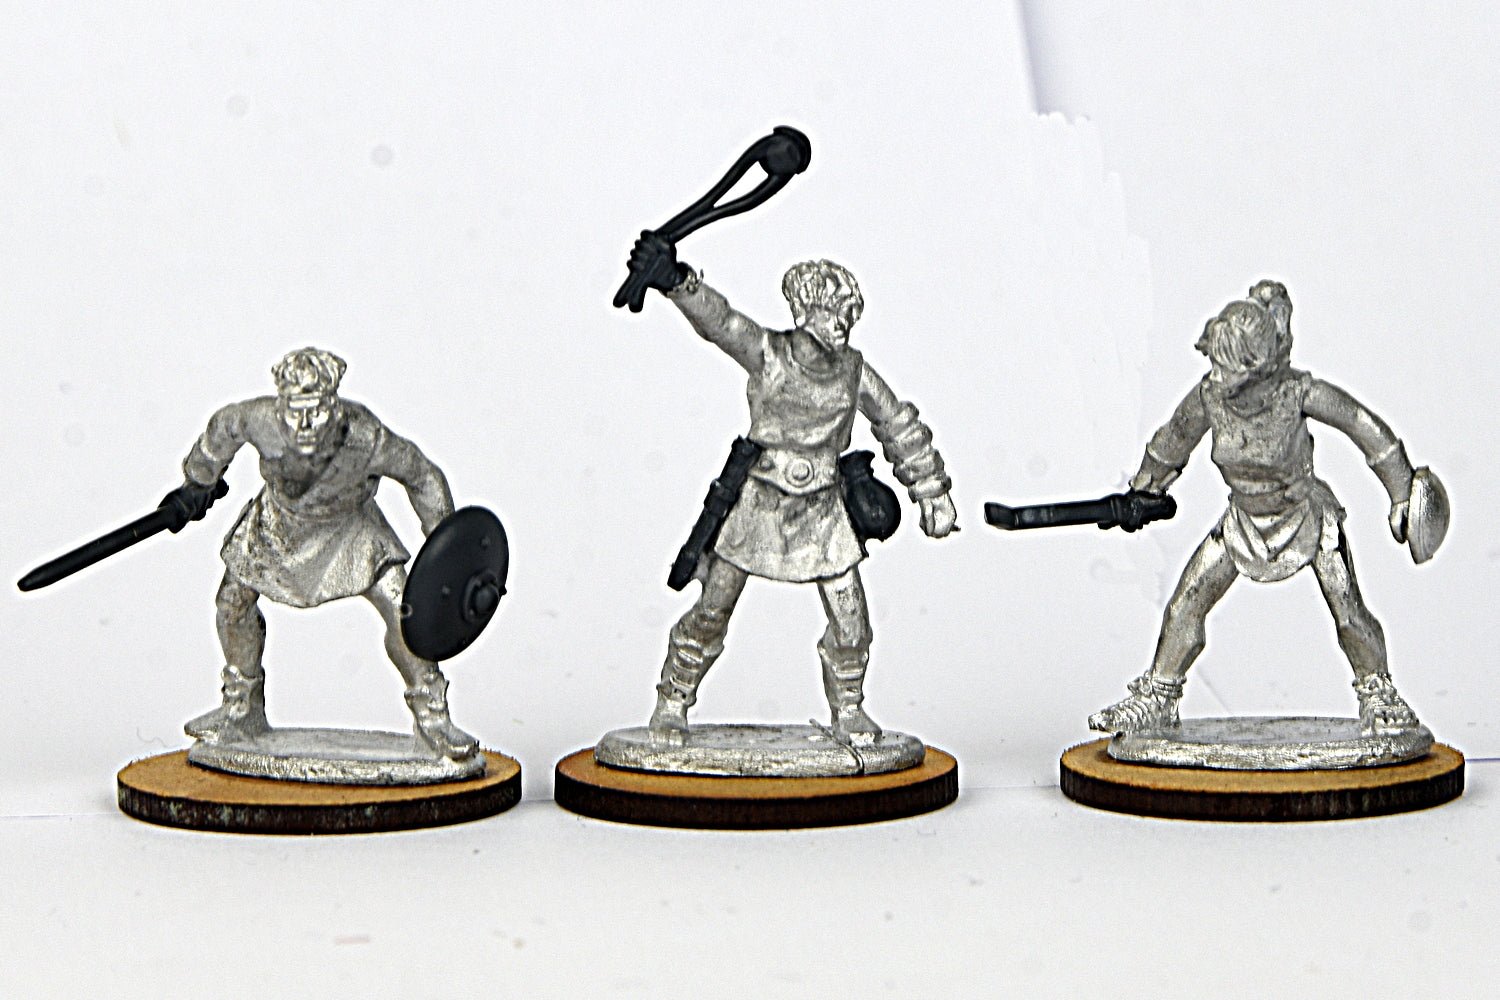
I really enjoy the aesthetic of the late-WWI-style camouflage that the French were still using in the late 30s (as seen here on my artillery support), so I've been very excited by the prospect of painting a few vehicles something other than the monotonous olive of my existing Allied toys. I am by habit a lazy painter, and by physiology not very good with colour, so this was a chance to push myself too (It is a "Painting Challenge", right?). To this end, I knew I would be trying some of the slightly more outlandish patterns, so with a bit of time unexpectedly on my hands, I dived in. This post will just show work-in-progress pics, but I hope you'll get the idea. All of these camouflage schemes have their origins in reference pics found online and from various Osprey books, although there is an element of adaptation oand interpretation, not least as I don't have an airbrush.
First up was the 3D-printed R40 tank I was gifted (below; right), and I knew I wanted to do something disruptive on it, in part to conceal some of the slightly rougher details of the print. To this end, I opted for contrasting the green base colour with a red-brown. Following a reference pic quite closely, the pattern is not outlined, but I rather enjoy the surprising subtlety:
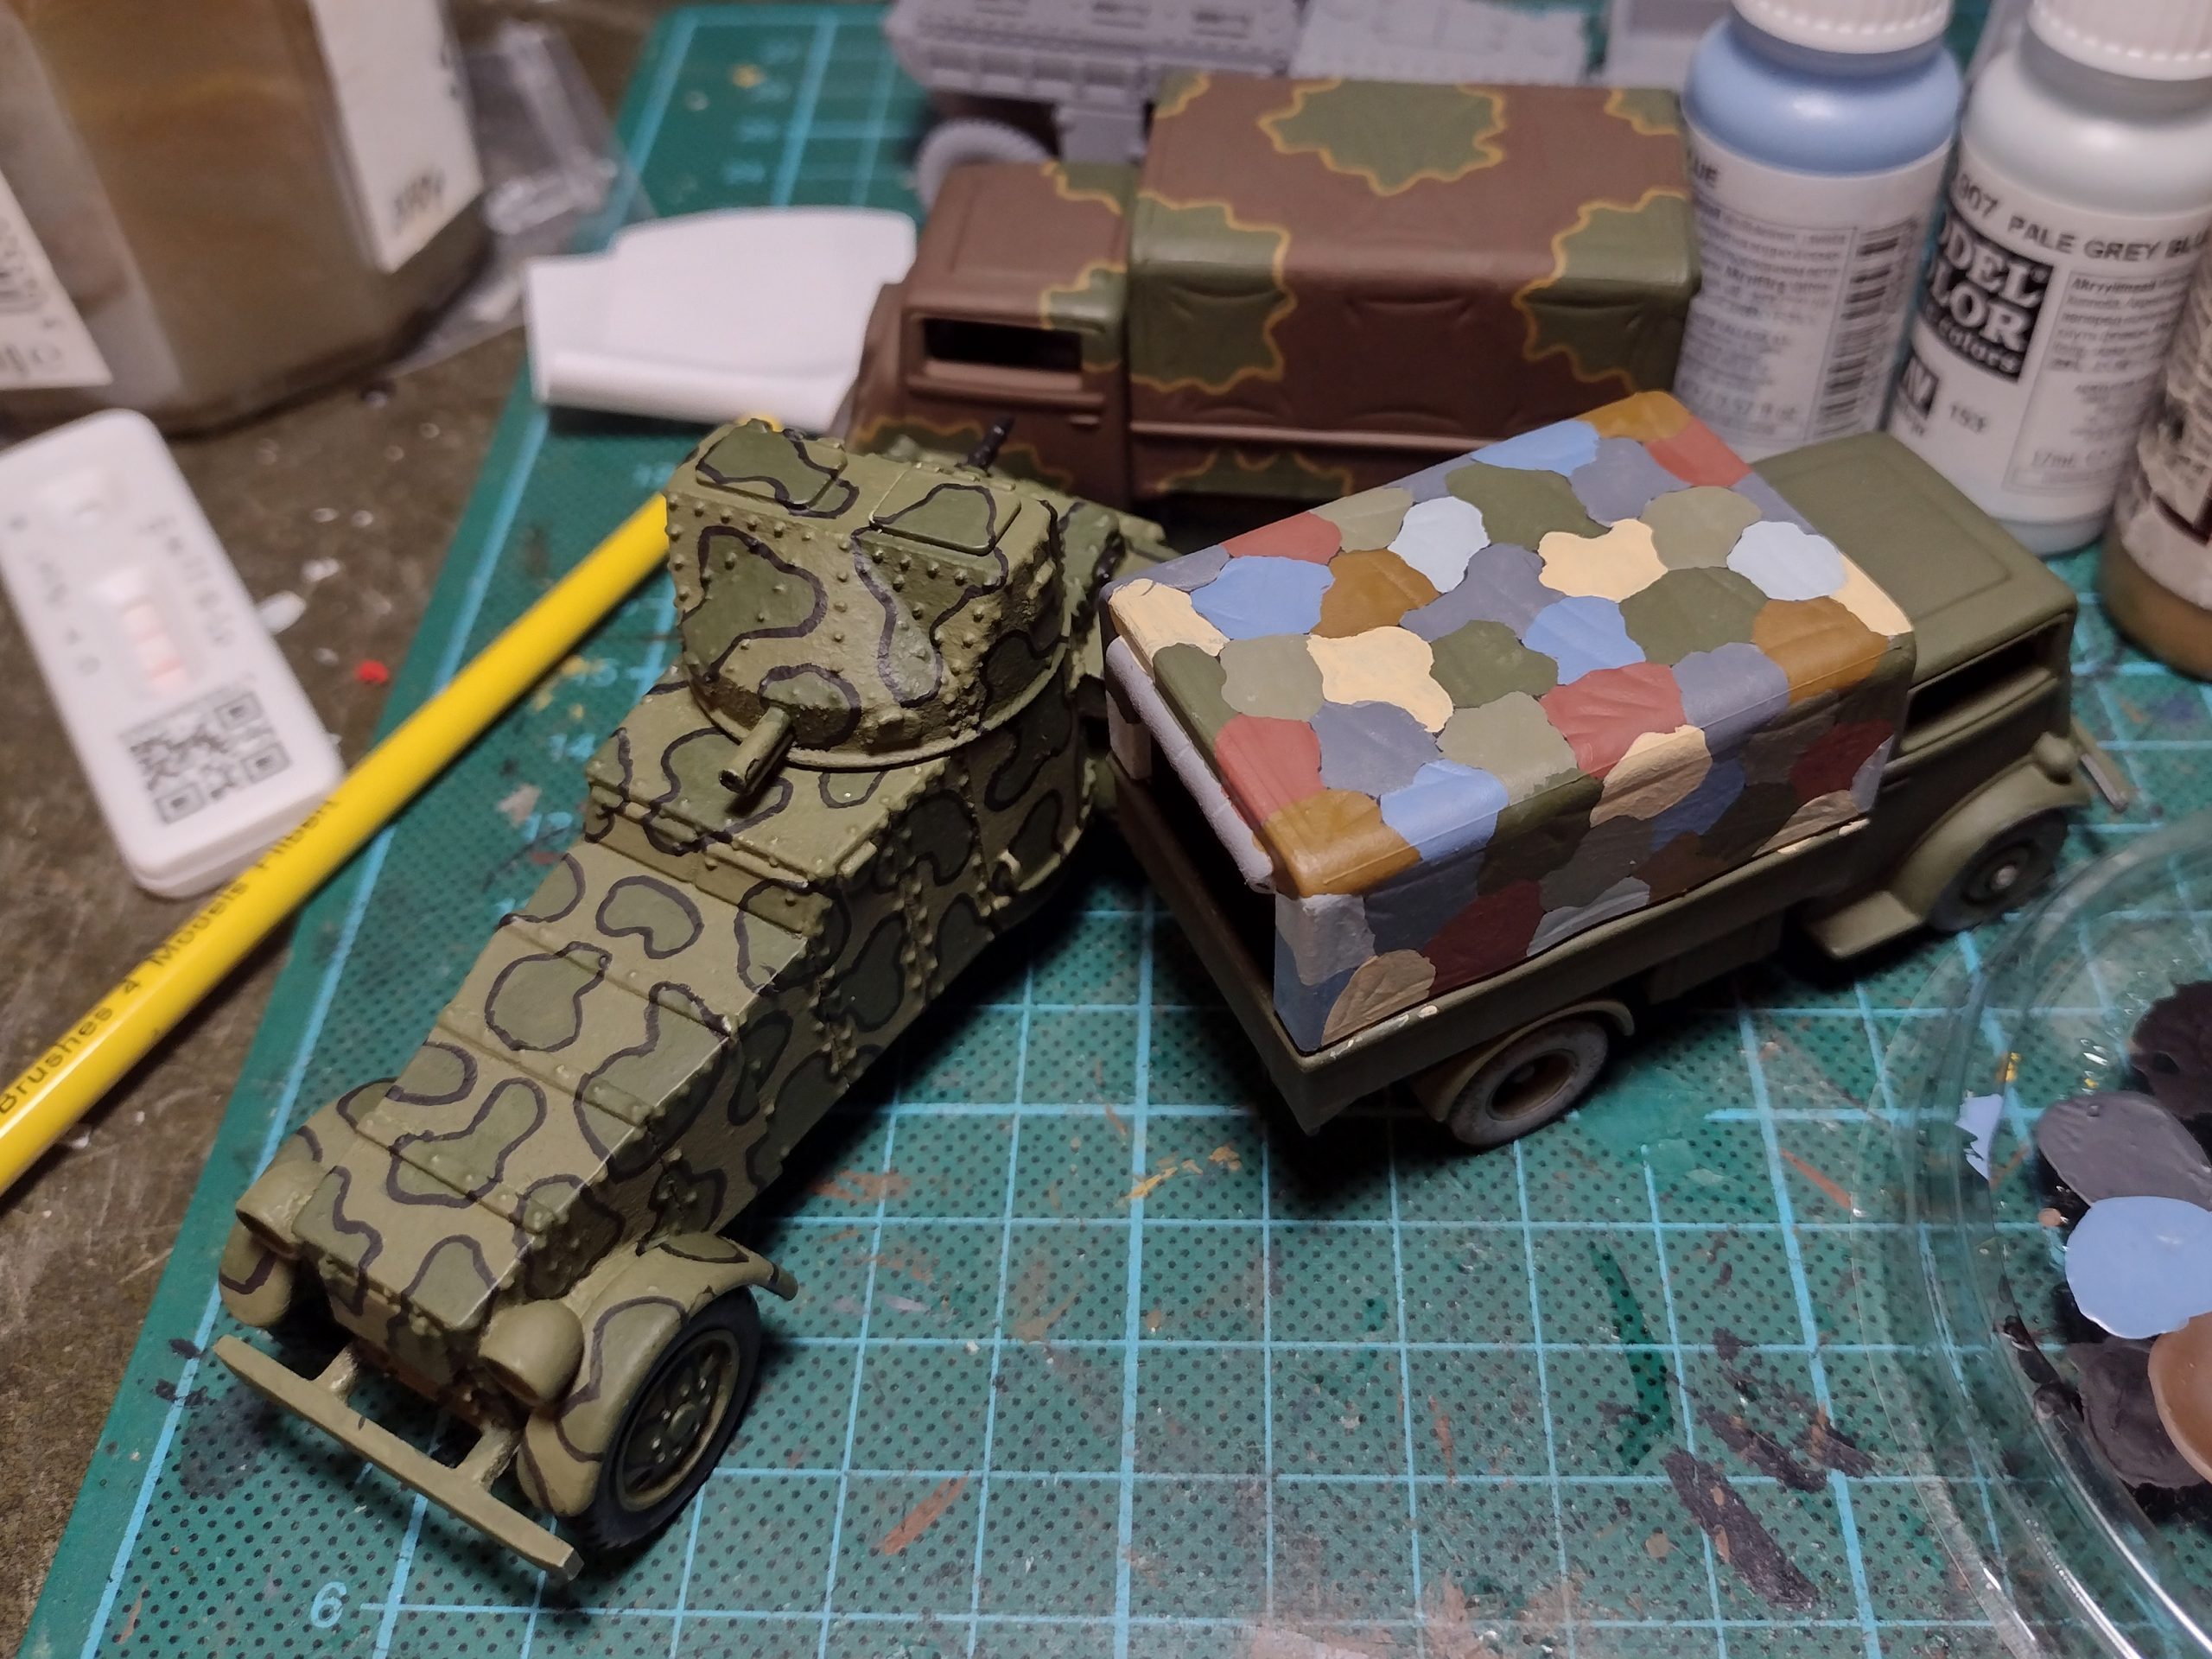
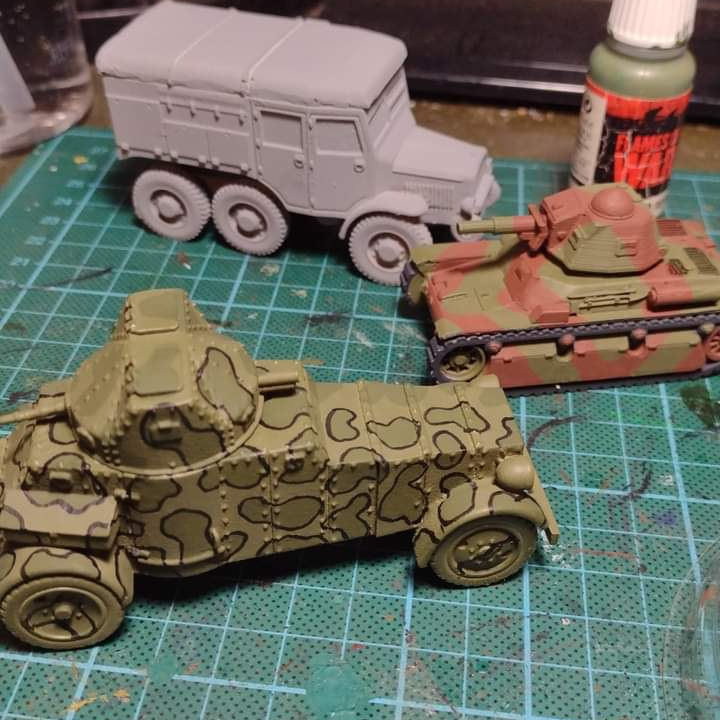 Alongside the R40 (foreground; left) is the huge and ungainly mass of the Laffly 50am - in this case from Mad Bob Miniatures, as is the Laffly S35T gun tractor behind them - and you can see that this clunky old armoured car is in the process of having an outlined frogskin kind of pattern applied. Again, this is an interpretation of a reference pic (in this case, I have hardened outlines that ought really to have been airbrushed), but I quite like it.
At this point, I remembered that I had some transport trucks I could use for practice. Whilst these were often painted a simple green, records and images I found suggest quite a variety existed still, so I thought I could combine getting some practice for the more 'important' vehicles with having a little fun in pursuit of my hobby and try out some more weird schemes. For this, I used three Fordson trucks (die-cast; purchaed cheaply from an online auction) which have been, like a great many French trucks diring this period, requisitioned from their civilian uses:
Alongside the R40 (foreground; left) is the huge and ungainly mass of the Laffly 50am - in this case from Mad Bob Miniatures, as is the Laffly S35T gun tractor behind them - and you can see that this clunky old armoured car is in the process of having an outlined frogskin kind of pattern applied. Again, this is an interpretation of a reference pic (in this case, I have hardened outlines that ought really to have been airbrushed), but I quite like it.
At this point, I remembered that I had some transport trucks I could use for practice. Whilst these were often painted a simple green, records and images I found suggest quite a variety existed still, so I thought I could combine getting some practice for the more 'important' vehicles with having a little fun in pursuit of my hobby and try out some more weird schemes. For this, I used three Fordson trucks (die-cast; purchaed cheaply from an online auction) which have been, like a great many French trucks diring this period, requisitioned from their civilian uses: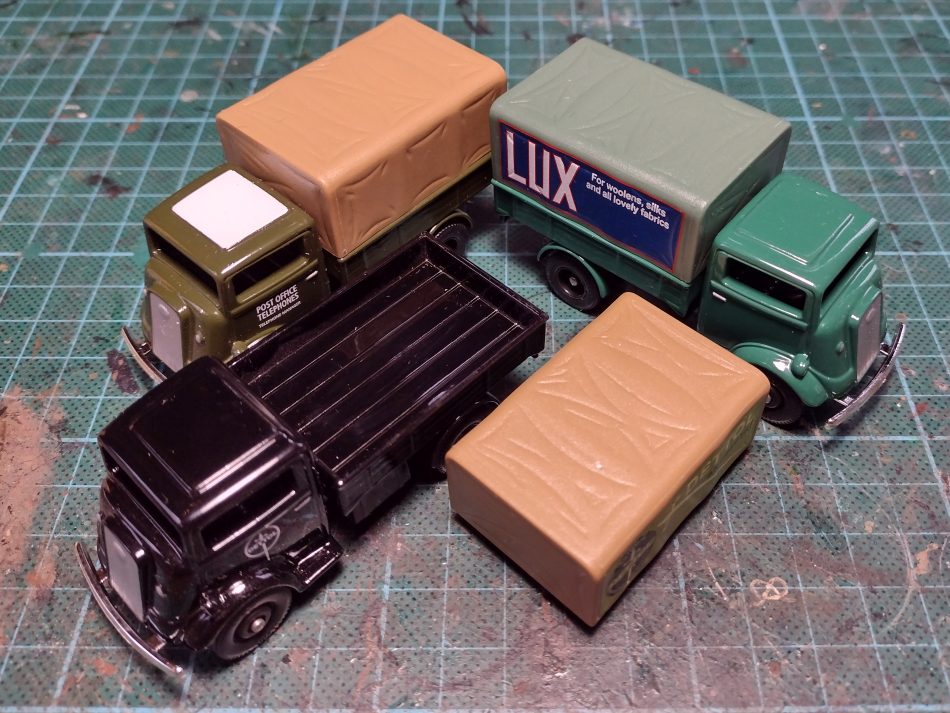 I love like the striking flattened front of these Fordson trucks - it looks very much like some of their contemporary snub-nosed Renault AHx trucks.
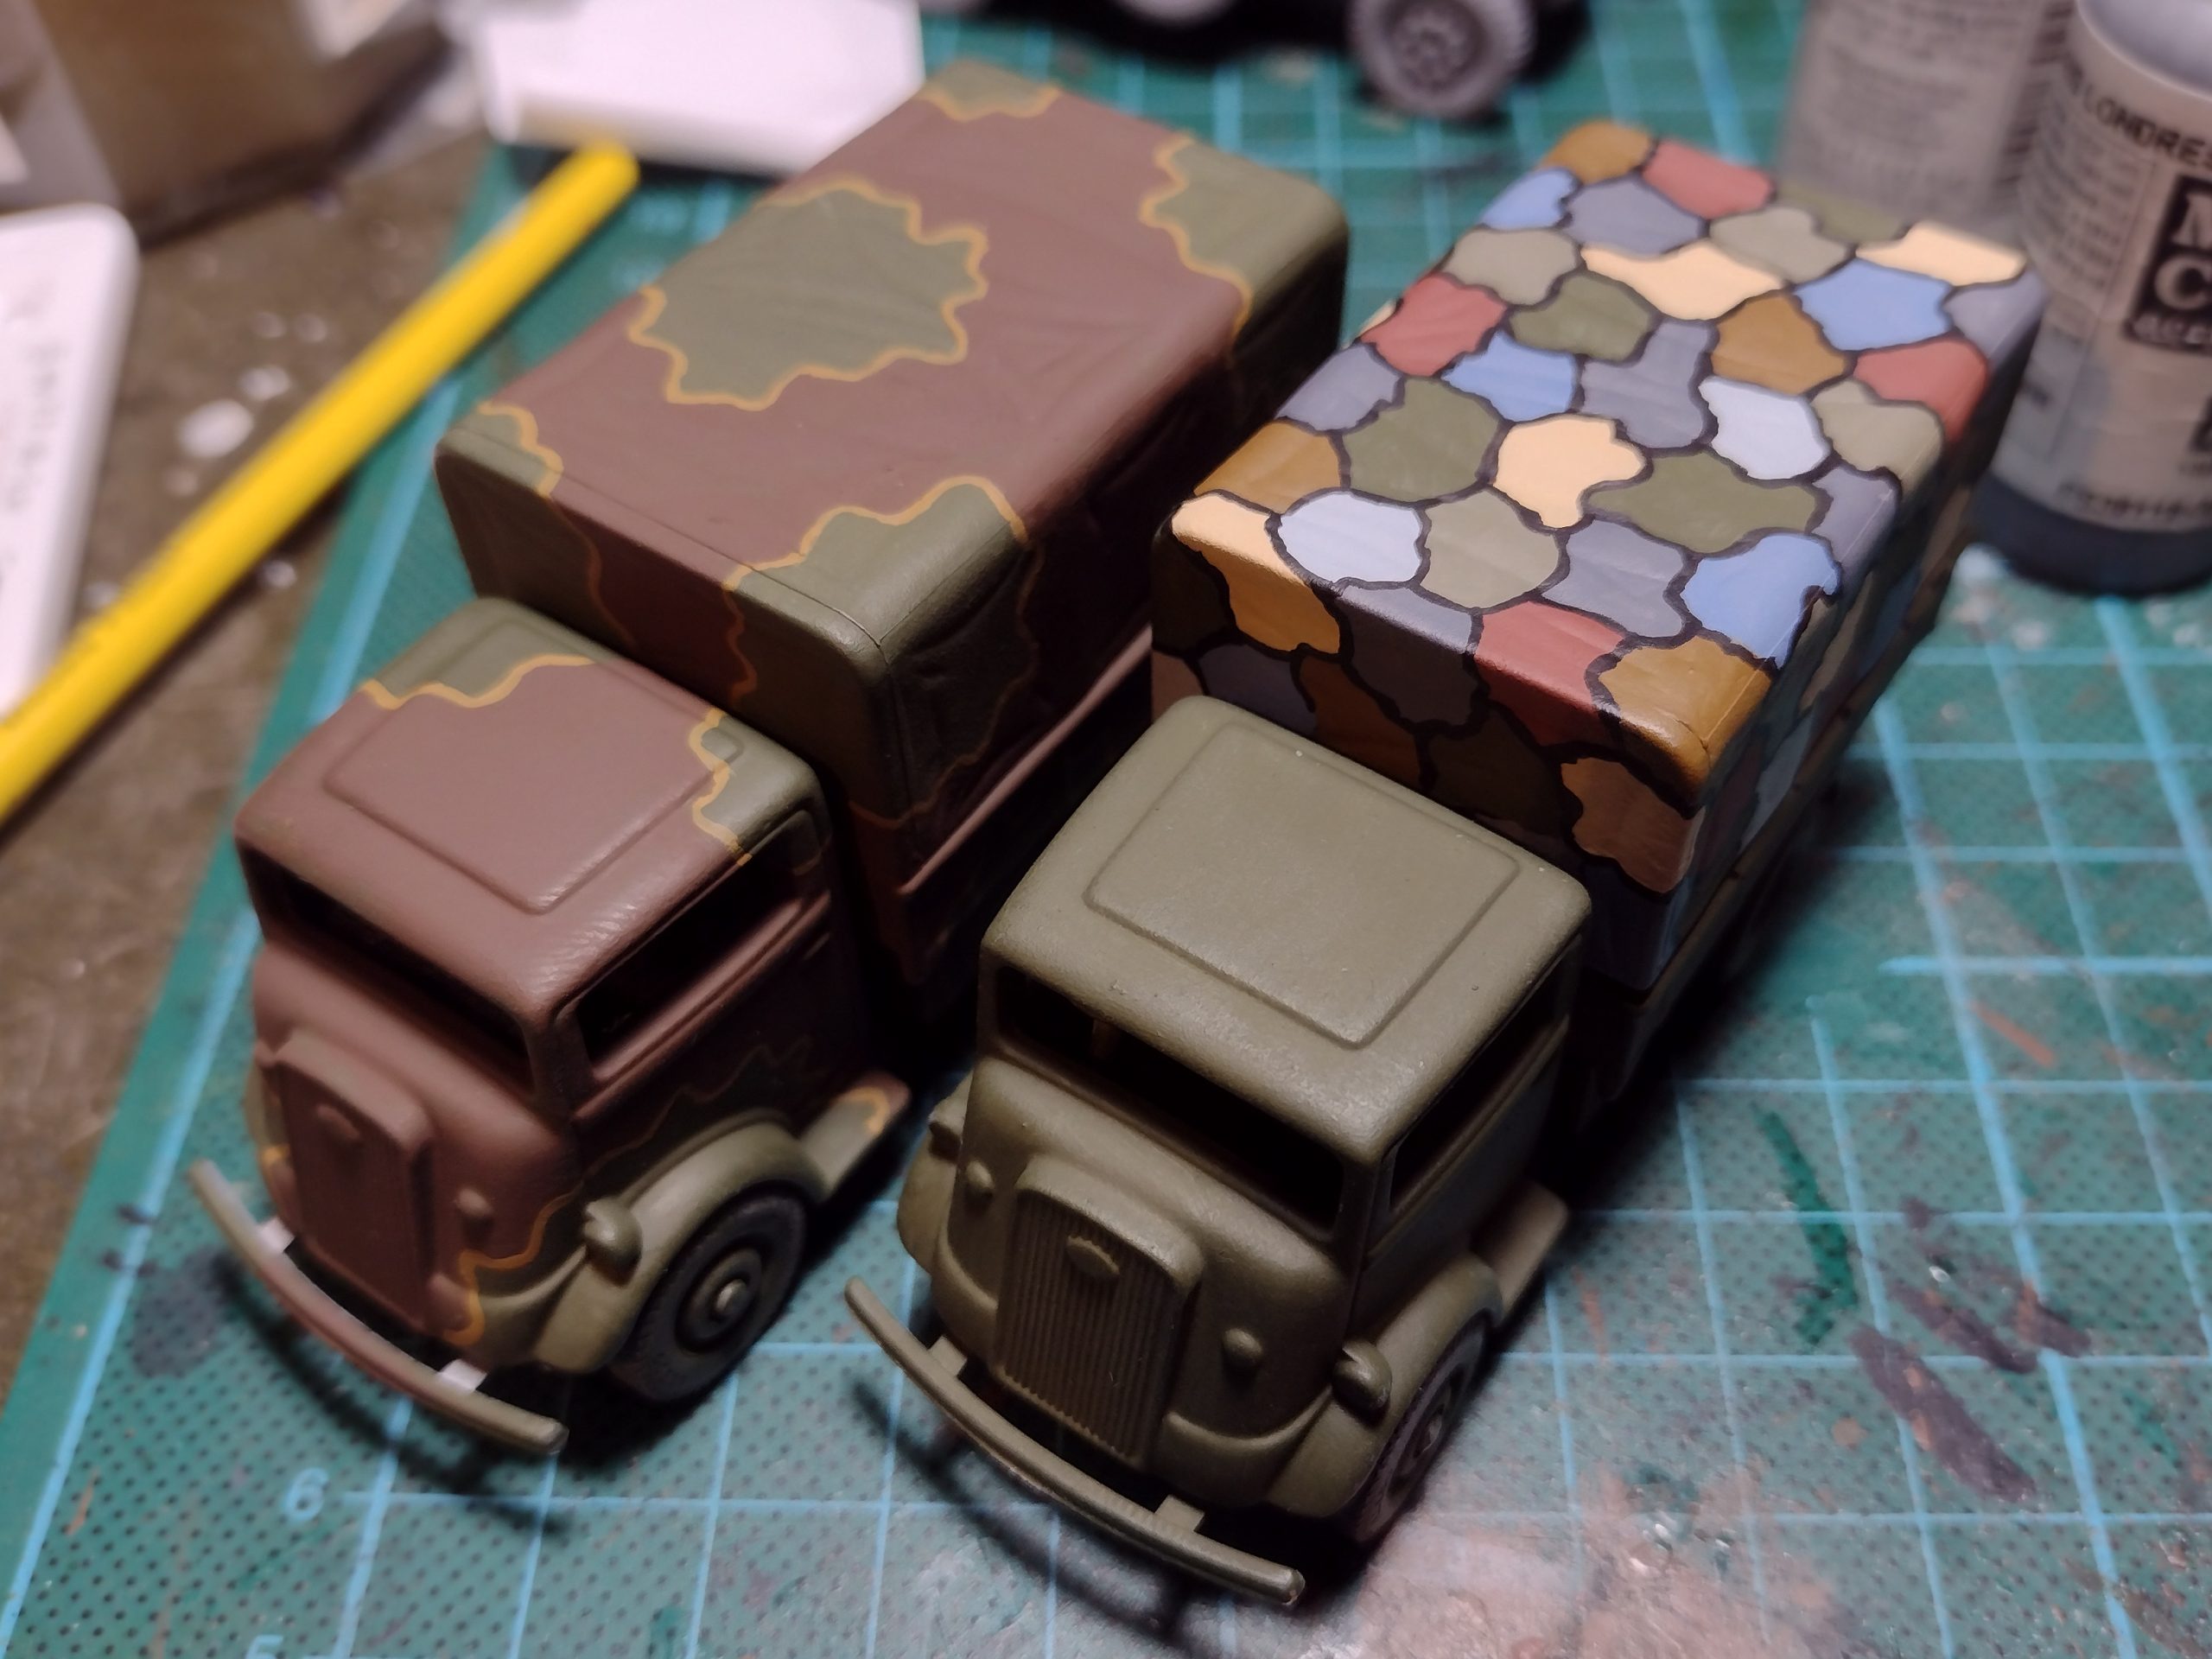
In the case of these trucks, I opted for two types of camouflage: one with a strongly outlined brown pattern, and one with the classic WW1-style elaborate swatches of colour. Whilst I appreciate the latter is unlikely to have been applied that often to transport vehicles, I have come across images that suggest it was, and besides: this was a chance for me to practise the skill. And have fun. And I quite enjoy how it comes out, too!
I love like the striking flattened front of these Fordson trucks - it looks very much like some of their contemporary snub-nosed Renault AHx trucks.
In the case of these trucks, I opted for two types of camouflage: one with a strongly outlined brown pattern, and one with the classic WW1-style elaborate swatches of colour. Whilst I appreciate the latter is unlikely to have been applied that often to transport vehicles, I have come across images that suggest it was, and besides: this was a chance for me to practise the skill. And have fun. And I quite enjoy how it comes out, too! Regardless, I did document the process, starting with just the rear canvas before extending the pattern to the cab:
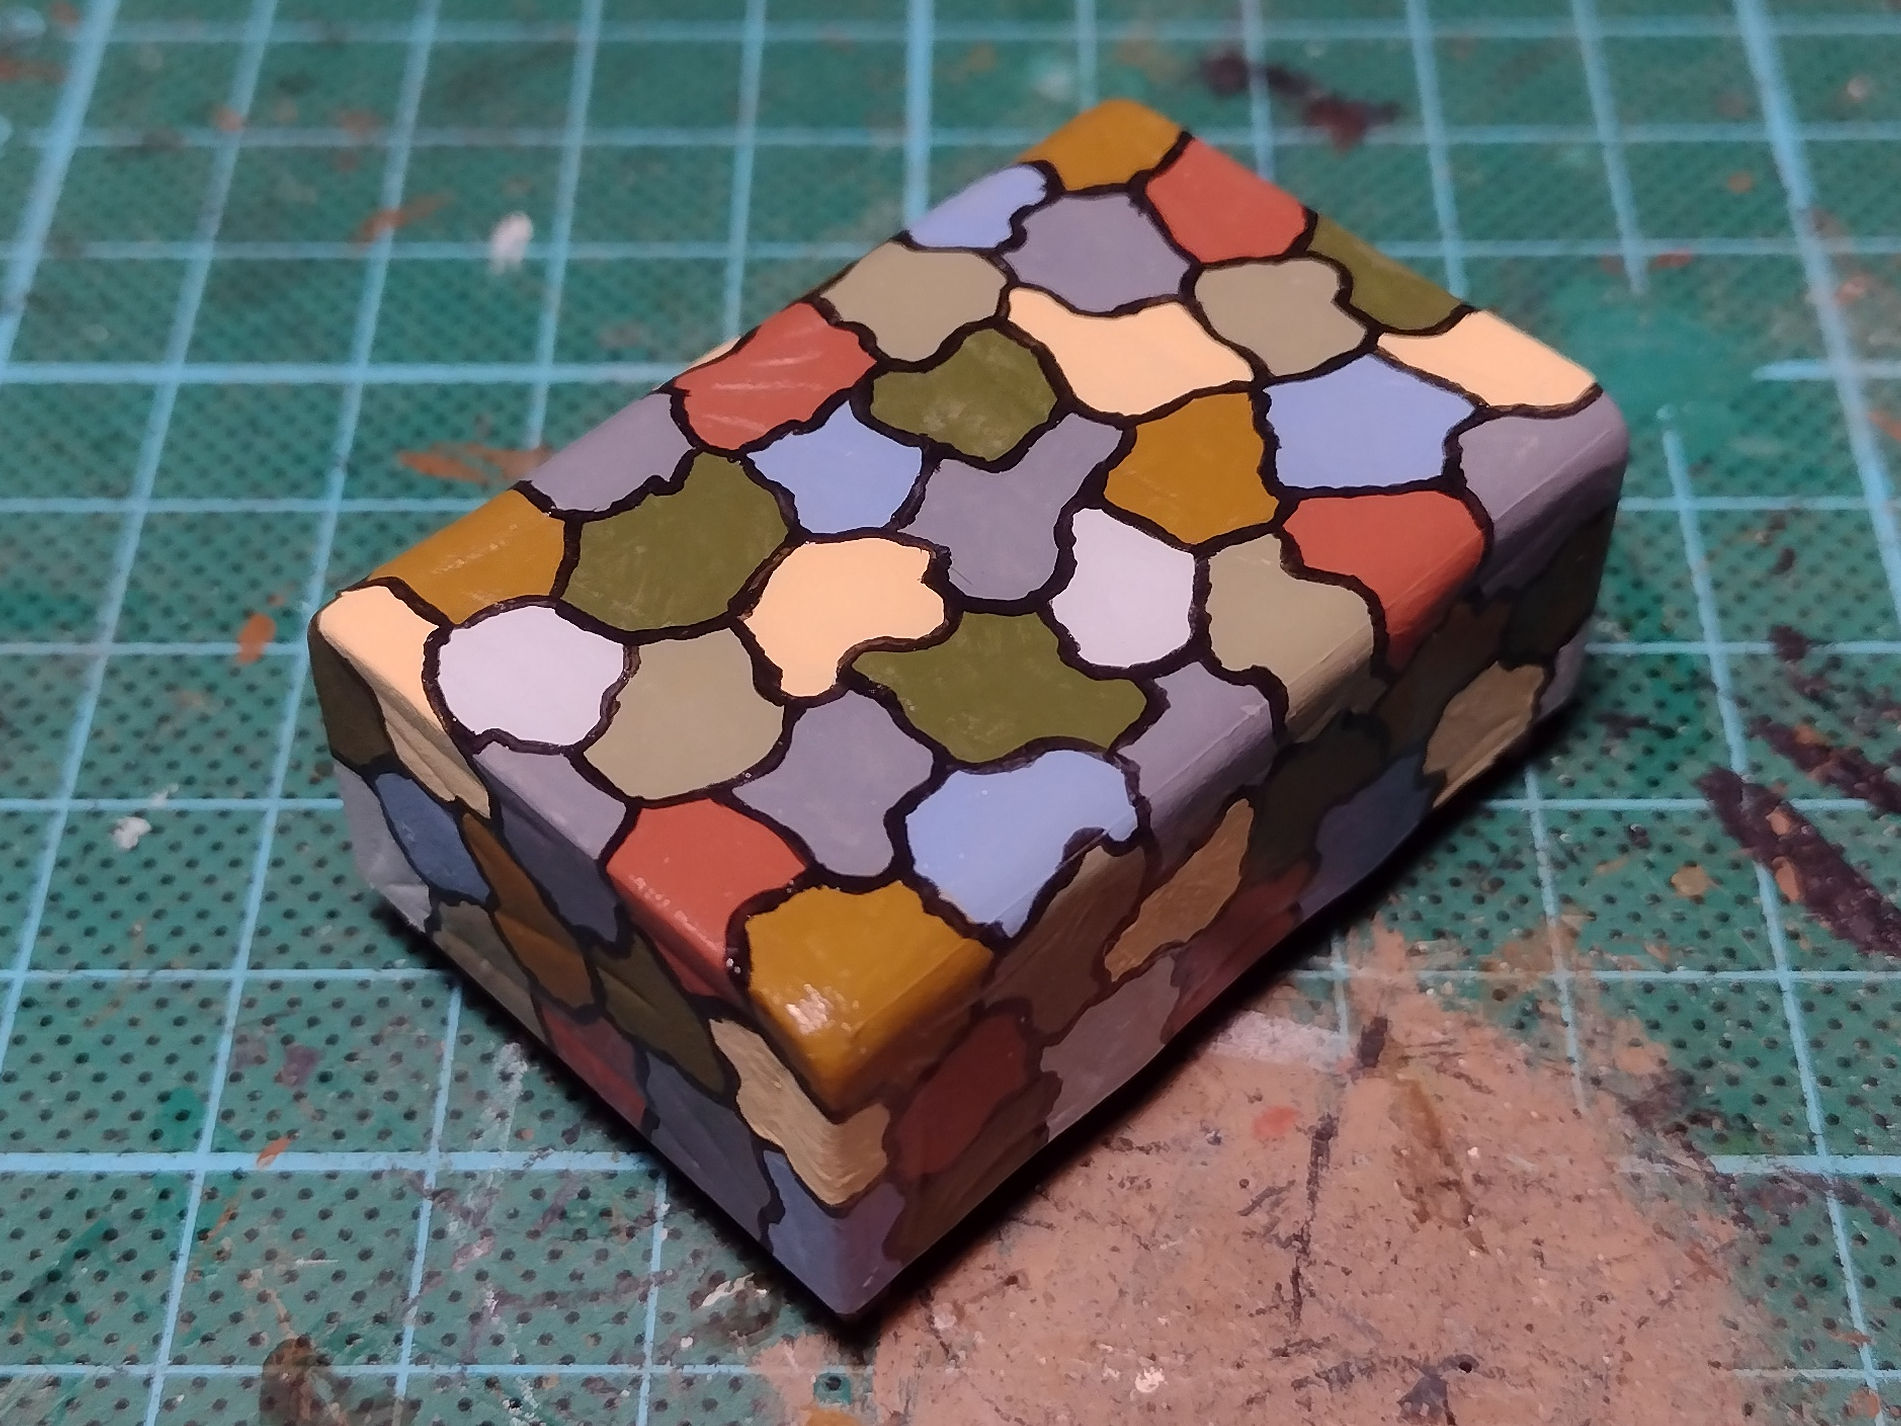
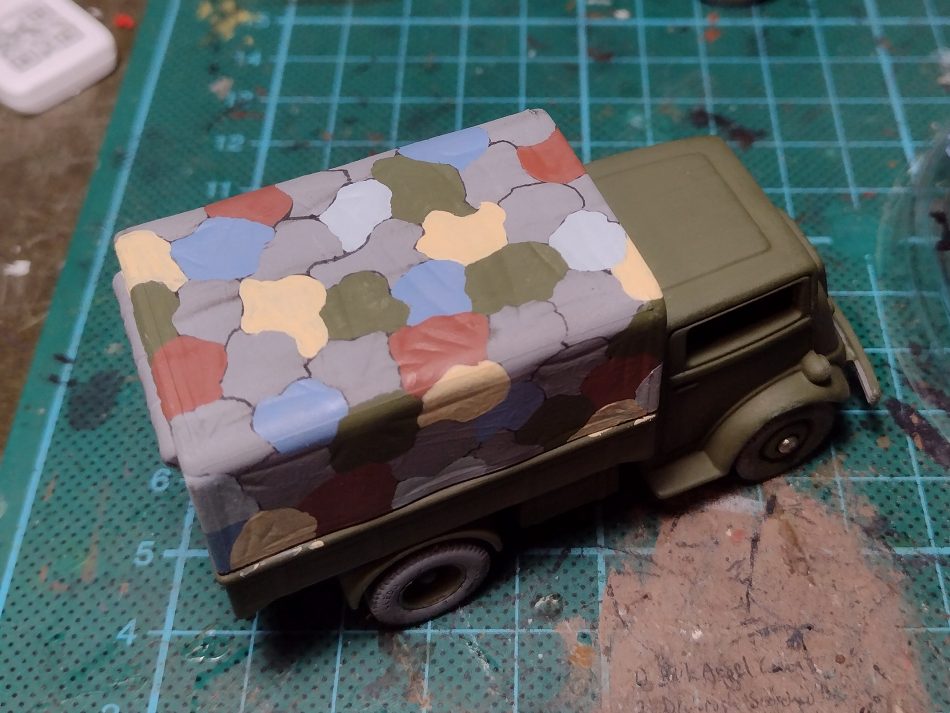 First, I drew on the pattern with a conventional fineliner. I let it dry, then varnished it with a matt varnish to secure it in place. A permanent fineliner would've negated this complexity, but I don't have one.
 I then added the swatches of colour, one colour at a time.
 Next, I went over the joins with a narrow brish and black paint.
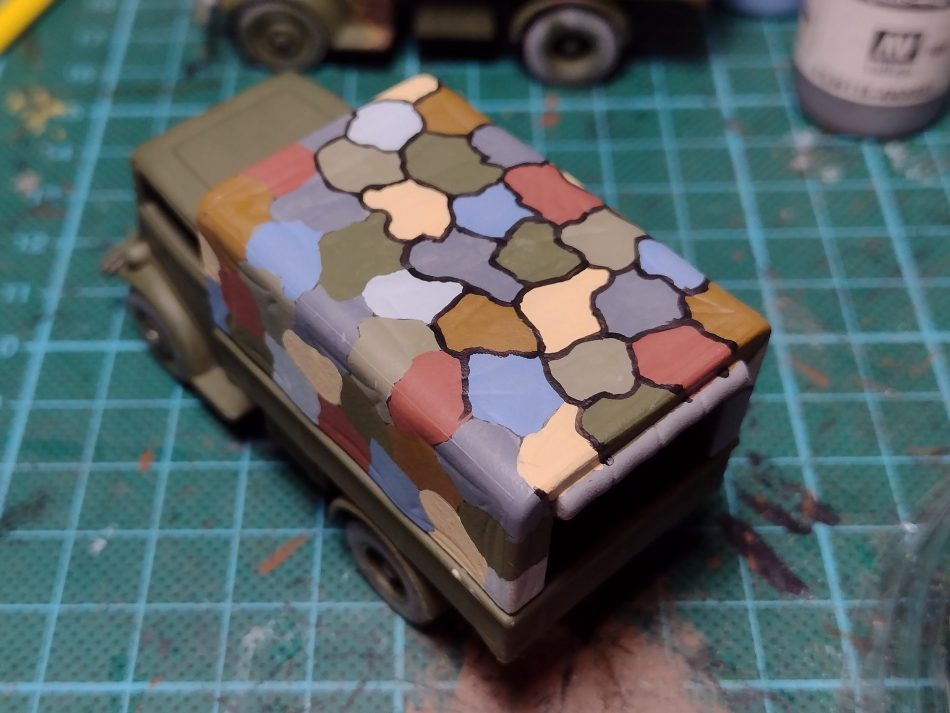
 The first iteration, before I realised I needed to add the cab.
 Here's the back on its own; varnished to preotect it. The gloss would be followed by matte.
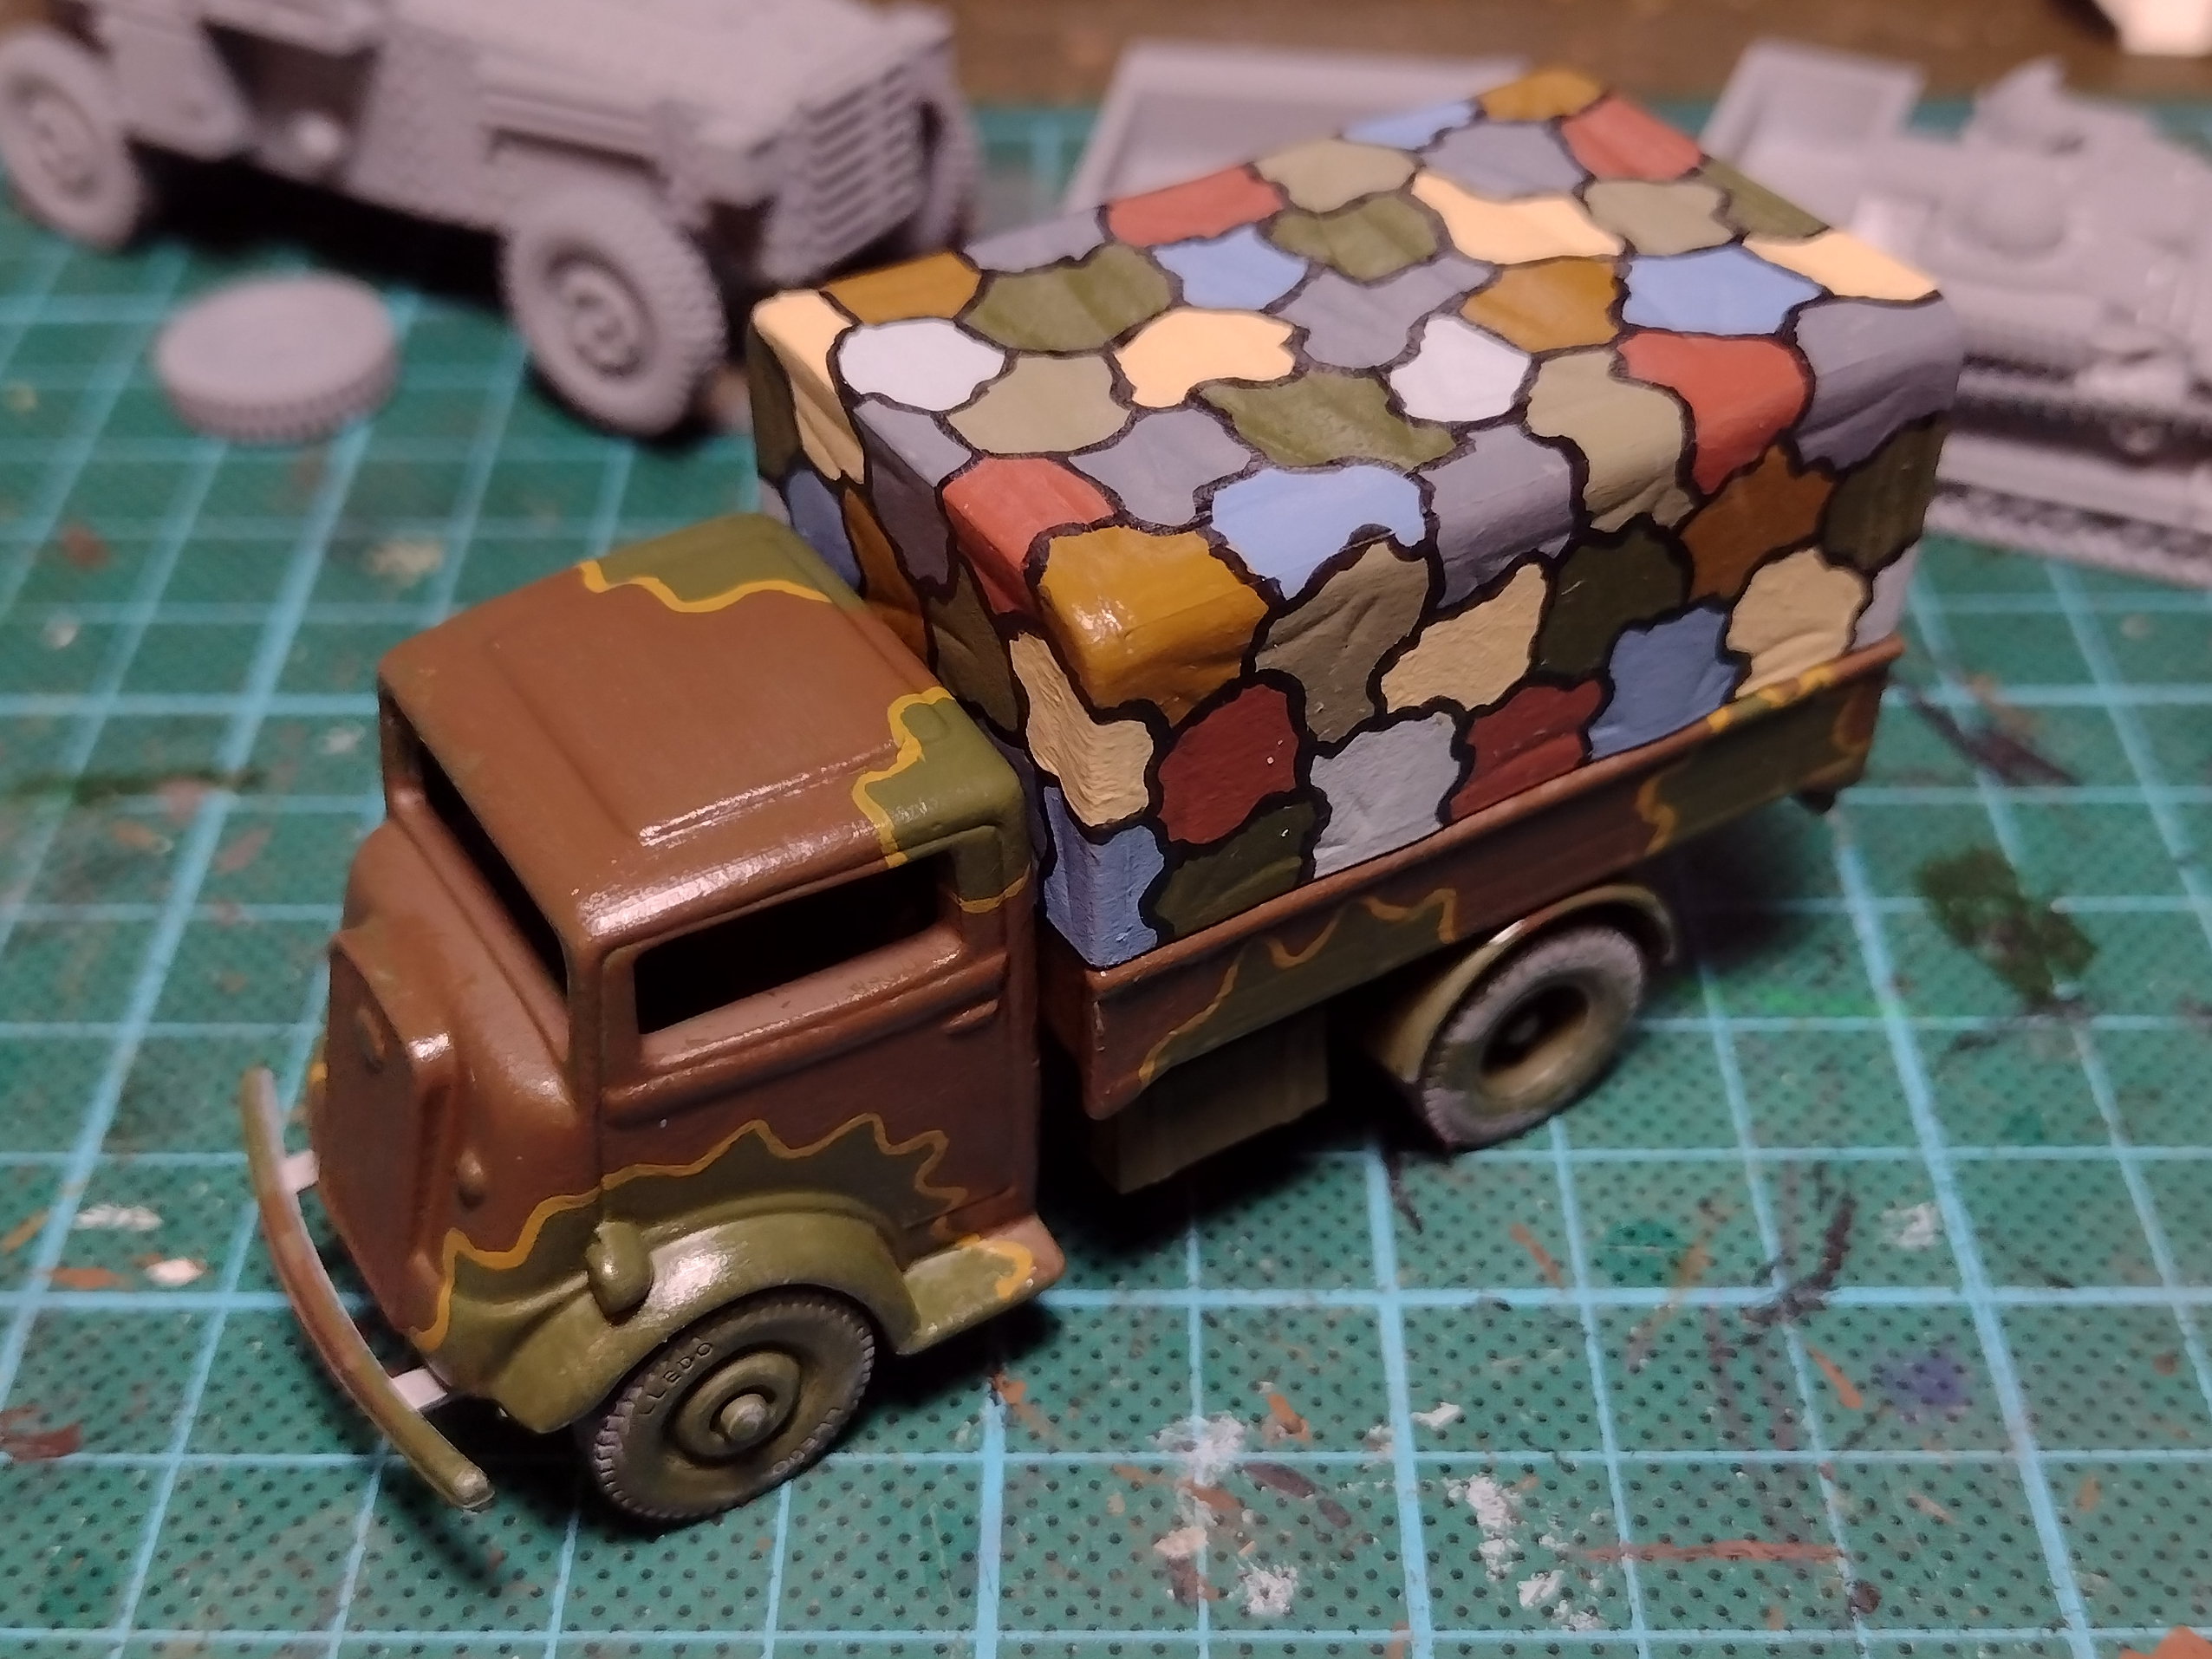
 And of course, I couldn't resist mixing-and-matching! Glossy, still.
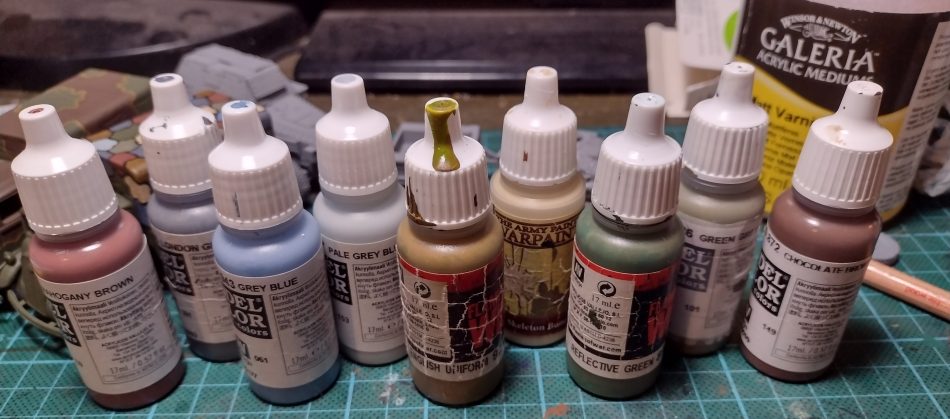 And the paints I used. L-R: Mahogony Brown, London Grey, Grey Blue, Pale Grey Blue, English Uniform, Skeleton Bone (by Army Painter), Reflective Green, Green Grey, and Chocolate Brown (although I didn't use that - it's an interloper!). All of these apart from the Skeleton Bone are by Vallejo. You can also see the Windsor & Newton Matt Varnish lurking in the background; the brush-on gloss varnish I used was Games Workshop's 'Ardcoat.
Until next time, then - when I'll be showcasing the first of the infantry before finishing off these vehicles.
- Chris
And the paints I used. L-R: Mahogony Brown, London Grey, Grey Blue, Pale Grey Blue, English Uniform, Skeleton Bone (by Army Painter), Reflective Green, Green Grey, and Chocolate Brown (although I didn't use that - it's an interloper!). All of these apart from the Skeleton Bone are by Vallejo. You can also see the Windsor & Newton Matt Varnish lurking in the background; the brush-on gloss varnish I used was Games Workshop's 'Ardcoat.
Until next time, then - when I'll be showcasing the first of the infantry before finishing off these vehicles.
- Chris
Alongside the R40 (foreground; left) is the huge and ungainly mass of the Laffly 50am - in this case from Mad Bob Miniatures, as is the Laffly S35T gun tractor behind them - and you can see that this clunky old armoured car is in the process of having an outlined frogskin kind of pattern applied. Again, this is an interpretation of a reference pic (in this case, I have hardened outlines that ought really to have been airbrushed), but I quite like it.
At this point, I remembered that I had some transport trucks I could use for practice. Whilst these were often painted a simple green, records and images I found suggest quite a variety existed still, so I thought I could combine getting some practice for the more 'important' vehicles with having a little fun in pursuit of my hobby and try out some more weird schemes. For this, I used three Fordson trucks (die-cast; purchaed cheaply from an online auction) which have been, like a great many French trucks diring this period, requisitioned from their civilian uses: I love like the striking flattened front of these Fordson trucks - it looks very much like some of their contemporary snub-nosed Renault AHx trucks.
In the case of these trucks, I opted for two types of camouflage: one with a strongly outlined brown pattern, and one with the classic WW1-style elaborate swatches of colour. Whilst I appreciate the latter is unlikely to have been applied that often to transport vehicles, I have come across images that suggest it was, and besides: this was a chance for me to practise the skill. And have fun. And I quite enjoy how it comes out, too!
I love like the striking flattened front of these Fordson trucks - it looks very much like some of their contemporary snub-nosed Renault AHx trucks.
In the case of these trucks, I opted for two types of camouflage: one with a strongly outlined brown pattern, and one with the classic WW1-style elaborate swatches of colour. Whilst I appreciate the latter is unlikely to have been applied that often to transport vehicles, I have come across images that suggest it was, and besides: this was a chance for me to practise the skill. And have fun. And I quite enjoy how it comes out, too!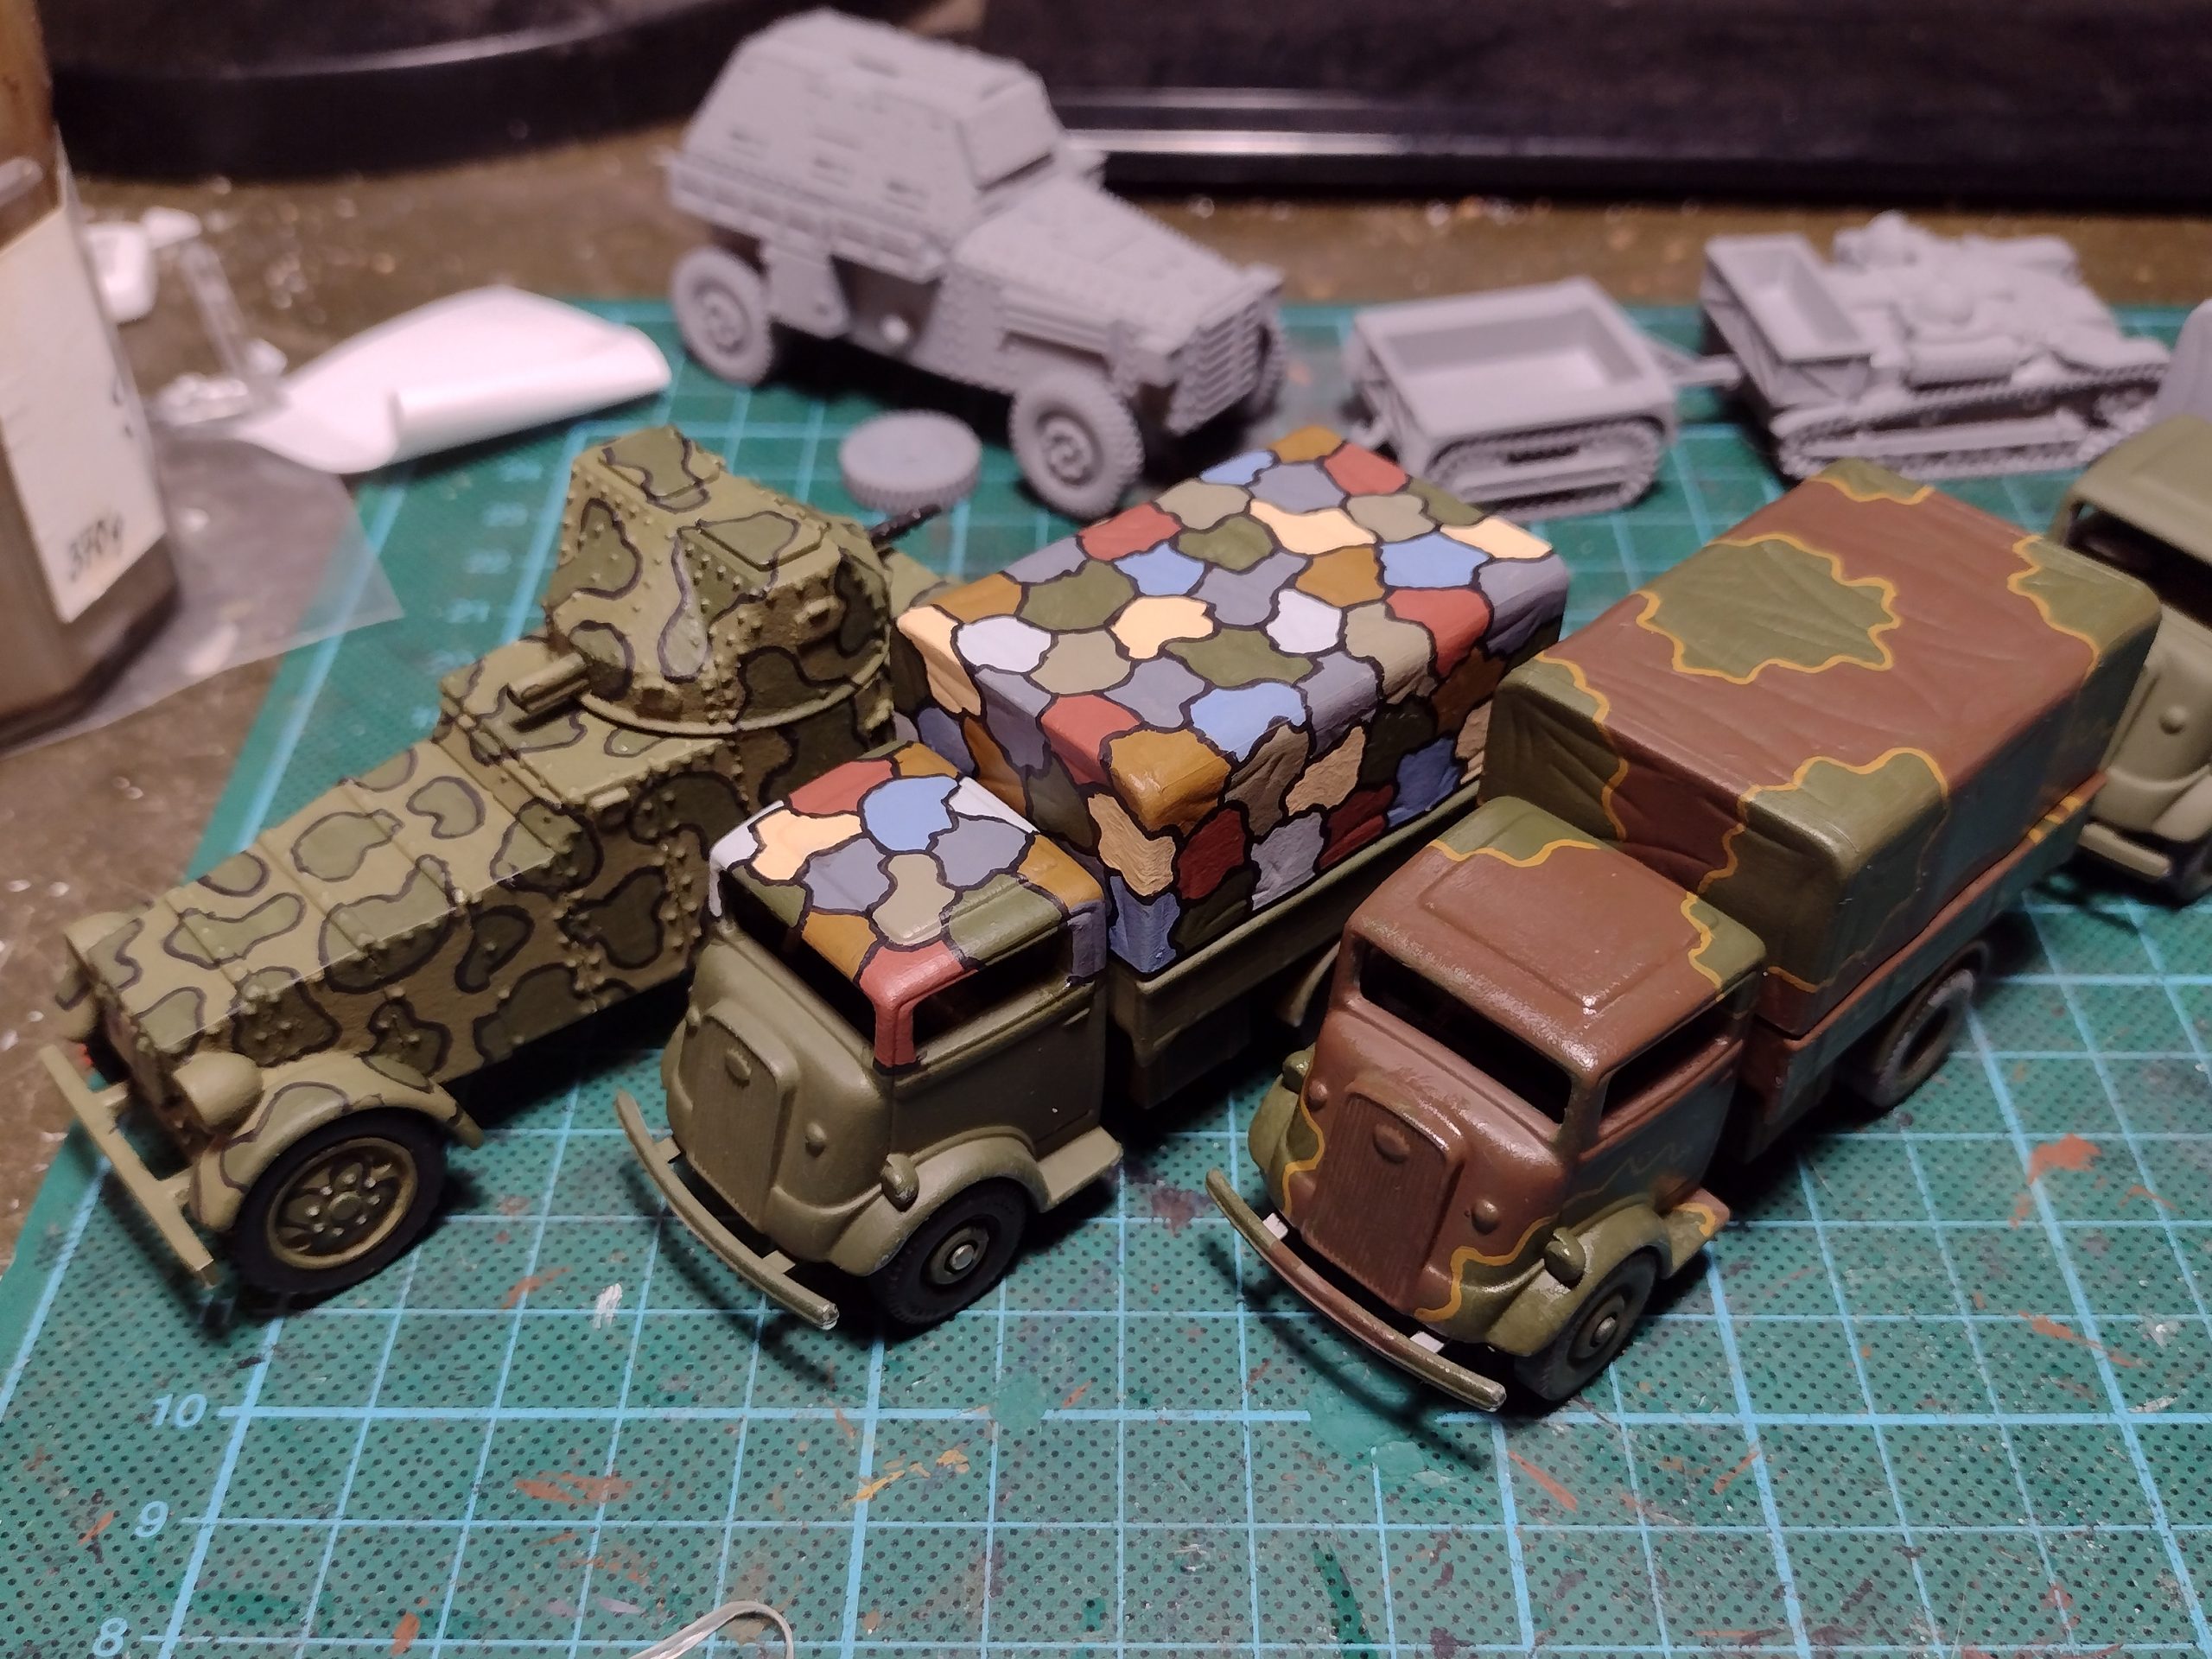 Regardless, I did document the process, starting with just the rear canvas before extending the pattern to the cab:
 First, I drew on the pattern with a conventional fineliner. I let it dry, then varnished it with a matt varnish to secure it in place. A permanent fineliner would've negated this complexity, but I don't have one.
 I then added the swatches of colour, one colour at a time.
 Next, I went over the joins with a narrow brish and black paint.
 The first iteration, before I realised I needed to add the cab.
 Here's the back on its own; varnished to preotect it. The gloss would be followed by matte.
 And of course, I couldn't resist mixing-and-matching! Glossy, still.
 And the paints I used. L-R: Mahogony Brown, London Grey, Grey Blue, Pale Grey Blue, English Uniform, Skeleton Bone (by Army Painter), Reflective Green, Green Grey, and Chocolate Brown (although I didn't use that - it's an interloper!). All of these apart from the Skeleton Bone are by Vallejo. You can also see the Windsor & Newton Matt Varnish lurking in the background; the brush-on gloss varnish I used was Games Workshop's 'Ardcoat.
Until next time, then - when I'll be showcasing the first of the infantry before finishing off these vehicles.
- Chris
And the paints I used. L-R: Mahogony Brown, London Grey, Grey Blue, Pale Grey Blue, English Uniform, Skeleton Bone (by Army Painter), Reflective Green, Green Grey, and Chocolate Brown (although I didn't use that - it's an interloper!). All of these apart from the Skeleton Bone are by Vallejo. You can also see the Windsor & Newton Matt Varnish lurking in the background; the brush-on gloss varnish I used was Games Workshop's 'Ardcoat.
Until next time, then - when I'll be showcasing the first of the infantry before finishing off these vehicles.
- Chris